Structr
Operations
Configuration
Structr is configured through the structr.conf file located in the installation directory. This file uses a simple key-value format where each line contains a setting name and its value, separated by an equals sign.
File Location
The location of structr.conf depends on how you installed Structr:
| Installation Type | File Location |
|---|---|
| Debian Package | /usr/lib/structr/structr.conf |
| ZIP Distribution | ./structr.conf (in the Structr directory) |
Configuration Interface
The preferred way to edit configuration settings is through the Configuration Interface in the Admin UI. This interface displays all available settings organized by category, shows default values, and provides descriptions for each setting.
You can access the Configuration Interface by clicking the wrench icon in the Admin UI header bar. The interface opens in a new browser tab and requires authentication with the superuser password.
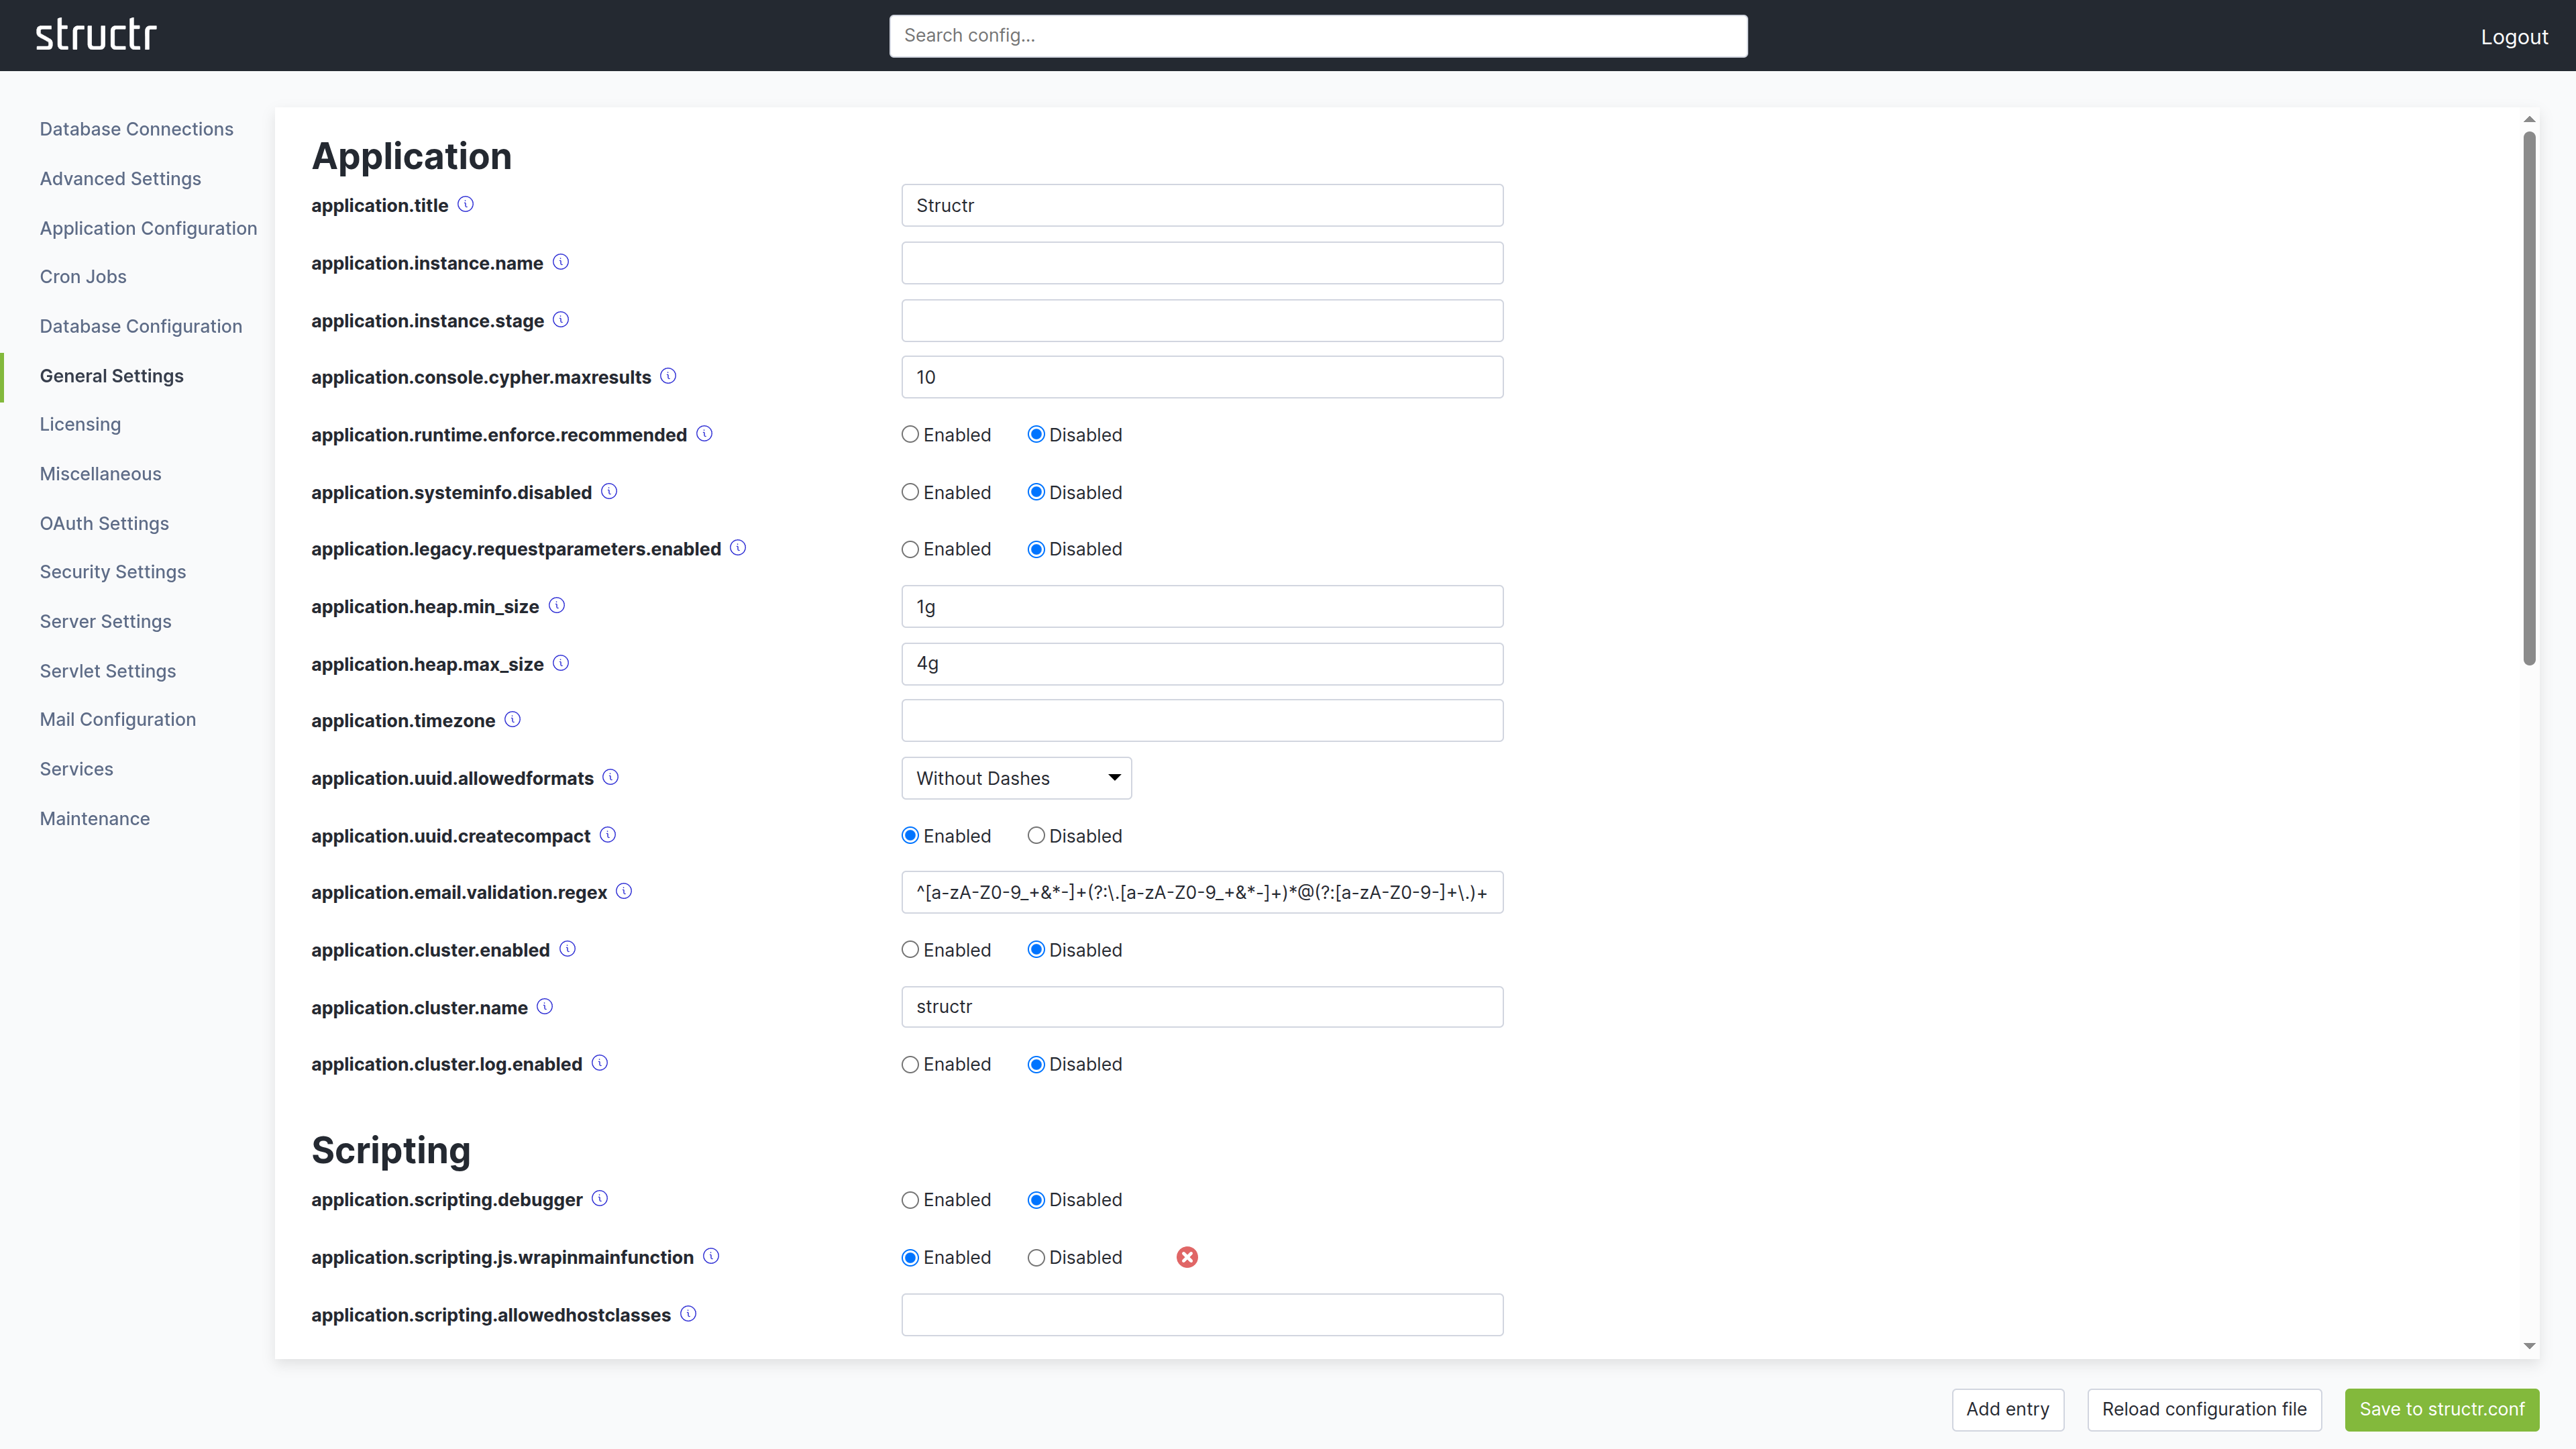
After making changes, click the green button in the lower right corner to save them to structr.conf. Individual settings can be reset to their default value using the red button with the white X next to each field. This takes effect immediately. The interface also provides a reload function to apply configuration changes without restarting Structr.
How Settings Are Stored
Structr has a large number of settings with built-in default values. The structr.conf file only stores settings that differ from these defaults. This keeps the file compact and makes it easy to see what has been customized.
A fresh installation contains only a single entry:
superuser.password = <generated-password>
As you customize your installation through the Configuration Interface, additional settings appear in the file. Settings that match their default values are not written to the file.
Editing the File Directly
While the Configuration Interface is the recommended approach, you can also edit structr.conf directly with a text editor. This is useful for automation, version control, or when you need to configure Structr before starting it for the first time.
Each setting goes on its own line:
superuser.password = mysecretpassword
application.title = My Application
httpservice.maxfilesize = 1000
After editing the file manually, changes take effect after restarting Structr or using the reload function in the Configuration Interface.
Configuration via Environment Variables (Docker)
When running Structr in a Docker container, you can pass configuration settings as environment variables instead of editing structr.conf. This is particularly useful with docker-compose.yml files, as it keeps configuration visible and allows different settings per environment without modifying the image.
Naming Convention
To convert a structr.conf setting to an environment variable:
- Replace any existing underscores with double underscores (
_→__) - Replace all dots with single underscores (
.→_) - Add
STRUCTR_as a prefix
Examples
| structr.conf Setting | Environment Variable |
|---|---|
application.http.port | STRUCTR_application_http_port |
superuser.password | STRUCTR_superuser_password |
application.instance.name | STRUCTR_application_instance_name |
application.heap.min_size | STRUCTR_application_heap_min__size |
Note how min_size becomes min__size – the double underscore preserves the original underscore, distinguishing it from underscores that replace dots.
Docker Compose Example
services:
  structr:
    image: structr/structr:latest
    ports:
      - "8082:8082"
    environment:
      - STRUCTR_superuser_password=mysecretpassword
      - STRUCTR_application_instance_name=Production
      - STRUCTR_application_instance_stage=PROD
      - STRUCTR_application_heap_max__size=8g
    volumes:
      - structr-data:/var/lib/structr/files
Environment variables take precedence over settings in structr.conf.
Essential Settings
While Structr has many configuration options, these are the settings you are most likely to need when setting up and running an instance.
| Category | Setting | Default | Description |
|---|---|---|---|
| Instance | application.instance.name | (empty) | A name displayed in the top right corner of the Admin UI. |
| Instance | application.instance.stage | (empty) | A stage label (e.g., “DEV”, “STAGING”, “PROD”) displayed alongside the instance name. |
| HTTP | application.http.port | 8082 | HTTP port. Requires restart. |
| HTTP | application.https.port | 8083 | HTTPS port. Requires restart. |
| HTTP | application.https.enabled | false | Enable HTTPS. Requires a keystore with SSL certificate. |
| Memory | application.heap.min_size | 1g | Minimum Java heap size (e.g., 512m, 1g). Requires restart. |
| Memory | application.heap.max_size | 4g | Maximum Java heap size (e.g., 2g, 4g, 8g). Requires restart. |
| Storage | files.path | <install-dir>/files | Storage location for uploaded files and the virtual file system. |
| Logging | log.level | INFO | Log verbosity: TRACE, DEBUG, INFO, WARN, ERROR. Takes effect immediately. |
| Admin | initialuser.name | admin | Username for the initial admin. |
| Admin | initialuser.password | admin | Password for the initial admin. Change immediately after first login. |
File Permissions
The structr.conf file contains sensitive information including database credentials and encryption keys. Restrict access to this file:
chmod 600 structr.conf
This ensures only the file owner can read and write the configuration. Other users on the system cannot access it.
When using Neo4j as database, also follow the Neo4j file permission recommendations.
Data-at-Rest Encryption
To protect data stored on disk in case of physical hardware theft, enable filesystem-level encryption on the operating system. This is called data-at-rest encryption and must be configured at the OS level as Structr does not provide this directly.
Consult your operating system documentation for options like LUKS (Linux), BitLocker (Windows), or FileVault (macOS).
Related Topics
- Email - SMTP configuration
- OAuth - Authentication provider settings
- JWT Authentication - Token settings
- Two-Factor Authentication - 2FA settings
Application Lifecycle
Structr applications are developed, tested, and deployed through an export/import mechanism that integrates with version control systems like Git. This enables you to work on a local development instance, track changes in a repository, collaborate with team members, and deploy updates to staging or production servers.
The export creates a portable folder structure containing your application’s schema, pages, templates, business logic, and configuration. This folder can be committed to a repository, shared with others, or imported into another Structr instance.
Application vs. Data Deployment
Structr provides two deployment mechanisms: application deployment and data deployment.
Application deployment exports the structure of your application: Schema, pages, templates, shared components, widgets, files marked for export, security settings, and business logic. This is everything needed to recreate the application on another system, but it does not include users, groups, or any data created during normal use of the application.
Data deployment exports the actual objects stored in your database. You select which types to export, making this useful for migrating user data, creating test datasets, or synchronizing content between environments.
Typical Workflow
Application deployment enables collaborative development of Structr applications. Whether you work alone or in a team, the recommended workflow is based on a code repository such as Git.
This is the typical development cycle. It is very important to do these steps in exactly the following order:
- Develop and test changes on a local Structr instance
- Export the application to a repository folder
- Commit and push your changes
- On the target server (staging or production), pull the latest changes
- Import the application
When working in a team, each developer works on their local instance and merges changes through the repository. Structr does not merge during import - all conflict resolution happens in the version control system.
For detailed setup instructions with Docker and Git, see the Version Control Workflow section below.
Data deployment serves a different purpose. You use it less frequently, typically for initial data migration when setting up a new environment, creating backups of user-generated content, or populating test systems with sample data.
Application Deployment
Application deployment exports everything that defines your application:
- Schema definitions and business logic from the Schema and Code areas
- Pages, shared components, and templates
- Files and folders marked for export
- Mail templates
- Widgets
- Site configurations
- Localizations
- Security settings (resource access grants)
This export does not include users, groups, or any data objects created by users of your application. You can deploy a new version of your application without affecting the data it operates on.
Export Methods
You can trigger an application export in three ways:
Via Dashboard
Go to the Dashboard, open the Deployment tab, enter an absolute path on the server filesystem into the “Export application to local directory” field, and click the button. The path can be any location where Structr has write access, for example /var/structr/deployments/my-app.
To download the export as a ZIP file instead, use the “Export and download application as ZIP file” button.
Via Admin Console
Open the Admin Console and enter AdminShell mode. Then run:
export /path/to/export/
Via REST API
curl -X POST http://localhost:8082/structr/rest/maintenance/deploy \
  -H "Content-Type: application/json" \
  -H "X-User: admin" \
  -H "X-Password: admin" \
  -d '{"mode":"export", "target":"/path/to/export/"}'
Import Methods
Application import is a destructive operation. Structr deletes all existing pages, schema definitions, templates, components, and other application data before importing the new version. User data (users, groups, and objects created by your application) remains untouched.
There is no conflict resolution or merging during import. If you need to merge changes from multiple developers, do this in your version control system before importing.
Via Dashboard
Enter the path to an existing export in the “Import application from local directory” field and click the button.
To import from a remote location, enter a URL to a ZIP file in the “Import application from URL” field. The URL must be publicly accessible without authentication. Structr downloads the ZIP file and imports its contents.
Via Admin Console
import /path/to/application/
Via REST API
curl -X POST http://localhost:8082/structr/rest/maintenance/deploy \
  -H "Content-Type: application/json" \
  -H "X-User: admin" \
  -H "X-Password: admin" \
  -d '{"mode":"import", "source":"/path/to/application/"}'
Export Format
Structr exports applications to a specific folder structure. Each component type has its own folder and a corresponding JSON file with metadata:
| Folder/File | Contents |
|---|---|
schema/ | Schema definitions and code from the Schema and Code areas |
pages/ | Pages from the Pages editor |
components/ | Shared components |
templates/ | Template elements |
files/ | Files from the virtual filesystem (only those marked for export) |
mail-templates/ | Mail templates |
security/ | Resource access grants |
modules/ | Application configuration and module definitions |
localizations.json | Localization entries |
sites.json | Site configurations |
widgets.json | Widgets created in the Pages area |
application-configuration-data.json | Schema layouts from the Schema editor |
deploy.conf | Information about the exporting Structr instance |
Each folder has a corresponding .json file (e.g., pages.json, files.json) containing metadata like visibility flags, content types, and UUIDs for each item.
Including Files in the Export
Files and folders in the virtual filesystem are not exported by default. To include a file or folder in the export, set the includeInFrontendExport flag on it. Child items inherit this flag from their parent folder, so setting it on a folder includes all its contents.
Note: The flag is named
includeInFrontendExportfor historical reasons. It controls inclusion in application deployment exports.
Pre- and Post-Deploy Scripts
You can include scripts that run automatically before or after import.
pre-deploy.conf
If a file named pre-deploy.conf is present in the application folder being imported, Structr executes it as a script before importing the data. Use this to create users or groups that are referenced in visibility settings of the exported files but may not exist in the target system.
{
    let myUserGroup = $.getOrCreate('Group', 'name', 'myUserGroup');
    let myNestedUserGroup = $.getOrCreate('Group', 'name', 'myNestedUserGroup');

    if (!$.isInGroup(myUserGroup, myNestedUserGroup)) {
        $.addToGroup(myUserGroup, myNestedUserGroup);
    }
}
post-deploy.conf
If a file named post-deploy.conf is present, Structr executes it after the import completes successfully. Use this to create data that must exist in every instance of your application.
{
    let necessaryUser = $.getOrCreate('User', 'name', 'necessaryUser');
    let myUserGroup = $.getOrCreate('Group', 'name', 'myUserGroup');

    if (!$.isInGroup(myUserGroup, necessaryUser)) {
        $.addToGroup(myUserGroup, necessaryUser);
    }
}
Version Control Workflow
When running Structr with Docker using custom volume directories, you can integrate deployment with a Git repository. This allows you to store your application in version control and collaborate with other developers.
The typical workflow:
- Clone your application repository to
./volumes/structr-repositoryon the host system - Import the application in Structr’s Dashboard under Deployment by entering
/var/lib/structr/repository/webappin the “Import application from local directory” field - Make changes in Structr (schema, pages, business logic, etc.)
- Export the application by entering
/var/lib/structr/repository/webappin the “Export application to local directory” field - On the host system, commit and push your changes from
./volumes/structr-repository - To deploy updates, pull the latest changes and repeat from step 2
This workflow keeps your application under version control while allowing you to use Structr’s visual editors for development. Merging changes from multiple developers happens in Git, not during Structr import.
Data Deployment
Data deployment exports the actual objects stored in your database. Unlike application deployment, you explicitly select which types to export. This gives you control over what data to migrate, back up, or synchronize between environments.
Common use cases include:
- Migrating users and groups to a new instance
- Creating backups of user-generated content
- Populating test environments with realistic data
- Synchronizing reference data between environments
Data Export
Via Dashboard
Go to the Dashboard, open the Deployment tab, select the types you want to export, enter an absolute path in the “Export data to local directory” field, and click Export.
Via Admin Console
export-data /path/to/export/ Type1,Type2,Type3
Via REST API
curl -X POST http://localhost:8082/structr/rest/maintenance/deployData \
  -H "Content-Type: application/json" \
  -H "X-User: admin" \
  -H "X-Password: admin" \
  -d '{"mode":"export", "target":"/path/to/export/", "types":"Type1,Type2,Type3"}'
Data Import
Data import adds new objects to the database. If an object with the same UUID already exists, it is replaced with the imported version. Objects that exist in the database but not in the import are left unchanged.
Via Dashboard
Enter the path to an existing data export in the “Import data from local directory” field and click the button.
Via Admin Console
import-data /path/to/data/
Via REST API
curl -X POST http://localhost:8082/structr/rest/maintenance/deployData \
  -H "Content-Type: application/json" \
  -H "X-User: admin" \
  -H "X-Password: admin" \
  -d '{"mode":"import", "source":"/path/to/data/"}'
Data Export Format
A data deployment export contains:
| Folder/File | Contents |
|---|---|
nodes/ | Export files for the selected node types |
relationships/ | Export files for relationships from/to the selected types |
pre-data-deploy.conf | Script that runs before data import |
post-data-deploy.conf | Script that runs after data import |
Import Behavior
Data import runs without validation by default. Cardinality constraints are not enforced, validation rules are not applied, and onCreate/onSave methods are not executed. This is because nodes and relationships are imported sequentially, and enabling validation would likely cause errors that stop the import.
After importing data, rebuild the database indexes by going to the Schema area, clicking the Admin button, and selecting “Rebuild all Indexes”.
The pre-data-deploy.conf and post-data-deploy.conf scripts work the same way as their application deployment counterparts.
Monitoring Progress
You can follow the progress of any export or import operation in the Server Log tab on the Dashboard or via the notifications in the Structr UI.
Related Topics
- Virtual File System - Managing files and the includeInFrontendExport flag
- Schema - Understanding schema definitions in deployment exports
Backup & Recovery
A Structr installation stores data in two separate locations: the graph database (Neo4j) holds all objects and relationships, while binary file contents and configuration are stored in the Structr installation directory. A complete backup must include both.
What to Back Up
| Component | Location | Contains |
|---|---|---|
| Database | Neo4j data directory | All objects, relationships, schema, users, permissions |
| Structr directory | Structr installation directory | Binary files, configuration, certificates, scripts |
The Structr directory contains several important subdirectories and files:
files/– Uploaded files, images, documents (binary content)structr.conf– Server settings, credentials, customizationsscripts/– Host scripts registered for execution- SSL certificates and keystores
- Other runtime configuration
The database and Structr directory must be backed up together to maintain consistency. A file referenced in the database must exist in the files/ directory, and vice versa.
Application Backup
To back up your application structure without data, use the Deployment Export feature. This creates a portable folder containing schema definitions, pages, templates, components, and configuration files that can be stored in version control.
Application backups are useful for:
- Version control of your application
- Deploying the same application to multiple environments
- Recovering the application structure after a fresh database setup
See the Application Lifecycle chapter for details on deployment exports.
Full Backup (Cold Backup)
A cold backup taken with all services stopped is the most reliable way to back up a Structr installation. It guarantees consistency between the database and binary files.
Server Installation
- Stop Structr:
systemctl stop structr - Stop Neo4j:
systemctl stop neo4j - Back up the following:
- Neo4j data directory (typically
/var/lib/neo4j/data/) - Structr installation directory (typically
/usr/lib/structr/for Debian packages)
- Start Neo4j:
systemctl start neo4j - Start Structr:
systemctl start structr
Docker Installation
- Stop the containers:
docker-compose down - Back up the Docker volumes:
- Neo4j data volume
- Structr data volume (files, configuration, scripts)
- Start the containers:
docker-compose up -d
You can find your volume locations with docker volume inspect <volume-name>.
VM Snapshots
If Structr and Neo4j run on the same virtual machine, creating a VM snapshot is the simplest backup method. Stop both services before taking the snapshot to ensure consistency.
Restore
Server Installation
- Stop Structr:
systemctl stop structr - Stop Neo4j:
systemctl stop neo4j - Replace the Neo4j data directory with the backup
- Replace the Structr installation directory with the backup
- Start Neo4j:
systemctl start neo4j - Start Structr:
systemctl start structr
Docker Installation
- Stop the containers:
docker-compose down - Replace the volume contents with the backup data
- Start the containers:
docker-compose up -d
Backup Strategy Recommendations
- Schedule backups during low-traffic periods to minimize downtime
- Test restore procedures regularly in a non-production environment
- Keep multiple backup generations (daily, weekly, monthly)
- Store backups in a separate location from the production system
- Document your backup and restore procedures
Related Topics
- Application Lifecycle - Deployment export and import
- Configuration - Server settings and file locations
- Maintenance - Maintenance mode for planned downtime
Multi-Site Hosting
A single Structr instance can serve multiple websites under different domains. This is useful when you want to run a public website and an internal application side by side, serve localized versions of your site under country-specific domains, or operate staging and production environments on the same server.
Structr uses Site objects to control which pages are served for which domain. You can think of this as a built-in reverse proxy: when a request arrives, Structr checks the hostname and port against your configured sites and serves only the pages assigned to the matching site.
Pages not assigned to any site are served for all requests, which is the default behavior when you don’t use this feature. Sites control page visibility only while files are not affected and remain accessible regardless of the requesting domain.
Creating a Site
Site is a built-in type in Structr. To create a site:
- Open the Data area in the Admin UI
- Select the
Sitetype - Create a new Site object with the following properties:
| Property | Description |
|---|---|
name | A descriptive name for the site (e.g., “Production Website”) |
hostname | The domain name this site responds to (e.g., example.com) |
port | Optional port number. If omitted, the site matches any port. |
Assigning Pages to Sites
Since there is no dedicated UI for managing site assignments, you configure the relationship between pages and sites in the Data area:
- Open the Data area in the Admin UI
- Select either the
Sitetype and edit thepagesproperty, or select thePagetype and edit thesitesproperty - Add or remove the relationship as needed
A page can be assigned to multiple sites if it should appear on more than one domain.
Request Matching
When Structr receives an HTTP request, it determines which pages to serve based on the following rules:
- If the page is not assigned to any site, it is visible for all requests
- If the page is assigned to one or more sites, Structr checks whether the request’s hostname and port match any of those sites
- A site matches if the hostname equals the request’s hostname AND either the site has no port defined or the port matches the request’s port
This means you can create a site with only a hostname to match all ports, or specify a port for exact matching.
Example Configuration
Consider a Structr instance accessible via three domains:
www.example.com(port 443) – public websiteadmin.example.com(port 443) – internal admin areastaging.example.com(port 8443) – staging environment
You would create three sites:
| Site Name | Hostname | Port |
|---|---|---|
| Public | www.example.com | (empty) |
| Admin | admin.example.com | (empty) |
| Staging | staging.example.com | 8443 |
Then assign your pages accordingly:
- Public marketing pages → Public site
- Admin dashboard pages → Admin site
- Test versions of pages → Staging site
- Shared components (e.g., error pages) → No site assignment (visible everywhere)
Deployment
Sites are included in application deployment exports. When you import an application, the site configurations are restored along with the page assignments.
If you deploy to an environment with different domain names (e.g., from staging to production), you may need to update the hostname properties after import.
Related Topics
- Pages - Creating and managing pages
- Application Lifecycle - Exporting and importing applications
Filesystem
Structr includes an integrated file storage system with a virtual filesystem that abstracts physical storage from the logical directory structure and metadata. Binary data can be stored on the local server filesystem, or on external storage backends through Structr’s File Service Provider API. Structr’s built-in web server can serve static HTML pages, CSS, JavaScript, images, and other web assets directly from this virtual filesystem, similar to how traditional web servers serve files from a document root.
Virtual Filesystem
The virtual filesystem in Structr represents a tree of folders and files. Each folder can contain subfolders and files, creating a familiar hierarchical structure.
This filesystem is called “virtual” because the folder structure exists only in the database – it doesn’t necessarily mirror a directory tree in the actual storage backend. A file’s path in Structr (like /documents/reports/quarterly.pdf) is independent of where the binary content is physically stored.
Benefits
This separation of metadata from storage provides flexibility:
- Files in different folders can be stored on different backends
- You can reorganize the virtual structure without moving physical files
- All files share consistent metadata, permissions, and search capabilities regardless of where they’re stored
- The same file can appear in multiple virtual locations without duplicating storage
Storage Backends
Since Structr 5.0, file content can be stored on various backends:
- Local filesystem – The default, stores files on the server’s disk
- Cloud storage – Amazon S3 and compatible services
- Archive systems – For long-term storage with different access patterns
You can configure storage backends per folder, allowing different parts of your virtual filesystem to use different physical storage. For example, frequently accessed files might live on fast local storage while archives go to cheaper cloud storage.
Custom Metadata
By extending the built-in File and Folder types in the schema, you can add custom metadata fields to your files. This allows you to create specialized types like:
InvoiceDocumentwith fields for invoice number, amount, and vendorProductImagewith fields for product reference, dimensions, and alt textBackupArchivewith fields for backup date, source system, and retention policy
Custom file types behave like any other schema type – you can query them, set permissions, and include them in your data model relationships.
Working with Files
Uploading
Files can be uploaded through:
- The Files area in the Admin UI
- The REST API upload endpoint
- Programmatically using the
$.create('File', ...)function with file content
REST API Upload
To upload files via REST, send a multipart form-data POST request to /structr/upload:
curl -X POST http://localhost:8082/structr/upload \
  -H "X-User: admin" \
  -H "X-Password: admin" \
  -F "file=@/path/to/document.pdf" \
  -F "parent=9aae3f6db3f34a389b84b91e2f4f9761"
The file parameter contains the file data. You can include additional parameters for any property defined on the File type:
| Parameter | Description |
|---|---|
file | The file content (required) |
parent | UUID of the target folder |
name | Override the filename |
visibleToPublicUsers | Set public visibility |
visibleToAuthenticatedUsers | Set authenticated visibility |
You can also pass UUIDs of related objects to link the file directly to existing data during upload.
Accessing
Files are accessible via:
- Direct URL using the file’s path or UUID
- The REST API for metadata and content
- Script functions for reading content programmatically
Permissions
Files use the same permission system as all other objects in Structr. You can control access through:
- Visibility flags (public, authenticated users)
- Owner permissions
- Group-based access grants
- Graph-based permission resolution through relationships
Advanced Features
Dynamic File Content
Files can be configured to evaluate their content as a template, similar to a Template element in Pages. When the isTemplate flag is enabled on a file, Structr processes template expressions in the file content before serving it. This allows you to mix static and dynamic content in CSS, JavaScript, or any other file type.
The text editor in the Files area has a “Show Preview” checkbox that displays a preview of the rendered output with template expressions evaluated.
Image Processing
When images are uploaded, Structr automatically extracts metadata and can create variants.
Automatic Metadata
For images, Structr automatically reads and stores:
- EXIF data (camera information, date taken, GPS coordinates, etc.)
- Image dimensions (width and height)
Automatic Thumbnails
Every image automatically gets two thumbnails that are:
- Generated on first access (not at upload time)
- Stored in a hidden folder
._structr_thumbnails - Linked to the original image via a thumbnail relationship in the database
Image Editing
Images can be cropped directly in the editor. This is currently the only image editing function available – other transformations like rotation or filters are not supported.
Supported Formats and Transformations
Supported formats: JPEG, PNG, GIF, WebP, TIFF
Transformations:
- Scaling to specific dimensions
- Cropping to aspect ratios
- Format conversion between supported types
- Thumbnail generation
Video Processing
Video files support:
- Transcoding between formats
- Playback from specific timestamps
- Streaming delivery
Text Extraction
Structr integrates Apache Tika to extract text from documents. Supported formats include PDF, Microsoft Office documents (Word, Excel, PowerPoint), and many others – over a thousand file types in total.
Extracted text can be indexed for full-text search, making document contents searchable alongside structured data.
Optical Character Recognition
If Tesseract OCR is installed on the server, Structr can extract text from images. This enables searching scanned documents or processing image-based PDFs.
Fulltext Indexing
When indexing is enabled for a file type, Structr builds full-text indexes from extracted content. This allows searching across document contents using the same query mechanisms as structured data.
Configuration
Key settings in structr.conf:
| Setting | Description |
|---|---|
application.filesystem.enabled | Enable per-user home directories |
application.filesystem.indexing.enabled | Enable text extraction and indexing |
application.filesystem.indexing.maxsize | Maximum file size (MB) for indexing |
application.filesystem.unique.paths | Prevent duplicate filenames in folders |
application.filesystem.checksums.default | Checksums to calculate on upload |
Checksums
By default, Structr calculates an xxHash checksum for every uploaded file. You can configure additional checksums:
- crc32 – Fast cyclic redundancy check
- md5 – 128-bit hash (32 hex characters)
- sha1 – 160-bit hash (40 hex characters)
- sha512 – 512-bit hash (128 hex characters)
Checksums enable integrity verification and duplicate detection.
Scripting Access
Files and folders can be created and manipulated programmatically from any scripting context.
Creating Files and Folders
Use $.create() to create files and folders:
// Create a folder
let folder = $.create('Folder', { name: 'documents' });

// Create a file in that folder
let file = $.create('File', {
    name: 'report.txt',
    parent: folder,
    contentType: 'text/plain'
});
Creating Folder Hierarchies
Structr provides functions to create entire folder hierarchies in one operation, automatically creating any missing parent folders.
Reading and Writing Binary Content
You can read and write binary content programmatically:
// Read file content
let content = $.getContent(file);

// Write file content
$.setContent(file, 'New content');
Custom File Types
For more control, create custom types that inherit from the File trait. This allows you to add custom properties and methods to your files while retaining all standard file functionality. For example, an InvoiceDocument type could have properties for invoice number and amount, plus a method to generate a PDF.
Serving Static Websites
Structr can serve complete static websites directly from its virtual filesystem. You can upload HTML files, stylesheets, JavaScript files, images, and fonts into a folder structure, and Structr’s web server delivers them to browsers just like Apache, Nginx, or any other traditional web server would.
This is useful for hosting static landing pages, documentation sites, or marketing websites alongside your dynamic Structr application. You can also use it during migration projects, serving an existing static site from Structr while gradually converting pages into dynamic Structr pages with data bindings and business logic.
To set up a static site, upload your files into the virtual filesystem while preserving the original directory structure. Files are served at URLs that match their path in the virtual filesystem, so a file at /assets/css/theme.css is accessible at that exact URL.
Differences from traditional web servers
While Structr serves static files in much the same way as traditional web servers, there is one important difference: Structr does not automatically resolve directory paths to index files. A request to /product/ resolves to the folder named product, not to a file like index.html inside it.
This means that directory-style links commonly used in static websites, such as href="/product/", will not work as expected. You need to use explicit file references like href="/product/index.html" instead.
Note that this only applies to static files in the virtual filesystem. Dynamic Structr pages behave differently: /product, /product/, and /product/index.html all resolve to the page named product. See the Navigation & Routing chapter for details on how Structr resolves page URLs.
Visibility and permissions
Static files follow the same permission model as all other objects in Structr. To make files accessible to public visitors, enable visibleToPublicUsers on the files and their parent folders. You can also restrict specific files or folders to authenticated users or individual groups, giving you fine-grained access control that traditional web servers typically require separate configuration for.
Maintenance
This chapter covers routine maintenance tasks for keeping your Structr instance running smoothly, including maintenance commands for database operations, the maintenance mode for planned downtime, and the process for updating to new versions.
Maintenance Commands
Maintenance commands perform administrative operations on the database and application, such as rebuilding indexes, migrating data, or clearing caches. You can execute them through the Admin UI, the REST API, or programmatically in scripts.
Executing via Admin UI
The Schema area provides access to common maintenance commands through the Admin menu:
Indexing – Nodes
- Rebuild Index – Recreates indexes for all or selected node types
- Add UUIDs – Adds UUIDs to nodes that lack one
- Create Labels – Creates Neo4j labels based on the type property
Indexing – Relationships
- Rebuild Index – Recreates indexes for relationships
- Add UUIDs – Adds UUIDs to relationships
Maintenance
- Flush Caches – Clears internal caches
- Clear Schema – Removes all custom types (use with caution)
Executing via REST API
Send a POST request to the maintenance endpoint:
POST /structr/rest/maintenance/<command>
Content-Type: application/json

{
    "parameter1": "value1",
    "parameter2": "value2"
}
For example, to rebuild the index for a specific type:
POST /structr/rest/maintenance/rebuildIndex
Content-Type: application/json

{
    "type": "Article"
}
Executing via Script
Use the maintenance() function to run commands from StructrScript or JavaScript. This requires admin privileges.
JavaScript
{
    $.maintenance('rebuildIndex', { type: 'Article' });
}
StructrScript
${maintenance('rebuildIndex', 'type', 'Article')}
In StructrScript, pass parameters as alternating key-value pairs. In JavaScript, pass a map as the second argument.
Available Commands
For a complete list of maintenance commands and their parameters, see the Maintenance Commands reference.
Maintenance Mode
Maintenance mode allows you to perform updates or other maintenance tasks while showing visitors a friendly maintenance page instead of an error. The Admin UI and all services remain accessible on separate ports, so you can continue working while users see the maintenance notice.
How It Works
When you enable maintenance mode:
- The main HTTP/HTTPS ports show a maintenance page to all visitors
- The Admin UI and API move to separate maintenance ports
- SSH and FTP services (if enabled) also move to their maintenance ports
This means you can perform maintenance tasks through the Admin UI while users cannot access the application.
Configuration
Configure maintenance mode in the Configuration Interface under Server Settings → Maintenance:
| Setting | Default | Description |
|---|---|---|
maintenance.enabled | false | Enable maintenance mode. |
maintenance.application.http.port | 8182 | HTTP port for Admin UI access during maintenance. |
maintenance.application.https.port | 8183 | HTTPS port during maintenance. |
maintenance.application.ssh.port | 8122 | SSH port during maintenance. |
maintenance.application.ftp.port | 8121 | FTP port during maintenance. |
maintenance.message | (default text) | Message shown on the maintenance page. HTML is allowed. |
maintenance.resource.path | (empty) | Path to a custom maintenance page. If empty, the default page with maintenance.message is shown. |
Enabling Maintenance Mode
- Open the Configuration Interface
- Navigate to Server Settings → Maintenance
- Optionally customize the maintenance message or provide a custom page
- Set
maintenance.enabledtotrue - Save the configuration
The maintenance page appears immediately on the main ports. Access the Admin UI through the maintenance port (default: 8182) to continue working.
Disabling Maintenance Mode
- Access the Configuration Interface through the maintenance port
- Set
maintenance.enabledtofalse - Save the configuration
The application returns to normal operation immediately.
Updates and Upgrades
Structr follows semantic versioning. Minor version updates (e.g., 5.1 → 5.2) include automatic migration and are generally safe. Major version updates (e.g., 5.x → 6.0) may include breaking changes and require more careful planning.
Before You Update
- Create a backup – Back up your database and the
filesdirectory - Export your application – Create an application deployment export as an additional safeguard
- Check the release notes – Review changes, especially for major versions
- For major versions – Read the migration guide and test the update in a non-production environment first
Update Process
The update process is straightforward:
- Enable maintenance mode (optional but recommended for production)
- Stop Structr:
systemctl stop structr - Install the new version:
- Debian package:
dpkg -i structr-<version>.deb - ZIP distribution: Extract and replace the installation files
- Start Structr:
systemctl start structr - Disable maintenance mode
Minor Version Updates
Minor versions maintain backward compatibility. Schema and data migrations happen automatically when Structr starts. Monitor the server log during startup to verify the migration completed successfully.
Major Version Updates
Major versions may include breaking changes to the schema, API, or scripting functions. Always:
- Read the migration guide for your target version
- Test the update in a staging environment
- Verify that your application works correctly before updating production
- Keep your backup until you have confirmed the update was successful
Related Topics
- Application Lifecycle - Creating backups through application export
- Backup and Recovery - Comprehensive backup strategies
- Health Checks and Monitoring - Monitoring your Structr instance
Monitoring
Structr provides several ways to monitor the health and performance of your instance: a web-based dashboard for interactive monitoring, and HTTP endpoints for integration with external monitoring systems like Prometheus and Grafana.
Dashboard Monitoring
The Admin UI Dashboard provides real-time monitoring capabilities:
- Server Log – Live view of the server log with configurable refresh interval
- Event Log – Structured view of API requests, authentication events, and transactions with timing breakdowns
- Threads – List of all running threads with the ability to interrupt or kill stuck threads
- Access Statistics – Filterable table of request statistics
See the Dashboard chapter for details on using these features.
System Resources
Structr monitors system resources to help you assess server capacity and diagnose performance issues. The Dashboard displays key metrics in the “About Structr” tab.
Available Metrics
| Metric | Description |
|---|---|
| Processors | Number of CPU cores available to the JVM |
| Free Memory | Currently unused heap memory |
| Total Memory | Heap memory currently allocated by the JVM |
| Max Memory | Maximum heap memory the JVM can allocate (configured via application.heap.max_size) |
| Uptime | Time since Structr started |
| Thread Count | Current number of active threads |
| Peak Thread Count | Highest thread count since startup |
| Daemon Thread Count | Number of daemon threads |
| CPU Load Average | System load average (1 minute) |
| Node Cache | Size and usage of the node cache |
| Relationship Cache | Size and usage of the relationship cache |
Interpreting Memory Values
The three memory values relate to each other as follows:
- Free Memory is the unused portion of Total Memory
- Total Memory grows up to Max Memory as needed
- If Free Memory stays consistently low while Total Memory equals Max Memory, consider increasing the heap size
Viewing System Resources
System resource information is available in two places:
- Dashboard – The “About Structr” tab shows processors, free memory, total memory, and max memory
- Health Check Endpoint – The
/structr/healthendpoint returns all metrics listed above in a machine-readable JSON format
HTTP Access Statistics
Structr automatically collects statistics about HTTP requests to your application. These statistics help you understand usage patterns, identify slow endpoints, and detect unusual access behavior.
Collected Metrics
For each endpoint (HTML pages and REST API), Structr tracks:
- Total request count
- Minimum response time
- Maximum response time
- Average response time
Statistics are aggregated per time interval to keep memory usage bounded while still providing useful historical data.
Viewing Statistics
Access statistics are available in two places:
- Dashboard – The “About Structr” tab shows a filterable table with request statistics grouped by timestamp, request count, and HTTP method
- Health Check Endpoint – The
/structr/healthendpoint includes response time statistics in thehtml:responseTimeandjson:responseTimesections
Configuration
Configure these settings in structr.conf or through the Configuration Interface:
| Setting | Default | Description |
|---|---|---|
application.stats.aggregation.interval | 60000 | Aggregation interval in milliseconds. Statistics are grouped into buckets of this size. |
Health Check Endpoint
The health check endpoint provides machine-readable status information for load balancers, container orchestration systems, and monitoring tools.
Endpoints
| Endpoint | Purpose |
|---|---|
/structr/health | Full health status in JSON format |
/structr/health/ready | Readiness probe (HTTP status only) |
Readiness Probe
The /structr/health/ready endpoint returns only an HTTP status code, making it suitable for Kubernetes readiness probes or load balancer health checks:
200 OK– Structr is ready to accept requests503 Service Unavailable– Structr is starting up, shutting down, or a deployment is in progress
Full Health Status
The /structr/health endpoint returns detailed status information in the application/health+json format:
- Memory utilization (free, max, total)
- CPU load average
- Uptime
- Thread counts (current, peak, daemon)
- Cache statistics (nodes, relationships)
- Response time statistics for HTML pages and REST endpoints
Access to the full health data is restricted by IP whitelist. Requests from non-whitelisted IPs receive only the HTTP status code.
Configuration
Configure these settings in structr.conf or through the Configuration Interface:
| Setting | Default | Description |
|---|---|---|
healthcheckservlet.path | /structr/health | Endpoint path |
healthcheckservlet.whitelist | 127.0.0.1, localhost, ::1 | IPs allowed to access full health data |
Prometheus Metrics
Structr exposes metrics in Prometheus format at /structr/metrics. This endpoint is designed for scraping by a Prometheus server.
Available Metrics
| Metric | Type | Description |
|---|---|---|
structr_http_requests_total | Counter | Total HTTP requests (labels: method, path, status) |
structr_http_request_duration_seconds | Histogram | Request duration (labels: method, path) |
In addition to Structr-specific metrics, standard JVM metrics are exposed (memory, garbage collection, threads, etc.).
Configuration
Configure these settings in structr.conf or through the Configuration Interface:
| Setting | Default | Description |
|---|---|---|
metricsservlet.path | /structr/metrics | Endpoint path |
metricsservlet.whitelist | 127.0.0.1, localhost, ::1 | IPs allowed to access metrics |
Prometheus Configuration
To scrape metrics from Structr, add a job to your Prometheus configuration:
scrape_configs:
  - job_name: 'structr'
    static_configs:
      - targets: ['localhost:8082']
    metrics_path: /structr/metrics
If Prometheus runs on a different machine, add its IP address to the whitelist in structr.conf:
metricsservlet.whitelist = 127.0.0.1, localhost, ::1, 10.0.0.50
Grafana Dashboard
A pre-built Grafana dashboard for Structr is available at grafana.com/grafana/dashboards/16770. You can import it using the dashboard ID 16770.
Query Histogram
The histogram endpoint provides detailed query performance analysis, useful for identifying slow queries and optimization opportunities.
Endpoint
/structr/histogram
Parameters
| Parameter | Description |
|---|---|
sort | Sort results by: total, count, min, max, avg (default: total) |
top | Number of results to return (default: 1000) |
reset | If present, clears the histogram data after returning results |
Example: /structr/histogram?sort=avg&top=100
Configuration
Configure these settings in structr.conf or through the Configuration Interface:
| Setting | Default | Description |
|---|---|---|
histogramservlet.path | /structr/histogram | Endpoint path |
histogramservlet.whitelist | 127.0.0.1, localhost, ::1 | IPs allowed to access histogram data |
Related Topics
- Dashboard - Interactive monitoring in the Admin UI
- Configuration - Server settings
- Maintenance - Maintenance mode for planned downtime
Logging & Debugging
This chapter covers the logging system and various debugging techniques available in Structr.
Server Log
Structr logs all server activity using the Log4J logging API with Logback as the implementation. The Logback configuration lives in the classpath in a file called logback.xml.
Log Location
The server log location depends on your installation method:
- Debian package:
/var/log/structr.log - ZIP installation:
logs/structr.login the Structr directory
Custom Log Configuration
The default logback.xml includes a reference to an optional logback-include.xml file where you can add custom settings. This is useful for changing the log level of individual Java packages to gain more detailed insight into internal processes.
Example logback-include.xml to enable debug logging for REST requests:
<included>
    <logger name="org.structr.rest" level="DEBUG"/>
</included>
Place this file in the same directory as logback.xml (typically the Structr installation directory or classpath).
Viewing the Log
You can view the server log in several ways:
- Dashboard – The Server Log tab shows the log in real-time with configurable refresh interval
- Command line – Use
tail -f /var/log/structr.log(Debian) ortail -f logs/structr.log(ZIP) to follow the log - Log file – Open the file directly in a text editor
Log Format
Each log entry follows the format:
Date Time [Thread] Level Logger - Message
Example:
2026-02-03 14:30:45.123 [qtp123456-42] INFO o.s.rest.servlet.JsonRestServlet - GET /structr/rest/User
The components are:
- Date and time with milliseconds
- Thread name in brackets
- Log level (DEBUG, INFO, WARN, ERROR)
- Logger name (abbreviated package and class)
- The actual message
Log Levels
Structr supports the standard log levels. Set the default level via log.level in structr.conf:
| Level | Description |
|---|---|
| ERROR | Serious problems that need immediate attention |
| WARN | Potential issues that do not prevent operation |
| INFO | Normal operational messages (default) |
| DEBUG | Detailed information for troubleshooting |
Changes to log.level take effect immediately without restart.
For more granular control, use logback-include.xml to set different log levels for specific Java packages. This allows you to enable debug logging for one component while keeping other components at INFO level.
Log Rotation
The Debian package includes automatic log rotation via the system’s logrotate service. The default configuration:
- Rotates daily when the log exceeds 10MB
- Keeps 30 days of history
- Compresses old log files
- Log location:
/var/log/structr.log
The configuration file is located at /etc/logrotate.d/structr:
/var/log/structr.log {
  su root adm
  copytruncate
  daily
  rotate 30
  dateext
  dateformat .%Y-%m-%d-%s
  size 10M
  compress
  delaycompress
}
If you installed Structr from the ZIP package, log rotation is not configured automatically. You can either set up logrotate manually or implement your own log management strategy.
When rotation is active, the Dashboard Server Log tab shows a log source selector where you can choose between the current and archived log files.
Logging Configuration
Configure these settings in structr.conf or through the Configuration Interface:
| Setting | Default | Description |
|---|---|---|
log.level | INFO | Default log level |
log.requests | false | Log all incoming HTTP requests |
log.querytime.threshold | 3000 | Log queries taking longer than this (milliseconds) |
log.callback.threshold | 50000 | Log transactions with more callbacks than this |
log.functions.stacktrace | false | Log full stack traces for function exceptions |
log.cypher.debug | false | Log generated Cypher queries |
log.cypher.debug.ping | false | Include WebSocket PING queries in Cypher debug log |
log.scriptprocess.commandline | 2 | Script execution logging: 0=none, 1=path only, 2=path and parameters |
log.directorywatchservice.scanquietly | false | Suppress directory watch service scan messages |
Logging from Code
Use the $.log() function to write messages to the server log from your application code.
JavaScript:
$.log('Processing order', order.id);
$.log('User logged in:', $.me.name);

// Template string syntax
$.log()`Processing batch ${page} of ${total}`);
StructrScript:
${log('Processing order', order.id)}
Log messages appear at INFO level with the logger name indicating the source location.
JavaScript Debugging
Structr includes a JavaScript debugger based on GraalVM that integrates with Chrome DevTools.
Enabling the Debugger
Set application.scripting.debugger to true in structr.conf or the Configuration Interface, then restart Structr.
When enabled, Structr generates a unique debugger URL on each startup. This URL is intentionally unpredictable for security reasons. You can find it in:
- The server log at startup
- The Dashboard in the “About Structr” tab under “Scripting Debugger”
Connecting Chrome DevTools
- Copy the debugger URL from the Dashboard or server log
- Open a new Chrome tab and paste the URL directly into the address bar
- Press Enter to open DevTools
Note that you must manually paste the URL – clicking links to chrome:// URLs is blocked by the browser for security reasons.
Setting Breakpoints
Chrome DevTools does not display your complete application code upfront. Instead, code snippets appear only when execution reaches them. This makes setting breakpoints through the DevTools interface impractical.
To pause execution at a specific point, insert the debugger statement directly in your code:
{
    let orders = $.find('Order', { status: 'pending' });

    debugger;  // Execution pauses here

    for (let order of orders) {
        // process order
    }
}
When execution hits the debugger statement, Chrome DevTools pauses and displays the surrounding code. From there you can:
- Step through code line by line
- Inspect variables and the call stack
- Evaluate expressions in the console
- Continue to the next
debuggerstatement or until completion
Remove debugger statements before deploying to production.
Limitations
The debugger pauses the entire request thread while waiting at a breakpoint. Use it only in development environments where blocking requests is acceptable.
JVM Remote Debugging
For debugging Structr itself or complex Java interop scenarios, you can attach a Java debugger (IntelliJ IDEA, Eclipse, etc.) to the running JVM.
Enabling Remote Debugging
Debian package:
Set the environment variable before starting Structr:
export ENABLE_STRUCTR_DEBUG=yes
systemctl restart structr
This enables debugging on port 5005.
ZIP installation:
Add the following JVM parameter to the start command or configuration:
-Xrunjdwp:transport=dt_socket,address=5005,server=y,suspend=n
Parameters:
address=5005– The port the debugger listens onserver=y– Structr waits for debugger connectionssuspend=n– Start immediately without waiting for debugger (useyto pause until debugger connects)
Connecting Your IDE
In IntelliJ IDEA:
- Run → Edit Configurations → Add New → Remote JVM Debug
- Set host to your server address and port to 5005
- Click Debug to connect
In Eclipse:
- Run → Debug Configurations → Remote Java Application
- Set connection properties and click Debug
Permission Debugging
When troubleshooting access control issues, add the logPermissionResolution parameter to your request:
GET /structr/rest/User?logPermissionResolution=true
This logs detailed information about how permissions are resolved for each object in the response, showing which grants or restrictions apply and why.
Thread Inspection
The Dashboard Threads tab shows all running threads in the JVM. This helps identify:
- Stuck or hung requests
- Infinite loops in code
- Deadlocks between threads
- Long-running operations
Each thread shows its name, state, and stack trace. You can interrupt or kill threads directly from the interface, though killing threads should be used with caution as it may leave data in an inconsistent state.
Event Log Debugging
The Dashboard Event Log provides structured information about requests and transactions:
- Authentication events with user details
- REST and HTTP requests with timing
- Transaction details including:
- Changelog update time
- Callback execution time
- Validation time
- Indexing time
Use the timing breakdown to identify performance bottlenecks in your application.
Common Debugging Scenarios
Package-specific Logging
To debug a specific area without flooding the log, create a logback-include.xml file:
<included>
    <!-- Debug REST API -->
    <logger name="org.structr.rest" level="DEBUG"/>

    <!-- Debug WebSocket communication -->
    <logger name="org.structr.websocket" level="DEBUG"/>

    <!-- Debug scripting -->
    <logger name="org.structr.core.script" level="DEBUG"/>
</included>
Slow Queries
Enable log.cypher.debug to see the generated Cypher queries, then analyze them for:
- Missing indexes
- Inefficient patterns
- Large result sets
The log.querytime.threshold setting automatically logs queries exceeding the threshold.
Permission Issues
Use logPermissionResolution=true on requests to see exactly how access is granted or denied.
JavaScript Errors
Enable log.functions.stacktrace to get full stack traces when functions throw exceptions.
Transaction Problems
The Event Log shows transaction timing. Look for transactions with high callback counts or long validation times.
Related Topics
- Monitoring – System health and performance metrics
- Configuration – Server settings
- Dashboard – Admin UI features
Changelog
Structr can automatically track all changes to your data, recording who changed what and when. This changelog provides a complete audit trail for compliance requirements, debugging, or building features like activity feeds and undo functionality.
Overview
The changelog system records five types of events:
| Verb | Description |
|---|---|
create | A node was created |
delete | A node was deleted |
link | A relationship was created |
unlink | A relationship was removed |
change | A property value was modified |
Structr provides two perspectives on the changelog data:
- Entity Changelog – What happened to a specific object? Use
changelog()to retrieve all changes made to an entity. - User Changelog – What did a specific user do? Use
userChangelog()to retrieve all changes made by a user.
Both track the same events, just organized differently.
Enabling the Changelog
The changelog is disabled by default. Enable it in structr.conf or through the Configuration Interface:
| Setting | Default | Description |
|---|---|---|
application.changelog.enabled | false | Enable entity-centric changelog |
application.changelog.user_centric.enabled | false | Enable user-centric changelog |
changelog.path | changelog/ | Directory where changelog files are stored |
You can enable one or both depending on your needs. Note that enabling the changelog adds overhead to every write operation, as each change must be recorded.
Storage
Changelog data is stored in files on the filesystem, not in the database. This keeps the database lean and allows the changelog to grow independently. The files are stored in the directory specified by changelog.path.
Querying the Entity Changelog
Use the changelog() function to retrieve the history of a specific entity.
Basic Usage
JavaScript:
let history = $.changelog(node);
StructrScript:
${changelog(current)}
You can also pass a UUID string instead of an entity:
let history = $.changelog('abc123-def456-...');
Resolving Related Entities
The second parameter controls whether related entities are resolved:
// Without resolving - target contains only the UUID
let history = $.changelog(node, false);

// With resolving - targetObj contains the actual entity (if it still exists)
let history = $.changelog(node, true);
Changelog Entry Structure
Each entry in the returned list contains different fields depending on the verb:
| Field | create | delete | link | unlink | change | Description |
|---|---|---|---|---|---|---|
verb | ✓ | ✓ | ✓ | ✓ | ✓ | The type of change |
time | ✓ | ✓ | ✓ | ✓ | ✓ | Timestamp (milliseconds since epoch) |
userId | ✓ | ✓ | ✓ | ✓ | ✓ | UUID of the user who made the change |
userName | ✓ | ✓ | ✓ | ✓ | ✓ | Name of the user |
target | ✓ | ✓ | ✓ | ✓ | UUID of the affected entity | |
type | ✓ | ✓ | Type of the created/deleted entity | |||
rel | ✓ | ✓ | Relationship type | |||
relId | ✓ | ✓ | Relationship UUID | |||
relDir | ✓ | ✓ | Direction (“in” or “out”) | |||
key | ✓ | Property name that was changed | ||||
prev | ✓ | Previous value (JSON) | ||||
val | ✓ | New value (JSON) | ||||
targetObj | ✓ | ✓ | ✓ | ✓ | Resolved entity (if resolve=true) |
Querying the User Changelog
Use the userChangelog() function to retrieve all changes made by a specific user.
JavaScript:
let userHistory = $.userChangelog(user);
let myHistory = $.userChangelog($.me);
StructrScript:
${userChangelog(me)}
The user changelog returns the same entry structure, but without userId and userName fields (since the user is already known). For change entries, the target and targetObj fields are included to indicate which entity was modified.
Filtering Results
Both functions support filtering to narrow down the results. Filters are combined with AND logic, except for filters that can have multiple values, which use OR logic within that filter.
Filter Parameters
| Filter | Applicable Verbs | Description |
|---|---|---|
timeFrom | all | Only entries at or after this time |
timeTo | all | Only entries at or before this time |
verb | all | Only entries with matching verb(s) |
userId | all | Only entries by matching user ID(s) |
userName | all | Only entries by matching user name(s) |
relType | link, unlink | Only entries with matching relationship type(s) |
relDir | link, unlink | Only entries with matching direction |
target | create, delete, link, unlink | Only entries involving matching target(s) |
key | change | Only entries changing matching property name(s) |
Time Filters
Time values can be specified as:
- Milliseconds since epoch (number)
- JavaScript Date object
- ISO format string:
yyyy-MM-dd'T'HH:mm:ssZ
JavaScript Filter Syntax
In JavaScript, pass filters as an object. Use arrays for multiple values:
// Single filter
let changes = $.changelog(node, false, {verb: 'change'});

// Multiple verbs (OR logic)
let linkEvents = $.changelog(node, false, {verb: ['link', 'unlink']});

// Combined filters (AND logic)
let recentLinks = $.changelog(node, false, {
    verb: ['link', 'unlink'],
    relType: 'OWNS',
    timeFrom: Date.now() - 86400000  // Last 24 hours
});

// Filter by specific property changes
let nameChanges = $.changelog(node, false, {
    verb: 'change',
    key: 'name'
});
StructrScript Filter Syntax
In StructrScript, pass filters as key-value pairs:
${changelog(current, false, 'verb', 'change')}
${changelog(current, false, 'verb', 'link', 'verb', 'unlink')}
${changelog(current, false, 'verb', 'change', 'key', 'name', 'timeFrom', now)}
Use Cases
Activity Feed
Show recent changes to an entity:
let recentActivity = $.changelog(document, true, {
    timeTo: Date.now(),
    timeFrom: Date.now() - 7 * 86400000  // Last 7 days
});

for (let entry of recentActivity) {
    $.log`${entry.userName} ${entry.verb}d at ${new Date(entry.time)}`;
}
Audit Trail
Track all modifications by a specific user:
let audit = $.userChangelog(suspiciousUser, true, {
    timeFrom: investigationStart,
    timeTo: investigationEnd
});
Property History
Show the history of a specific property:
let priceHistory = $.changelog(product, false, {
    verb: 'change',
    key: 'price'
});

for (let entry of priceHistory) {
    $.log`Price changed from ${entry.prev} to ${entry.val}`;
}
Relationship Tracking
Find when relationships were created or removed:
let membershipChanges = $.changelog(group, true, {
    verb: ['link', 'unlink'],
    relType: 'HAS_MEMBER'
});
Performance Considerations
- The changelog adds write overhead to every database modification
- Changelog files grow over time and are not automatically pruned
- Consider enabling only the perspective you need (entity or user)
- For high-volume applications, implement a retention policy to archive or delete old changelog files
- Queries with
resolve=trueperform additional database lookups
Related Topics
- Built-in Analytics – Custom event tracking for application-level analytics
- Logging & Debugging – Server logging and debugging tools
- Security – Access control and permissions