Structr
Security
Overview
Structr provides a security system that controls who can access your application and what they can do. This chapter covers authentication (verifying identity), authorization (granting permissions), and the tools to manage both.
Core Concepts
Structr’s security model is built on four pillars:
| Concept | Question it answers | Key mechanism |
|---|---|---|
| Users & Groups | Who are the actors? | User accounts, group membership, inheritance |
| Authentication | How do we verify identity? | Sessions, JWT, OAuth, two-factor |
| Permissions | What can each actor do? | Ownership, grants, visibility flags |
| Access Control | Which endpoints are accessible? | Resource Access Permissions |
These concepts work together: a request arrives, Structr authenticates the user (or treats them as anonymous), then checks permissions for the requested operation.
Authentication
When a request reaches Structr, the authentication system determines the user context. Structr checks for a session cookie first, then for a JWT token in the Authorization header, then for X-User and X-Password headers. If none of these are present, Structr treats the request as anonymous.
Structr supports multiple authentication methods that you can combine based on your needs:
| Scenario | Recommended method |
|---|---|
| Web application with login form | Sessions |
| Single-page application (SPA) | JWT |
| Mobile app | JWT |
| Login via external provider (Google, Azure, GitHub) | OAuth |
| Your server calling Structr API | JWT or authentication headers |
| External system with its own identity provider | JWKS validation |
| High-security requirements | Any method combined with two-factor authentication |
The distinction between the last two server scenarios: when your own backend calls Structr, you control the credentials and can use JWT tokens that Structr issues or simple authentication headers. When an external system (like an Azure service principal) calls Structr with tokens from its own identity provider, Structr validates those tokens against the provider’s JWKS endpoint.
Permission Resolution
Once Structr knows who is making the request, it evaluates permissions for every operation the user attempts. Structr checks permissions in a specific order and stops at the first match:
- Admin users bypass all permission checks
- Visibility flags grant read access to public or authenticated users
- Ownership grants full access to the object creator
- Direct grants check SECURITY relationships to the user or their groups
- Schema permissions check type-level grants for groups
- Graph resolution follows permission propagation paths through relationships
For details on each level, see the User Management article.
Getting Started
Basic Web Application
A basic security setup for a typical web application involves creating users and groups in the Security area of the Admin UI, creating a Resource Access Permission with signature _login that allows POST for public users, implementing a login form that posts to /structr/rest/login, and configuring permissions on your data types.
Adding OAuth
To add OAuth login, register your application with the OAuth provider, configure the provider settings in structr.conf, add login links pointing to /oauth/<provider>/login, and optionally implement onOAuthLogin to customize user creation.
Adding Two-Factor Authentication
To add two-factor authentication, set security.twofactorauthentication.level to 1 (optional) or 2 (required), create a two-factor code entry page, and update your login flow to handle the 202 response.
Securing an API
To secure a REST API for external consumers, create Resource Access Permissions for each endpoint you want to expose, configure JWT settings in structr.conf, implement token request and refresh logic in your API clients, and optionally configure CORS if clients run in browsers.
Related Topics
- REST Interface / Authentication - Resource Access Permissions and CORS configuration
- SSL Configuration - Installing SSL certificates for HTTPS
- Configuration Interface - Security-related settings in structr.conf
- Admin UI / Security - Managing users and groups through the graphical interface
User Management
Structr provides a multi-layered security system that combines user and group management with flexible permission resolution. This chapter covers how to manage users and groups, how authentication works, and how permissions are resolved.
Users
The User type is a built-in type in Structr that represents user accounts in your application. Users can authenticate, own objects, receive permissions, and belong to groups. Every request to Structr is evaluated in the context of a user - either an authenticated user or an anonymous user.
You can use the User type directly, extend it with additional properties, or create subtypes for specialized user categories in your application.
Creating Users
You can create users through the Admin UI or programmatically.
Via Admin UI:
- Navigate to the Security area
- Click “Add User”
- Structr creates a new user with a random default name
- Rename the user and configure properties through the Edit dialog
Via REST API (curl):
curl -X POST http://localhost:8082/structr/rest/User \
  -H "Content-Type: application/json" \
  -H "X-User: admin" \
  -H "X-Password: admin" \
  -d '{
    "name": "john.doe",
    "eMail": "john.doe@example.com",
    "password": "securePassword123"
  }'
Via REST API (JavaScript):
const response = await fetch('/structr/rest/User', {
    method: 'POST',
    headers: {
        'Content-Type': 'application/json'
    },
    body: JSON.stringify({
        name: 'john.doe',
        eMail: 'john.doe@example.com',
        password: 'securePassword123'
    })
});

const result = await response.json();
console.log('Created user:', result.result.id);
User Properties
The following properties are available on user objects:
| Property | Type | Description |
|---|---|---|
name | String | Username for authentication |
eMail | String | Email address, often used as an alternative login identifier |
password | String | User password (stored as a secure hash, never in cleartext) |
isAdmin | Boolean | Administrator flag that grants full system access, bypassing all permission checks |
blocked | Boolean | When true, completely disables the account and prevents any action |
passwordAttempts | Integer | Counter for failed login attempts; triggers account lockout when threshold is exceeded |
locale | String | Preferred locale for localization (e.g., de_DE, en_US). Structr uses this value in the $.locale() function and for locale-aware formatting. |
publicKey | String | SSH public key for filesystem access via the SSH service |
skipSecurityRelationships | Boolean | Disables automatic creation of OWNS and SECURITY relationships when this user creates objects. Useful for admin users creating many objects where individual ownership tracking is not needed. |
confirmationKey | String | Temporary authentication key used during self-registration. Replaces the password until the user confirms their account via the confirmation link. |
twoFactorSecret | String | Secret key for TOTP two-factor authentication (see Two-Factor Authentication chapter) |
twoFactorConfirmed | Boolean | Indicates whether the user has completed two-factor setup |
isTwoFactorUser | Boolean | Enables two-factor authentication for this user (when 2FA level is set to optional) |
Setting Passwords
Structr never stores cleartext passwords - only secure hash values. To set or change a password:
Via Admin UI:
- Open the user’s Edit Properties dialog
- Go to the Node Properties tab
- Enter the new password in the Password field
Via REST API (curl):
curl -X PUT http://localhost:8082/structr/rest/User/<UUID> \
  -H "Content-Type: application/json" \
  -H "X-User: admin" \
  -H "X-Password: admin" \
  -d '{"password": "newSecurePassword456"}'
Via REST API (JavaScript):
await fetch('/structr/rest/User/<UUID>', {
    method: 'PUT',
    headers: {
        'Content-Type': 'application/json'
    },
    body: JSON.stringify({
        password: 'newSecurePassword456'
    })
});
You cannot display or recover existing passwords. If a user forgets their password, use the password reset flow or set a new password directly.
Extending the User Type
You can customize the User type to fit your application’s needs.
Adding Properties
To add properties to the User type, open the Schema area, locate the User type, and add new properties. For example, you might add a phoneNumber property or a department property. These properties then become available on all user objects.
Creating Subtypes
For more complex scenarios, you can create subtypes of User. This is useful when your application has different kinds of users with different properties or behaviors - for example, an Employee type and a Customer type, both inheriting from User.
To create a subtype, create a new type in the Schema and select User as its base class. The subtype inherits all User functionality (authentication, permissions, group membership) and can add its own properties and methods.
Groups
The Group type organizes users and simplifies permission management. Instead of granting permissions to individual users, you grant them to groups and add users to those groups. When a user belongs to a group, they inherit all permissions granted to that group.
Groups also serve as the integration point for external directory services like LDAP. When you connect Structr to an LDAP server, directory groups can map to Structr groups, enabling centralized user management. For details, see the LDAP chapter.
Creating Groups
Via Admin UI:
- Navigate to the Security area
- Click “Add Group”
- Rename the group as appropriate
Via REST API (curl):
curl -X POST http://localhost:8082/structr/rest/Group \
  -H "Content-Type: application/json" \
  -H "X-User: admin" \
  -H "X-Password: admin" \
  -d '{"name": "Editors"}'
Via REST API (JavaScript):
await fetch('/structr/rest/Group', {
    method: 'POST',
    headers: {
        'Content-Type': 'application/json'
    },
    body: JSON.stringify({
        name: 'Editors'
    })
});
Managing Membership
In the Admin UI, drag and drop users into groups in the Security area. Groups can contain both users and other groups, allowing hierarchical structures.
Via REST API (curl):
# Add user to group
curl -X PUT http://localhost:8082/structr/rest/User/<USER_UUID> \
  -H "Content-Type: application/json" \
  -H "X-User: admin" \
  -H "X-Password: admin" \
  -d '{"groups": ["<GROUP_UUID>"]}'
Via REST API (JavaScript):
await fetch('/structr/rest/User/<USER_UUID>', {
    method: 'PUT',
    headers: {
        'Content-Type': 'application/json'
    },
    body: JSON.stringify({
        groups: ['<GROUP_UUID>']
    })
});
Group Inheritance
All members inherit access rights granted to a group. This includes direct group members, users in nested subgroups, and permissions that flow down the group hierarchy.
Schema-Based Permissions
In addition to object-level permissions, Structr supports schema-based permissions that apply to all instances of a type. This feature allows you to grant a group access to all objects of a specific type without creating individual permission grants.
To configure schema-based permissions:
- Open the Schema area
- Select the type you want to configure
- Open the Security tab
- Configure which groups have read, write, delete, or accessControl permissions on all instances of this type
Schema-based permissions are evaluated efficiently and improve performance compared to individual object permissions, especially when you have many objects of the same type.
User Categories
Structr distinguishes several categories of users based on their authentication status and privileges.
Anonymous Users
Requests without authentication credentials are anonymous requests. The corresponding user is called the anonymous user or public user. Anonymous users are at the lowest level of the access control hierarchy and can only access objects explicitly marked as public.
Authenticated Users
A request that includes valid credentials is an authenticated request. Authenticated users are at a higher level in the access control hierarchy and can access objects based on their permissions, group memberships, and ownership.
Admin Users
Admin users have the isAdmin flag set to true. They can create, read, modify, and delete all nodes and relationships in the database. They can access all endpoints, modify the schema, and execute maintenance tasks. Admin users bypass all permission checks.
Note: The
isAdminflag is required for users to log into the Structr Admin UI.
Superuser
The superuser is a special account defined in structr.conf with the superuser.password setting. This account exists separately from regular admin users and serves specific purposes:
- Logging into the Configuration Interface
- Performing system-level operations that require elevated privileges beyond normal admin access
The superuser account is not stored in the database. It exists only through the configuration file setting.
Authentication Methods
Authentication determines who is making a request. Structr supports multiple authentication methods that you can use depending on your application’s needs.
| Method | Use Case |
|---|---|
| HTTP Headers | Simple API access, scripting |
| Session Cookies | Web applications with login forms |
| JSON Web Tokens | Stateless APIs, single-page applications |
| OAuth | Login via external providers (Google, GitHub, etc.) |
For details on JWT authentication, including token creation, refresh tokens, and external JWKS providers, see the JWT Authentication chapter.
For details on OAuth authentication with providers like Google, GitHub, or Auth0, see the OAuth chapter.
Authentication Headers
You can provide username and password via the HTTP headers X-User and X-Password. When you secure the connection with TLS, the headers are encrypted and your credentials are protected.
Note: Do not use authentication headers over unencrypted connections (http://…) except for localhost. Always use HTTPS for remote servers.
curl:
curl -s http://localhost:8082/structr/rest/Project \
  -H "X-User: admin" \
  -H "X-Password: admin"
JavaScript:
const response = await fetch('/structr/rest/Project', {
    headers: {
        'X-User': 'admin',
        'X-Password': 'admin'
    }
});

const data = await response.json();
console.log(data.result);
Response:
{
    "result": [
        {
            "id": "362cc05768044c7db886f0bec0061a0a",
            "type": "Project",
            "name": "Project #1"
        }
    ],
    "query_time": "0.000035672",
    "result_count": 1,
    "page_count": 1,
    "result_count_time": "0.000114435",
    "serialization_time": "0.001253579"
}
You must send the authentication headers with every request. For applications where this is impractical, use session-based authentication.
Sessions
Session-based authentication lets you log in once and use a session cookie for subsequent requests. The server maintains session state and the cookie authenticates each request.
Prerequisites
Create a Resource Access Permission with the signature _login that allows POST for non-authenticated users. For details on Resource Access Permissions, see the REST Interface chapter.
Login
curl:
curl -si http://localhost:8082/structr/rest/login \
  -X POST \
  -H "Content-Type: application/json" \
  -d '{"name": "user", "password": "password"}'
JavaScript:
const response = await fetch('/structr/rest/login', {
    method: 'POST',
    headers: {
        'Content-Type': 'application/json'
    },
    credentials: 'include',  // Important: include cookies
    body: JSON.stringify({
        name: 'user',
        password: 'password'
    })
});

if (response.ok) {
    const data = await response.json();
    console.log('Logged in as:', data.result.name);
}
Response:
HTTP/1.1 200 OK
Set-Cookie: JSESSIONID=f49d1dbb60be23612b0820453d996e41...;Path=/
Content-Type: application/json;charset=utf-8

{
    "result": {
        "id": "0490bebcbc2f4018857a492c532334c2",
        "type": "User",
        "isUser": true,
        "name": "user"
    }
}
The Set-Cookie header contains the session ID. Most HTTP clients handle session cookies automatically.
Logout
To end a session, send a POST request to the logout endpoint. Create a Resource Access Permission with the signature _logout that allows POST for authenticated users.
curl:
curl -si http://localhost:8082/structr/rest/logout \
  -X POST \
  -b "JSESSIONID=your-session-id"
JavaScript:
await fetch('/structr/rest/logout', {
    method: 'POST',
    credentials: 'include'
});
Permission System
Structr’s permission system operates on multiple levels, checked in the following order:
- Administrator Check - Users with
isAdmin=truebypass all other checks - Visibility Flags - Simple public/private flags on objects
- Ownership - Creator/owner permissions
- Permission Grants - Explicit user/group permissions
- Schema-Based Permissions - Type-level permissions for groups
- Graph-Based Resolution - Permission propagation through relationships
Permission Types
Four basic permissions control access to objects:
| Permission | Description |
|---|---|
| Read | View object properties and relationships |
| Write | Modify object properties |
| Delete | Remove objects from the database |
| AccessControl | Modify security settings and permissions on the object |
Visibility Flags
Every object has two visibility flags:
| Flag | Description |
|---|---|
visibleToPublicUsers | Grants read access to anonymous users |
visibleToAuthenticatedUsers | Grants read access to logged-in users |
These flags provide simple access control without explicit permission grants. Visibility grants read permission - the object appears in results and you can read its properties.
Note that these flags are independent: visibleToPublicUsers does not imply visibility for authenticated users, and visibleToAuthenticatedUsers does not imply visibility for anonymous users.
Ownership
When a non-admin user creates an object, Structr automatically grants full permissions (Read, Write, Delete, AccessControl) through an OWNS relationship.
When an anonymous user creates an object (if a Resource Access Permission allows the request), the object becomes ownerless. You can configure default permissions for ownerless nodes in the Configuration Interface.
Note: An object must first be visible to a user before they can modify it.
For admin users, you can disable automatic ownership creation by setting skipSecurityRelationships = true. This improves performance when creating many objects that do not need individual ownership tracking.
To prevent ownership for non-admin users, add an onCreate lifecycle method:
{
    $.set($.this, 'owner', null);
}
Permission Grants
You can grant specific permissions to users or groups on individual objects through SECURITY relationships.
Granting permissions:
$.grant(user, node, 'read, write');
Revoking permissions:
$.revoke(user, node, 'write');
Structr creates SECURITY relationships automatically when users create objects. To skip this for admin users, set skipSecurityRelationships = true. For non-admin users, use a lifecycle method:
{
    $.revoke($.me, $.this, 'read, write, delete, accessControl');
}
Note: If you skip both OWNS and SECURITY relationships, the creating user may lose access to the object. Use
grant()orcopy_permissions()to assign appropriate access.
Graph-Based Permission Resolution
For complex scenarios, Structr can propagate permissions through relationships. This enables domain-specific security models where access to one object grants access to related objects.
How It Works
When you configure a relationship for permission propagation, Structr follows that relationship when resolving access. For example, if a user has READ permission on a ProductGroup, and you configure the relationship from ProductGroup to Product to propagate READ, the user automatically gets READ access to all Products in that group.
Relationships configured for permission propagation are called active relationships and appear in orange in the schema editor.
Propagation Direction
| Direction | Effect |
|---|---|
| None | Permission resolution not active |
| Source to Target | Permissions propagate in the direction of the relationship |
| Target to Source | Permissions propagate against the direction of the relationship |
| Both | Permissions propagate in both directions |
Permission Actions
For each permission type (read, write, delete, accessControl), you can configure what happens when traversing the relationship:
| Action | Effect |
|---|---|
| Add | Grants this permission to users traversing the relationship |
| Keep | Maintains this permission if the user already has it |
| Remove | Revokes this permission when traversing |
Hidden Properties
When users gain access through permission propagation, you can hide sensitive properties from them. Configure hidden properties on the relationship, and Structr excludes those properties from JSON output for users accessing objects via that path.
Resolution Process
When a non-admin user accesses an object:
- Structr checks for direct permissions
- If none exist, Structr searches for connected paths through active relationships
- Structr traverses relationships applying ADD, KEEP, or REMOVE rules
- If a valid path with sufficient permissions is found, access is granted
- If no path exists, access is denied
Permission resolution only follows active relationships. If your schema has a chain like ProductGroup → SubGroup → Product, but only ProductGroup → SubGroup is active, users with access to ProductGroup do not automatically access Products in SubGroups.
Account Security
Password Policy
Configure password requirements in structr.conf:
# Minimum password length
security.passwordpolicy.minlength = 8

# Maximum failed login attempts before lockout
security.passwordpolicy.maxfailedattempts = 4

# Complexity requirements
security.passwordpolicy.complexity.enforce = true
security.passwordpolicy.complexity.requiredigits = true
security.passwordpolicy.complexity.requirelowercase = true
security.passwordpolicy.complexity.requireuppercase = true
security.passwordpolicy.complexity.requirenonalphanumeric = true

# Clear all sessions when password changes
security.passwordpolicy.onchange.clearsessions = true
When you enable complexity enforcement, passwords must contain at least one character from each required category.
Account Lockout
When a user exceeds the maximum failed login attempts configured in security.passwordpolicy.maxfailedattempts, Structr locks the account. The passwordAttempts property tracks failures.
To unlock an account, reset passwordAttempts to 0:
curl:
curl -X PUT http://localhost:8082/structr/rest/User/<UUID> \
  -H "Content-Type: application/json" \
  -H "X-User: admin" \
  -H "X-Password: admin" \
  -d '{"passwordAttempts": 0}'
JavaScript:
await fetch('/structr/rest/User/<UUID>', {
    method: 'PUT',
    headers: {
        'Content-Type': 'application/json'
    },
    body: JSON.stringify({
        passwordAttempts: 0
    })
});
Blocking Users
To manually disable a user account, set blocked to true. A blocked user cannot perform any action in Structr, regardless of their permissions or admin status. This is useful for temporarily suspending accounts without deleting them.
curl:
curl -X PUT http://localhost:8082/structr/rest/User/<UUID> \
  -H "Content-Type: application/json" \
  -H "X-User: admin" \
  -H "X-Password: admin" \
  -d '{"blocked": true}'
To unblock a user, set blocked to false.
Two-Factor Authentication
Structr supports TOTP-based two-factor authentication. For configuration and implementation details, see the Two-Factor Authentication chapter.
User Self-Registration
You can allow users to sign up themselves instead of creating accounts manually. The registration process uses double opt-in: users enter their email address, receive a confirmation email, and click a link to complete registration.
Prerequisites
- Configure SMTP settings so Structr can send emails (see the SMTP chapter)
- Create a Resource Access Permission with signature
_registrationallowing POST for public users - Enable
jsonrestservlet.user.autocreateinstructr.conf
How It Works
- User submits their email to the registration endpoint
- Structr creates a user with a
confirmationKeyinstead of a password - Structr sends a confirmation email with a unique link
- User clicks the link, which validates the
confirmationKey - Structr confirms the account and redirects to the target page
- User can now set their password and log in normally
Mail Templates
Structr uses the following mail templates for registration emails. Create these as MailTemplate objects to overwrite the defaults:
| Template Name | Purpose | Default Value |
|---|---|---|
CONFIRM_REGISTRATION_SENDER_ADDRESS | Sender email address | smtp.user from structr.conf (if it contains a valid email address); otherwise structr-mail-daemon@localhost |
CONFIRM_REGISTRATION_SENDER_NAME | Sender name | Structr Mail Daemon |
CONFIRM_REGISTRATION_SUBJECT | Email subject | Welcome to Structr, please finalize registration |
CONFIRM_REGISTRATION_TEXT_BODY | Plain text body | Go to ${link} to finalize registration. |
CONFIRM_REGISTRATION_HTML_BODY | HTML body | <div>Click <a href='${link}'>here</a> to finalize registration.</div> |
CONFIRM_REGISTRATION_BASE_URL | Base URL for the link | ${base_url} |
CONFIRM_REGISTRATION_TARGET_PAGE | Redirect page after confirmation | register_thanks |
CONFIRM_REGISTRATION_ERROR_PAGE | Redirect page on error | register_error |
The ${link} variable in the body templates contains the confirmation URL.
Note: You can use scripting in the TEXT_BODY and HTML_BODY templates. The script runs in the context of the user (the
mekeyword refers to the user being registered).
Registration Endpoint
curl:
curl -X POST http://localhost:8082/structr/rest/registration \
  -H "Content-Type: application/json" \
  -d '{"eMail": "user.name@example.com"}'
JavaScript:
await fetch('/structr/rest/registration', {
    method: 'POST',
    headers: {
        'Content-Type': 'application/json'
    },
    body: JSON.stringify({
        eMail: 'user.name@example.com'
    })
});
The accepted attributes are configured in registration.customuserattributes. The eMail attribute is always supported.
Password Reset
To allow users to regain access when they forget their password, Structr provides a password reset flow.
Prerequisites
- Configure SMTP settings so Structr can send emails (see the SMTP chapter)
- Create a Resource Access Permission with signature
_resetPasswordallowing POST for public users - Enable
jsonrestservlet.user.autologininstructr.confto allow auto-login via the reset link
Mail Templates
Structr uses the following mail templates for password reset emails. Create these as MailTemplate objects to overwrite the defaults:
| Template Name | Purpose | Default Value |
|---|---|---|
RESET_PASSWORD_SENDER_ADDRESS | Sender email address | smtp.user from structr.conf (if it contains a valid email address); otherwise structr-mail-daemon@localhost |
RESET_PASSWORD_SENDER_NAME | Sender name | Structr Mail Daemon |
RESET_PASSWORD_SUBJECT | Email subject | Request to reset your Structr password |
RESET_PASSWORD_TEXT_BODY | Plain text body | Go to ${link} to reset your password. |
RESET_PASSWORD_HTML_BODY | HTML body | <div>Click <a href='${link}'>here</a> to reset your password.</div> |
RESET_PASSWORD_BASE_URL | Base URL for the link | ${base_url} |
RESET_PASSWORD_TARGET_PAGE | Redirect page for password entry | /reset-password |
The ${link} variable contains the password reset URL. This link is valid only once.
Password Reset Endpoint
curl:
curl -X POST http://localhost:8082/structr/rest/reset-password \
  -H "Content-Type: application/json" \
  -d '{"eMail": "user.name@example.com"}'
JavaScript:
await fetch('/structr/rest/reset-password', {
    method: 'POST',
    headers: {
        'Content-Type': 'application/json'
    },
    body: JSON.stringify({
        eMail: 'user.name@example.com'
    })
});
Structr sends an email with a link to the configured target page. When the user clicks the link, they are automatically logged in and can set a new password.
Best Practices
- Grant minimal permissions - Follow the principle of least privilege
- Use groups effectively - Manage permissions through groups rather than individual grants
- Use schema-based permissions for performance - When all instances of a type should have the same permissions, configure them at the schema level
- Test with non-admin users - Admin users bypass all permission checks, so always test your permission design with regular users
- Design clear permission flows - When using graph-based resolution, document how permissions propagate through your data model
- Monitor failed logins - Watch for brute-force attempts through the
passwordAttemptsproperty - Enable two-factor authentication - Require 2FA for admin users and sensitive operations
Related Topics
- Two-Factor Authentication - TOTP-based second factor for login security
- JWT Authentication - Token-based authentication with JSON Web Tokens
- OAuth - Authentication with external providers like Google, GitHub, or Auth0
- SMTP - Configuring email for self-registration and password reset
- LDAP - Integrating with external directory services
- SSH Service - Configuring SSH access to the Structr filesystem
- REST Interface/Authentication - Resource Access Permissions and endpoint security
- Security (Admin UI) - Managing users, groups, and resource access permissions in the Admin UI
Two-Factor Authentication
Structr supports two-factor authentication (2FA) using the TOTP (Time-Based One-Time Password) standard. When enabled, users must provide a code from an authenticator app in addition to their password. This adds a second layer of security that protects accounts even if passwords are compromised.
TOTP is compatible with common authenticator apps like Google Authenticator, Microsoft Authenticator, Authy, and others.
Prerequisites
Because TOTP relies on synchronized time, ensure that both the Structr server and users’ mobile devices are synced to an NTP server. Time drift of more than 30 seconds can cause authentication failures.
Configuration
Configure two-factor authentication in structr.conf or through the Configuration Interface.
Application Settings
| Setting | Default | Description |
|---|---|---|
security.twofactorauthentication.level | 1 | Enforcement level: 0 = disabled, 1 = optional (per-user), 2 = required for all users |
security.twofactorauthentication.issuer | structr | The issuer name displayed in authenticator apps |
security.twofactorauthentication.algorithm | SHA1 | Hash algorithm: SHA1, SHA256, or SHA512 |
security.twofactorauthentication.digits | 6 | Code length: 6 or 8 digits |
security.twofactorauthentication.period | 30 | Code validity period in seconds |
security.twofactorauthentication.logintimeout | 30 | Time window in seconds to enter the code after password authentication |
security.twofactorauthentication.loginpage | /twofactor | Application page for entering the two-factor code |
security.twofactorauthentication.whitelistedIPs | Comma-separated list of IP addresses that bypass two-factor authentication |
Note: Changing
algorithm,digits, orperiodafter users have already enrolled invalidates their existing authenticator setup. SettwoFactorConfirmed = falseon affected users so they receive a new QR code on their next login.
Enforcement Levels
The level setting controls how two-factor authentication applies to users:
| Level | Behavior |
|---|---|
| 0 | Two-factor authentication is completely disabled |
| 1 | Optional - users can enable 2FA individually via the isTwoFactorUser property |
| 2 | Required - all users must use two-factor authentication |
User Properties
Three properties on the User type control two-factor authentication:
| Property | Type | Description |
|---|---|---|
isTwoFactorUser | Boolean | Enables two-factor authentication for this user. Only effective when level is set to 1 (optional). |
twoFactorConfirmed | Boolean | Indicates whether the user has completed two-factor setup. Automatically set to true after first successful 2FA login. Set to false to force re-enrollment. |
twoFactorSecret | String | The secret key used to generate TOTP codes. Automatically generated when the user first enrolls. |
Authentication Flow
The two-factor login process works as follows:
- User submits username and password to
/structr/rest/login - If credentials are valid and 2FA is enabled, Structr returns HTTP status 202 (Accepted)
- The response headers contain a temporary token and, for first-time setup, QR code data
- User scans the QR code with their authenticator app (first time only)
- User enters the 6-digit code from their authenticator app
- User submits the code with the temporary token to
/structr/rest/login - If the code is valid, Structr creates a session and returns HTTP status 200
Implementation
To implement two-factor authentication in your application, you need two pages: a login page and a two-factor code entry page.
Login Page
Create a login form that detects the two-factor response. When the server returns status 202, redirect to the two-factor page with the token and optional QR data.
JavaScript:
async function login(username, password) {
    const response = await fetch('/structr/rest/login', {
        method: 'POST',
        headers: {
            'Content-Type': 'application/json'
        },
        body: JSON.stringify({
            name: username,
            password: password
        })
    });

    if (response.status === 202) {
        // Two-factor authentication required
        const token = response.headers.get('token');
        const qrdata = response.headers.get('qrdata') || '';
        const twoFactorPage = response.headers.get('twoFactorLoginPage');

        window.location.href = `${twoFactorPage}?token=${token}&qrdata=${qrdata}`;
    } else if (response.ok) {
        // Login successful, no 2FA required
        window.location.href = '/';
    } else {
        // Login failed
        const error = await response.json();
        console.error('Login failed:', error);
    }
}
curl:
curl -si http://localhost:8082/structr/rest/login \
  -X POST \
  -H "Content-Type: application/json" \
  -d '{"name": "user", "password": "password"}'
When two-factor authentication is required, the response looks like:
HTTP/1.1 202 Accepted
token: eyJhbGciOiJIUzI1NiJ9...
twoFactorLoginPage: /twofactor
qrdata: iVBORw0KGgoAAAANSUhEUgAA...
The response headers contain:
| Header | Description |
|---|---|
token | Temporary token for the two-factor login (valid for the configured timeout period) |
twoFactorLoginPage | The configured page for entering the two-factor code |
qrdata | Base64-encoded PNG image of the QR code (only present if twoFactorConfirmed is false) |
Two-Factor Page
Create a page that displays the QR code for first-time setup and accepts the TOTP code.
JavaScript:
document.addEventListener('DOMContentLoaded', () => {
    const params = new URLSearchParams(location.search);
    const token = params.get('token');
    const qrdata = params.get('qrdata');

    // Display QR code for first-time setup
    if (qrdata) {
        const qrImage = document.getElementById('qrcode');
        // Convert URL-safe base64 back to standard base64
        const standardBase64 = qrdata.replaceAll('_', '/').replaceAll('-', '+');
        qrImage.src = 'data:image/png;base64,' + standardBase64;
        qrImage.style.display = 'block';

        document.getElementById('setup-instructions').style.display = 'block';
    }

    // Handle form submission
    document.getElementById('twoFactorForm').addEventListener('submit', async (event) => {
        event.preventDefault();

        const code = document.getElementById('code').value;

        const response = await fetch('/structr/rest/login', {
            method: 'POST',
            headers: {
                'Content-Type': 'application/json'
            },
            body: JSON.stringify({
                twoFactorToken: token,
                twoFactorCode: code
            })
        });

        if (response.ok) {
            window.location.href = '/';
        } else {
            document.getElementById('error').textContent = 'Invalid code. Please try again.';
        }
    });
});
curl:
curl -si http://localhost:8082/structr/rest/login \
  -X POST \
  -H "Content-Type: application/json" \
  -d '{"twoFactorToken": "eyJhbGciOiJIUzI1NiJ9...", "twoFactorCode": "123456"}'
Example HTML Structure
<!DOCTYPE html>
<html>
<head>
    <title>Two-Factor Authentication</title>
</head>
<body>
    <h1>Two-Factor Authentication</h1>

    <div id="setup-instructions" style="display: none;">
        <p>Scan this QR code with your authenticator app:</p>
        <img id="qrcode" alt="QR Code" />
        <p>Then enter the 6-digit code shown in your app.</p>
    </div>

    <form id="twoFactorForm">
        <label for="code">Authentication Code:</label>
        <input type="text" id="code" name="code"
               pattern="[0-9]{6,8}" maxlength="8"
               autocomplete="one-time-code" required />
        <button type="submit">Verify</button>
    </form>

    <p id="error" style="color: red;"></p>

    <script src="twofactor.js"></script>
</body>
</html>
Managing User Enrollment
Enabling 2FA for a User
When the enforcement level is set to 1 (optional), enable two-factor authentication for individual users by setting isTwoFactorUser to true.
curl:
curl -X PUT http://localhost:8082/structr/rest/User/<UUID> \
  -H "Content-Type: application/json" \
  -H "X-User: admin" \
  -H "X-Password: admin" \
  -d '{"isTwoFactorUser": true}'
JavaScript:
await fetch('/structr/rest/User/<UUID>', {
    method: 'PUT',
    headers: {
        'Content-Type': 'application/json'
    },
    body: JSON.stringify({
        isTwoFactorUser: true
    })
});
The user will see the QR code on their next login.
Re-Enrolling a User
To force a user to set up two-factor authentication again (for example, if they lost their phone), set twoFactorConfirmed to false:
curl:
curl -X PUT http://localhost:8082/structr/rest/User/<UUID> \
  -H "Content-Type: application/json" \
  -H "X-User: admin" \
  -H "X-Password: admin" \
  -d '{"twoFactorConfirmed": false}'
The user will receive a new QR code on their next login. Their authenticator app will need to be updated with the new secret.
Disabling 2FA for a User
To disable two-factor authentication for a user (when level is 1):
curl:
curl -X PUT http://localhost:8082/structr/rest/User/<UUID> \
  -H "Content-Type: application/json" \
  -H "X-User: admin" \
  -H "X-Password: admin" \
  -d '{"isTwoFactorUser": false}'
IP Whitelisting
For trusted networks or automated systems, you can bypass two-factor authentication based on IP address. Add IP addresses to the security.twofactorauthentication.whitelistedIPs setting:
security.twofactorauthentication.whitelistedIPs = 192.168.1.100, 10.0.0.0/24
Requests from whitelisted IPs proceed with password authentication only, even if the user has two-factor authentication enabled.
Troubleshooting
Invalid Code Errors
If users consistently receive “invalid code” errors:
- Check time synchronization - The most common cause is time drift between the server and the user’s device. Ensure both are synced to NTP.
- Verify the period setting - If you changed
security.twofactorauthentication.period, users need to re-enroll. - Check the algorithm - Some older authenticator apps only support SHA1.
Lost Authenticator Access
If a user loses access to their authenticator app:
- An administrator sets
twoFactorConfirmed = falseon the user - The user logs in with username and password
- The user scans the new QR code with their authenticator app
- The user completes the login with the new code
QR Code Not Displaying
If the QR code does not display:
- Check that
qrdatais present in the response headers - Verify the base64 conversion (URL-safe to standard)
- Ensure the
twoFactorConfirmedproperty is false
Related Topics
- User Management - User properties and account security
- JWT Authentication - Token-based authentication
- OAuth - Authentication with external providers
JWT Authentication
Structr supports authentication and authorization with JSON Web Tokens (JWTs). JWTs enable stateless authentication where the server does not need to maintain session state. This approach is particularly useful for APIs, single-page applications, and mobile apps.
You can learn more about JWT at https://jwt.io/.
Configuration
Structr supports three methods for signing and verifying JWTs:
- Secret Key – a shared secret for signing and verification
- Java KeyStore – a private/public keypair stored in a JKS file
- External JWKS – validation against an external identity provider like Microsoft Entra ID
Secret Key
To use JWTs with a secret key, configure the following settings in structr.conf or through the Configuration Interface:
| Setting | Value |
|---|---|
security.jwt.secrettype | secret |
security.jwt.secret | Your secret key (at least 32 characters) |
Java KeyStore
When you want to sign and verify JWTs with a private/public keypair, you first need to create a Java KeyStore file containing your keys.
Create a new keypair in a new KeyStore file with the following keytool command:
keytool -genkey -alias jwtkey -keyalg RSA -keystore server.jks -storepass jkspassword
Store the KeyStore file in the same directory as your structr.conf file.
Configure the following settings:
| Setting | Value |
|---|---|
security.jwt.secrettype | keypair |
security.jwt.keystore | The name of your KeyStore file |
security.jwt.keystore.password | The password to your KeyStore file |
security.jwt.key.alias | The alias of the key in the KeyStore file |
Token Settings
You can adjust token expiration and issuer in the configuration:
| Setting | Default | Description |
|---|---|---|
security.jwt.jwtissuer | structr | The issuer field in the JWT |
security.jwt.expirationtime | 60 | Access token expiration in minutes |
security.jwt.refreshtoken.expirationtime | 1440 | Refresh token expiration in minutes (default: 24 hours) |
Creating Tokens
Structr creates JWT access tokens through a request to the token resource. With each access token, Structr also creates a refresh token that you can use to obtain further access tokens without sending user credentials again.
Structr provides the tokens in the response body and stores them as HttpOnly cookies in the browser.
Prerequisites
Create a Resource Access Permission with the signature _token that allows POST for public users.
Requesting a Token
curl:
curl -X POST http://localhost:8082/structr/rest/token \
  -H "Content-Type: application/json" \
  -d '{
    "name": "admin",
    "password": "admin"
  }'
JavaScript:
const response = await fetch('/structr/rest/token', {
    method: 'POST',
    headers: {
        'Content-Type': 'application/json'
    },
    body: JSON.stringify({
        name: 'admin',
        password: 'admin'
    })
});

const data = await response.json();
const accessToken = data.result.access_token;
const refreshToken = data.result.refresh_token;
Response:
{
  "result": {
    "access_token": "eyJhbGciOiJIUzI1NiJ9.eyJpc3MiOiJzdHJ1Y3RyIiwic3ViIjoiYWRtaW4iLCJleHAiOjE1OTc5MjMzNjh9...",
    "refresh_token": "eyJhbGciOiJIUzI1NiJ9.eyJpc3MiOiJzdHJ1Y3RyIiwidHlwZSI6InJlZnJlc2giLCJleHAiOjE1OTgwMDYxNjh9...",
    "expiration_date": "1597923368582",
    "token_type": "Bearer"
  },
  "result_count": 1,
  "page_count": 1,
  "result_count_time": "0.000041704",
  "serialization_time": "0.000166971"
}
Refreshing a Token
To obtain a new access token without sending user credentials again, include the refresh token in the request header:
curl:
curl -X POST http://localhost:8082/structr/rest/token \
  -H "refresh_token: eyJhbGciOiJIUzI1NiJ9..."
JavaScript:
const response = await fetch('/structr/rest/token', {
    method: 'POST',
    headers: {
        'refresh_token': refreshToken
    }
});

const data = await response.json();
const newAccessToken = data.result.access_token;
Token Lifetime
The access token remains valid until:
- The expiration time is exceeded
- You revoke the token
- You revoke the refresh token that Structr created with it
- The user creates a new token (which invalidates the previous one)
The refresh token remains valid until:
- The expiration time is exceeded
- You revoke the token
Authenticating Requests
To authenticate a request with a JWT, you have two options.
Cookie-Based Authentication
When you request a token from a browser, Structr stores the access token as an HttpOnly cookie. The browser automatically sends this cookie with subsequent requests, so you do not need additional configuration.
JavaScript:
// After obtaining a token, subsequent requests are automatically authenticated
const response = await fetch('/structr/rest/User', {
    credentials: 'include'  // Include cookies
});

const data = await response.json();
Bearer Token Authentication
For API access or when cookies are not available, send the access token in the HTTP Authorization header:
curl:
curl http://localhost:8082/structr/rest/User \
  -H "Authorization: Bearer eyJhbGciOiJIUzI1NiJ9..."
JavaScript:
const response = await fetch('/structr/rest/User', {
    headers: {
        'Authorization': `Bearer ${accessToken}`
    }
});

const data = await response.json();
Revoking Tokens
Structr stores tokens in the database, allowing you to revoke them before they expire. This is useful for implementing logout functionality or invalidating compromised tokens.
Viewing Active Tokens
You can query the RefreshToken type to see active tokens for a user:
curl:
curl http://localhost:8082/structr/rest/RefreshToken \
  -H "X-User: admin" \
  -H "X-Password: admin"
JavaScript:
const response = await fetch('/structr/rest/RefreshToken', {
    headers: {
        'Authorization': `Bearer ${accessToken}`
    }
});

const tokens = await response.json();
Revoking a Specific Token
To revoke a token, delete the corresponding RefreshToken object:
curl:
curl -X DELETE http://localhost:8082/structr/rest/RefreshToken/<UUID> \
  -H "X-User: admin" \
  -H "X-Password: admin"
JavaScript:
await fetch(`/structr/rest/RefreshToken/${tokenId}`, {
    method: 'DELETE',
    headers: {
        'Authorization': `Bearer ${accessToken}`
    }
});
When you delete a refresh token, the associated access token also becomes invalid.
Revoking All Tokens for a User
To log out a user from all devices, delete all their refresh tokens:
curl:
curl -X DELETE "http://localhost:8082/structr/rest/RefreshToken?user=<USER_UUID>" \
  -H "X-User: admin" \
  -H "X-Password: admin"
External JWKS Providers
Structr can validate JWTs issued by external authentication systems like Microsoft Entra ID, Keycloak, Auth0, or other OIDC-compliant identity providers. This enables machine-to-machine authentication where external systems send requests to Structr with pre-issued tokens.
When an external system (such as an Entra ID service principal) sends a request to Structr with a JWT in the Authorization header, Structr validates the token by fetching the public key from the configured JWKS endpoint. Structr does not manage these external identities - it only validates the tokens they produce.
This capability is particularly useful for:
- Integrating with enterprise identity providers
- Machine-to-machine authentication using service principals
- Centralizing authentication across multiple applications
Note: JWKS validation handles incoming requests with externally-issued tokens. For interactive user login through external providers, see the OAuth chapter.
Configuration
To enable external token validation, configure the JWKS provider settings:
| Setting | Description |
|---|---|
security.jwt.secrettype | Set to jwks for external JWKS validation |
security.jwks.provider | The JWKS endpoint URL of the external service |
security.jwt.jwtissuer | The expected issuer claim in the JWT |
security.jwks.admin.claim.key | Token claim to check for admin privileges (optional) |
security.jwks.admin.claim.value | Value that grants admin privileges (optional) |
security.jwks.group.claim.key | Token claim containing group memberships (optional) |
Microsoft Entra ID
To validate tokens issued by Microsoft Entra ID (formerly Azure Active Directory), configure the JWKS endpoint and issuer for your Azure tenant:
security.jwt.secrettype = jwks
security.jwks.provider = https://login.microsoftonline.com/<tenant-id>/discovery/v2.0/keys
security.jwt.jwtissuer = https://login.microsoftonline.com/<tenant-id>/v2.0
security.jwks.admin.claim.key = roles
security.jwks.admin.claim.value = <your-admin-role-name>
security.jwks.group.claim.key = roles
Replace <tenant-id> with your Azure tenant ID and <your-admin-role-name> with the role value that should grant admin privileges in Structr.
In Azure Portal, configure your App Registration to include role claims in the token under “Token configuration”.
After you configure these settings, Structr validates tokens in the Authorization header against the configured service.
How It Works
When Structr receives a request with a JWT in the Authorization header:
- Structr extracts the token and reads its header to identify the signing key (via the
kidclaim) - Structr fetches the public keys from the configured JWKS endpoint
- Structr verifies the token signature using the appropriate public key
- If validation succeeds, Structr processes the request in the context of the authenticated identity
Structr caches the public keys from the JWKS endpoint to avoid fetching them on every request.
Error Handling
If token validation fails, Structr returns an appropriate HTTP error:
| Status | Reason |
|---|---|
| 401 Unauthorized | Token is missing, expired, or has an invalid signature |
| 503 Service Unavailable | JWKS endpoint is unreachable |
When the JWKS endpoint is temporarily unavailable, Structr uses cached keys if available. If no cached keys exist, the request fails with a 503 error.
Best Practices
- Use short expiration times for access tokens - 15-60 minutes is typical. Use refresh tokens to obtain new access tokens.
- Store refresh tokens securely - Refresh tokens have longer lifetimes and should be protected.
- Use HTTPS - Always transmit tokens over encrypted connections.
- Implement token refresh logic - Check for 401 responses and automatically refresh tokens when they expire.
- Revoke tokens on logout - Delete refresh tokens when users log out to prevent token reuse.
Related Topics
- User Management - Users, groups, and the permission system
- OAuth - Interactive authentication with external identity providers
- Two-Factor Authentication - Adding a second factor to login security
- REST Interface/Authentication - Resource Access Permissions and endpoint security
OAuth
Structr supports OAuth authentication through various external identity providers. OAuth allows users to authenticate using their existing accounts from services like Google, GitHub, or Microsoft Entra ID, eliminating the need for separate credentials in your application.
OAuth implements an interactive login flow where users authenticate through a provider’s login page. For machine-to-machine authentication using pre-issued tokens, see the JWKS section in the JWT Authentication chapter.
For more information about how OAuth works, see the Authorization Code Flow documentation.
Supported Providers
Structr includes built-in support for the following OAuth providers:
- OpenID Connect (Auth0) – works with any OIDC-compliant provider
- Microsoft Entra ID (Azure AD) – enterprise Single Sign-On with Azure Active Directory
- Keycloak – open-source identity and access management
- GitHub
You can also configure custom OAuth providers by specifying the required endpoints.
Configuration
Configure OAuth settings in structr.conf or through the Configuration Interface.
Enabling Providers
Control which OAuth providers are available using the oauth.servers setting:
| Setting | Description |
|---|---|
oauth.servers | Space-separated list of enabled OAuth providers (e.g., google github azure). Defaults to all available providers: auth0 azure facebook github google linkedin keycloak |
Provider Settings
Each provider requires a client ID and client secret. Most providers also support simplified tenant-based configuration where endpoints are constructed automatically.
Recommended Approach: Tenant-Based Configuration
For providers that support it, use the tenant/server settings and Structr will automatically construct the authorization, token, and userinfo endpoints:
Auth0
oauth.auth0.tenant = your-tenant.auth0.com
oauth.auth0.client_id = <your-client-id>
oauth.auth0.client_secret = <your-client-secret>
Microsoft Entra ID (Azure AD)
oauth.azure.tenant_id = <your-tenant-id>
oauth.azure.client_id = <your-client-id>
oauth.azure.client_secret = <your-client-secret>
Keycloak
oauth.keycloak.server_url = https://keycloak.example.com
oauth.keycloak.realm = master
oauth.keycloak.client_id = <your-client-id>
oauth.keycloak.client_secret = <your-client-secret>
Other Providers (Google, GitHub, Facebook, LinkedIn)
These providers use default endpoints and only require credentials:
oauth.google.client_id = <your-client-id>
oauth.google.client_secret = <your-client-secret>
Complete Provider Settings Reference
The following table shows all available settings. Replace <provider> with the provider name (auth0, azure, google, facebook, github, linkedin, keycloak).
General Settings (All Providers)
| Setting | Required | Description |
|---|---|---|
oauth.<provider>.client_id | Yes | Client ID from the OAuth provider |
oauth.<provider>.client_secret | Yes | Client secret from the OAuth provider |
oauth.<provider>.redirect_uri | No | Callback URL that the provider calls after successful authentication. Defaults to /oauth/<provider>/auth |
oauth.<provider>.error_uri | No | Page to redirect to when authentication fails. Defaults to /error |
oauth.<provider>.return_uri | No | Page to redirect to after successful login. Defaults to / |
oauth.<provider>.logout_uri | No | Logout URI. Defaults to /logout |
oauth.<provider>.scope | No | OAuth scope. Defaults vary by provider |
Tenant/Server-Based Configuration (Recommended)
Markdown Rendering Hint: MarkdownTopic(Auth0) not rendered because level 5 >= maxLevels (5)
Markdown Rendering Hint: MarkdownTopic(Azure AD) not rendered because level 5 >= maxLevels (5)
Markdown Rendering Hint: MarkdownTopic(Keycloak) not rendered because level 5 >= maxLevels (5)
Manual Endpoint Configuration (Advanced)
If you don’t use tenant-based configuration or need to override endpoints:
| Setting | Description |
|---|---|
oauth.<provider>.authorization_location | Full URL of the authorization endpoint |
oauth.<provider>.token_location | Full URL of the token endpoint |
oauth.<provider>.user_details_resource_uri | Full URL where Structr retrieves user details |
Required Global Setting
Enable automatic user creation so Structr can create user nodes for new OAuth users:
| Setting | Value |
|---|---|
jsonrestservlet.user.autocreate | true |
Provider-Specific Examples
Microsoft Entra ID (Azure AD)
oauth.servers = azure
oauth.azure.tenant_id = <your-tenant-id>
oauth.azure.client_id = <your-client-id>
oauth.azure.client_secret = <your-client-secret>
oauth.azure.return_uri = /
jsonrestservlet.user.autocreate = true
oauth.servers = google
oauth.google.client_id = <your-client-id>
oauth.google.client_secret = <your-client-secret>
jsonrestservlet.user.autocreate = true
GitHub
oauth.servers = github
oauth.github.client_id = <your-client-id>
oauth.github.client_secret = <your-client-secret>
jsonrestservlet.user.autocreate = true
Keycloak
oauth.servers = keycloak
oauth.keycloak.server_url = https://keycloak.example.com
oauth.keycloak.realm = production
oauth.keycloak.client_id = <your-client-id>
oauth.keycloak.client_secret = <your-client-secret>
jsonrestservlet.user.autocreate = true
Admin UI Integration
When you configure an OAuth provider, Structr automatically adds a login button for that provider to the Admin UI login form. Clicking this button redirects to the provider’s login page and returns to the Structr backend after successful authentication. This enables Single Sign-On for administrators without additional configuration.
Setting the isAdmin flag
Please note that in order to log into the Admin User Interface, the new user must be created with the isAdmin flag set to true. That means you need to implement a custom onOAuthLogin lifecycle method as described below, and select an “Admin Group” in Azure AD that Structr can use to identify administrators.
Triggering Authentication
For your own application pages, trigger OAuth authentication by redirecting users to /oauth/<provider>/login.
HTML
<a href="/oauth/auth0/login">Login with Auth0</a>
<a href="/oauth/azure/login">Login with Microsoft</a>
<a href="/oauth/google/login">Login with Google</a>
<a href="/oauth/github/login">Login with GitHub</a>
<a href="/oauth/facebook/login">Login with Facebook</a>
<a href="/oauth/linkedin/login">Login with LinkedIn</a>
<a href="/oauth/keycloak/login">Login with Keycloak</a>
Authentication Flow
When a user clicks the login link in your page or in the Admin UI login form, the following process is executed:
- Structr redirects the user to the provider’s authorization URL
- The user authenticates with the provider (enters credentials, approves permissions)
- The provider redirects back to Structr’s callback URL with an authorization code
- Structr exchanges the authorization code for an access token
- Structr retrieves user details from the provider
- Structr creates or updates the local User node
- If configured, Structr calls the
onOAuthLoginmethod on the User type - Structr creates a session and redirects to the configured return URL
Customizing User Creation
When a user logs in via OAuth for the first time, Structr creates a new user node. You can customize this process by implementing the onOAuthLogin lifecycle method on your User type (or a User subtype).
Method Parameters
The onOAuthLogin method receives information about the login through $.methodParameters:
| Parameter | Description |
|---|---|
provider | The name of the OAuth provider (e.g., “google”, “github”, “azure”) |
userinfo | Object containing user details from the provider |
The userinfo object contains provider-specific fields. Common fields include:
| Field | Description |
|---|---|
name | User’s display name |
email | User’s email address |
sub | Unique identifier from the provider |
accessTokenClaims | Claims from the access token (provider-specific) |
Example: Basic User Setup
{
    $.log('User ' + $.this.name + ' logged in via ' + $.methodParameters.provider);

    // Update user name from provider data
    const providerName = $.methodParameters.userinfo['name'];
    if (providerName && $.this.name !== providerName) {
        $.this.name = providerName;
    }

    // Set email if available
    const providerEmail = $.methodParameters.userinfo['email'];
    if (providerEmail) {
        $.this.eMail = providerEmail;
    }
}
Example: Azure AD Integration with Group Mapping
This example shows how to integrate with Azure Active Directory (Entra ID), including mapping Azure groups to Structr admin privileges:
{
    const ADMIN_GROUP = 'bc6fbf5f-34f9-4789-8443-76b194edfa09';  // Azure AD group ID

    $.log('User ' + $.this.name + ' just logged in via ' + $.methodParameters.provider);
    $.log('User information: ', JSON.stringify($.methodParameters.userinfo, null, 2));

    // Update username from Azure AD
    if ($.this.name !== $.methodParameters.userinfo['name']) {
        $.log('Updating username ' + $.this.name + ' to ' + $.methodParameters.userinfo['name']);
        $.this.name = $.methodParameters.userinfo['name'];
    }

    // Check Azure AD group membership for admin rights
    let azureGroups = $.methodParameters.userinfo['accessTokenClaims']['wids'];
    $.log('Azure AD groups: ', JSON.stringify(azureGroups, null, 2));

    if (azureGroups.includes(ADMIN_GROUP)) {
        $.this.isAdmin = true;
        $.log('Granted admin rights for ' + $.this.name);
    } else {
        $.this.isAdmin = false;
        $.log('User ' + $.this.name + ' does not have admin rights');
    }
}
Example: Mapping Provider Groups to Structr Groups
{
    const GROUP_MAPPING = {
        'azure-editors-group-id': 'Editors',
        'azure-viewers-group-id': 'Viewers',
        'azure-admins-group-id': 'Administrators'
    };

    let azureGroups = $.methodParameters.userinfo['accessTokenClaims']['groups'] || [];

    for (let azureGroupId in GROUP_MAPPING) {
        let structrGroupName = GROUP_MAPPING[azureGroupId];
        let structrGroup = $.first($.find('Group', 'name', structrGroupName));

        if (structrGroup) {
            if (azureGroups.includes(azureGroupId)) {
                $.add_to_group(structrGroup, $.this);
                $.log('Added ' + $.this.name + ' to group ' + structrGroupName);
            } else {
                $.remove_from_group(structrGroup, $.this);
                $.log('Removed ' + $.this.name + ' from group ' + structrGroupName);
            }
        }
    }
}
Provider Setup
Each OAuth provider requires you to register your application and obtain client credentials. The general process is:
- Create a developer account with the provider
- Register a new application
- Configure the redirect URI to match
oauth.<provider>.redirect_uriexactly - Copy the client ID and client secret to your Structr configuration
Redirect URI Format
Your redirect URI typically follows this pattern:
https://your-domain.com/oauth/<provider>/auth
Register this URL with the provider and ensure it matches your Structr configuration exactly. Mismatched redirect URIs are a common source of OAuth errors.
Provider-Specific Setup Notes
Microsoft Entra ID (Azure AD)
- Register the application in Azure Portal under “App registrations”
- Configure “Redirect URIs” under Authentication – use
https://your-domain.com/oauth/azure/auth - Add required API permissions (e.g., User.Read, openid, profile)
- For group claims, configure “Token configuration” to include groups
- Use your Azure tenant ID in the
oauth.azure.tenant_idsetting, or usecommonfor multi-tenant apps
- Enable the “Google+ API” or “People API” in the Google Cloud Console
- Configure OAuth consent screen before creating credentials
- Uses default endpoints – only client credentials required
GitHub
- Set “Authorization callback URL” in your OAuth App settings
- Request appropriate scopes (e.g.,
user:emailfor email access) - Uses default endpoints – only client credentials required
Keycloak
- Create a client in your Keycloak realm
- Set “Valid Redirect URIs” to
https://your-domain.com/oauth/keycloak/auth - Configure client authentication and standard flow
- Provide server URL and realm name for automatic endpoint construction
Auth0
- Create an application in the Auth0 dashboard
- Configure “Allowed Callback URLs” to
https://your-domain.com/oauth/auth0/auth - Copy your Auth0 tenant domain (e.g.,
your-tenant.auth0.com) - Tenant-based configuration automatically constructs all endpoints
Error Handling
When authentication fails, Structr redirects to the configured error_uri with error information in the query parameters.
Common error scenarios:
| Error | Cause | Solution |
|---|---|---|
invalid_client | Wrong client ID or secret | Verify credentials in Structr configuration |
redirect_uri_mismatch | Redirect URI doesn’t match | Ensure exact match between provider and Structr config |
access_denied | User denied permission | User must approve the requested permissions |
server_error | Provider-side error | Check provider status, retry later |
Best Practices
- Use HTTPS - OAuth requires secure connections in production
- Use tenant-based configuration - Simplifies setup and reduces configuration errors
- Validate user data - Don’t blindly trust data from providers; validate and sanitize
- Map groups carefully - Document the relationship between provider groups and Structr permissions
- Handle token expiration - OAuth tokens expire; implement refresh logic if needed
- Log authentication events - Track logins for security auditing
- Enable only needed providers - Use
oauth.serversto limit available authentication methods
Related Topics
- User Management - Users, groups, and the permission system
- JWT Authentication - Token-based authentication, including external JWKS providers for machine-to-machine scenarios
- Two-Factor Authentication - Adding a second factor after OAuth login
- REST Interface/Authentication - Resource Access Permissions and endpoint security
SSL Configuration
HTTPS encrypts all communication between the browser and server, protecting sensitive data from interception. Structr supports automatic SSL certificate management through Let’s Encrypt as well as manual certificate installation.
Prerequisites
Before configuring HTTPS, you need superuser credentials for your Structr instance and a domain name pointing to your server. Let’s Encrypt does not work with localhost, so you need a real domain for automatic certificates. The server must be reachable from the internet on ports 80 and 443 for Let’s Encrypt validation. If you want to use the standard ports 80 and 443, you also need appropriate privileges to bind to these privileged ports.
Certificate Types
Structr supports two types of SSL certificates:
Let’s Encrypt certificates are issued by a trusted certificate authority and recognized by all browsers without warnings. They require a publicly accessible domain and internet connectivity for validation. Let’s Encrypt certificates are free and automatically renewed.
Self-signed certificates are generated locally without a certificate authority. Browsers will show security warnings because they cannot verify the certificate’s authenticity. Self-signed certificates are suitable for local development and testing, but not for production use.
For production deployments, use Let’s Encrypt. For local development where Let’s Encrypt is not possible, use self-signed certificates or mkcert.
Let’s Encrypt
Let’s Encrypt provides free, automatically renewed SSL certificates. When you request a certificate, Structr handles the domain validation process and stores the resulting certificate files in the /opt/structr/ssl/ directory. You do not need to manually manage these files - Structr configures the paths automatically.
Configuration
Configure Let’s Encrypt in the Configuration Interface under Security Settings:
| Setting | Description |
|---|---|
letsencrypt.domains | Your domain name(s), comma-separated for multiple domains |
letsencrypt.email | Contact email for certificate notifications |
letsencrypt.challenge | Validation method: http (default) or dns |
Requesting a Certificate
After configuring the domain, request a certificate through the REST API:
curl -X POST http://your-domain.com/structr/rest/maintenance/letsencrypt \
  -H "X-User: admin" \
  -H "X-Password: admin" \
  -H "Content-Type: application/json" \
  -d '{"server": "production", "challenge": "http", "wait": "10"}'
The parameters control the certificate request:
| Parameter | Description |
|---|---|
server | production for real certificates, staging for testing |
challenge | http for HTTP-01 validation, dns for DNS-01 |
wait | Seconds to wait for challenge completion |
You can also request certificates through the Admin UI under Dashboard → Maintenance → Let’s Encrypt Certificate.
Certificate Renewal
Let’s Encrypt certificates are valid for 90 days. Structr automatically renews certificates before they expire. To manually trigger renewal, execute the certificate request again.
Enabling HTTPS
Once you have a certificate (from Let’s Encrypt or manually installed), enable HTTPS in the Configuration Interface under Server Settings:
| Setting | Description |
|---|---|
application.http.port | HTTP port, typically 80 |
application.https.port | HTTPS port, typically 443 |
application.https.enabled | Set to true to enable HTTPS |
httpservice.force.https | Set to true to redirect all HTTP traffic to HTTPS |
After changing these settings, restart the HTTP service. You can do this in the Services tab of the Configuration Interface, through the REST API, or via the command line:
curl -X POST http://localhost:8082/structr/rest/maintenance/restartService \
  -H "X-User: admin" \
  -H "X-Password: admin" \
  -H "Content-Type: application/json" \
  -d '{"serviceName": "HttpService"}'
sudo systemctl restart structr
Manual Certificate Installation
If you have certificates from another certificate authority or need to use existing certificates, you can install them manually. Manual certificates are stored in the same directory as Let’s Encrypt certificates (/opt/structr/ssl/), but you must configure the paths explicitly.
Place your certificate files in the Structr SSL directory and set appropriate ownership:
sudo mkdir -p /opt/structr/ssl/
sudo cp your-certificate.pem /opt/structr/ssl/
sudo cp your-private-key.pem /opt/structr/ssl/
sudo chown -R structr:structr /opt/structr/ssl/
Configure the certificate paths in the Configuration Interface under Server Settings:
| Setting | Description |
|---|---|
application.ssl.certificate.path | Path to your certificate file |
application.ssl.private.key.path | Path to your private key file |
SSL Hardening
For enhanced security, configure protocol and cipher settings:
| Setting | Recommended Value |
|---|---|
application.ssl.protocols | TLSv1.2,TLSv1.3 |
application.ssl.ciphers | ECDHE-RSA-AES256-GCM-SHA384,ECDHE-RSA-AES128-GCM-SHA256 |
application.ssl.dh.keysize | 2048 |
Local Development
Let’s Encrypt requires a publicly accessible domain and cannot issue certificates for localhost. For local development, you need to use self-signed certificates instead. Unlike Let’s Encrypt certificates, self-signed certificates are not trusted by browsers, so you will see security warnings. This is acceptable for development but not for production.
You have two options for creating local certificates: generating a self-signed certificate manually with OpenSSL, or using mkcert which creates certificates trusted by your local machine.
Self-Signed Certificates
Generate a self-signed certificate for development:
openssl req -x509 -newkey rsa:4096 \
  -keyout localhost-key.pem \
  -out localhost-cert.pem \
  -days 365 -nodes \
  -subj "/CN=localhost"

sudo mkdir -p /opt/structr/ssl/
sudo mv localhost-cert.pem localhost-key.pem /opt/structr/ssl/
Configure Structr to use these certificates:
| Setting | Value |
|---|---|
application.https.enabled | true |
application.https.port | 8443 |
application.ssl.certificate.path | /opt/structr/ssl/localhost-cert.pem |
application.ssl.private.key.path | /opt/structr/ssl/localhost-key.pem |
Browsers will show security warnings for self-signed certificates. Click through the warning to access your application during development.
Using mkcert
For a smoother development experience, use mkcert to create locally-trusted certificates. Install mkcert through your package manager (brew install mkcert on macOS, sudo apt install mkcert on Ubuntu), then create and install a local certificate authority:
mkcert -install
mkcert localhost 127.0.0.1 ::1

sudo mkdir -p /opt/structr/ssl/
sudo mv localhost+2.pem /opt/structr/ssl/localhost-cert.pem
sudo mv localhost+2-key.pem /opt/structr/ssl/localhost-key.pem
Browsers will trust mkcert certificates without warnings.
Verification
After enabling HTTPS, verify your configuration by testing the HTTPS connection with curl -I https://your-domain.com. If you enabled HTTP-to-HTTPS redirection, test that as well with curl -I http://your-domain.com - this should return a 301 or 302 redirect to the HTTPS URL.
You can check certificate details with OpenSSL:
echo | openssl s_client -connect your-domain.com:443 2>/dev/null | \
  openssl x509 -noout -dates
In the browser, navigate to your domain and check for the lock icon in the address bar. Click the icon to view certificate details and verify the certificate is valid and issued by the expected authority.
Troubleshooting
Certificate Generation Fails
When Let’s Encrypt certificate generation fails, first verify that your domain’s DNS correctly points to your server. The server must be reachable from the internet on ports 80 and 443 for the validation challenge. Check that no other service (like Apache or nginx) is using port 80. Review the Structr log for detailed error messages:
tail -f /var/log/structr/structr.log | grep -i letsencrypt
HTTPS Not Working
If HTTPS connections fail after setup, verify that application.https.enabled is set to true and that the certificate files exist in the SSL directory. Make sure you restarted the HTTP service after changing configuration. Check whether the HTTPS port is listening and not blocked by a firewall:
sudo netstat -tlnp | grep :443
ls -la /opt/structr/ssl/
Permission Denied on Ports 80/443
Binding to ports below 1024 requires elevated privileges. You can either grant the capability to bind privileged ports to Java, or use higher ports with port forwarding:
# Grant capability to Java
sudo setcap 'cap_net_bind_service=+ep' /usr/bin/java

# Or use port forwarding
sudo iptables -t nat -A PREROUTING -p tcp --dport 80 -j REDIRECT --to-port 8082
sudo iptables -t nat -A PREROUTING -p tcp --dport 443 -j REDIRECT --to-port 8443
HTTP Not Redirecting to HTTPS
If HTTP traffic is not redirecting to HTTPS, verify that httpservice.force.https is set to true and restart the HTTP service after changing the setting. Also clear your browser cache, as browsers may have cached the non-redirecting response.
Related Topics
- Security - Authentication methods, users, groups, and permissions
- Configuration Interface - Managing Structr settings including SSL configuration
- Operations - Server management and maintenance tasks
SSH Access
Structr includes a built-in SSH server that provides command-line access to the Admin Console and filesystem. Administrators can connect via SSH to execute scripts, run queries, and manage files without using the web interface.
Overview
The SSH service provides two main capabilities:
- Admin Console - An interactive command-line interface for executing JavaScript, StructrScript, Cypher queries, and administrative commands
- Filesystem Access - SFTP and SSHFS access to Structr’s virtual filesystem
SSH access is restricted to admin users. Non-admin users receive an authentication error when attempting to connect.
Enabling the SSH Service
The SSH service is not enabled by default. To activate it:
- Open the Configuration Interface
- Enable the
SSHServicein the list of configured services - Save the configuration
- Navigate to the Services tab
- Start the SSHService
When the service starts successfully, you see log entries like:
INFO  org.structr.files.ssh.SSHService - Setting up SSH server..
INFO  org.structr.files.ssh.SSHService - Initializing host key generator..
INFO  org.structr.files.ssh.SSHService - Configuring SSH server..
INFO  org.structr.files.ssh.SSHService - Starting SSH server on port 8022
INFO  org.structr.files.ssh.SSHService - Initialization complete.
On first startup, Structr generates an SSH host key and stores it locally. This key identifies your Structr instance to SSH clients.
Configuration
Configure the SSH service in structr.conf:
| Setting | Default | Description |
|---|---|---|
sshservice.port | 8022 | The port the SSH server listens on |
Remember that structr.conf only contains settings that differ from defaults. If you want to use port 8022, you do not need to add this setting.
Setting Up User Access
SSH authentication uses public key authentication. Each user who needs SSH access must have their public key configured in Structr.
To add a public key for a user:
- Open the Security area in the Admin UI
- Select the user
- Open the Edit dialog
- Navigate to the Advanced tab
- Paste the user’s public key into the
publicKeyfield - Save the changes
The public key is typically found in ~/.ssh/id_rsa.pub or ~/.ssh/id_ed25519.pub on the user’s machine. The entire contents of this file should be pasted into the field.
Note: Only users with
isAdmin = truecan connect via SSH. Non-admin users receive the error “SSH access is only allowed for admin users!” when attempting to connect.
Connecting via SSH
Connect to Structr using a standard SSH client:
ssh -p 8022 admin@localhost
Replace admin with your username, localhost with your server address, and 8022 with your configured port.
On first connection, you are prompted to verify the server’s host key fingerprint:
The authenticity of host '[localhost]:8022 ([127.0.0.1]:8022)' can't be established.
RSA key fingerprint is SHA256:9YVTKL8x/PUhOdQUPdDmwdCDqZmDzbE5NuXlY16jQeI.
Are you sure you want to continue connecting (yes/no/[fingerprint])? yes
After confirming, you see the welcome message and enter the Admin Console:
Welcome to the Structr 6.2-SNAPSHOT JavaScript console. Use <Shift>+<Tab> to switch modes.
admin@Structr/>
Admin Console
The Admin Console provides an interactive environment for executing commands. It supports multiple modes, each with different capabilities.
Switching Modes
Use Console.setMode() to switch between modes:
Console.setMode('JavaScript')   // Default mode
Console.setMode('StructrScript')
Console.setMode('Cypher')
Console.setMode('AdminShell')
Console.setMode('REST')
You can also press Shift+Tab to cycle through available modes.
JavaScript Mode
The default mode. Execute JavaScript code with full access to Structr’s scripting API:
admin@Structr/> $.find('User')
admin@Structr/> $.find('Project', { status: 'active' })
admin@Structr/> $.create('Task', { name: 'New Task' })
StructrScript Mode
Execute StructrScript expressions:
admin@Structr/> find('User')
admin@Structr/> size(find('Project'))
Cypher Mode
Execute Neo4j Cypher queries directly:
admin@Structr/> MATCH (n:User) RETURN n
admin@Structr/> MATCH (p:Project)-[:HAS_TASK]->(t:Task) RETURN p.name, count(t)
AdminShell Mode
Access administrative commands. Type help to see available commands:
admin@Structr/> Console.setMode('AdminShell')
Mode set to 'AdminShell'. Type 'help' to get a list of commands.
admin@Structr/> help
REST Mode
Execute REST-style operations. Type help to see available commands:
admin@Structr/> Console.setMode('REST')
Mode set to 'REST'. Type 'help' to get a list of commands.
admin@Structr/> help
Filesystem Access
You can mount Structr’s virtual filesystem on your local machine using SSHFS. This allows you to browse and edit files using standard file management tools.
Mounting with SSHFS
Install SSHFS on your system if not already available, then mount the filesystem:
sshfs admin@localhost:/ mountpoint -p 8022
Replace:
adminwith your usernamelocalhostwith your server addressmountpointwith your local mount directory8022with your configured SSH port
After mounting, you can navigate the Structr filesystem like any local directory:
cd mountpoint
ls -la
Unmounting
To unmount the filesystem:
fusermount -u mountpoint   # Linux
umount mountpoint          # macOS
Troubleshooting
Connection Refused
If you cannot connect:
- Verify the SSHService is running in the Services tab
- Check that the port is not blocked by a firewall
- Confirm you are using the correct port (default: 8022)
# Check if the port is listening
netstat -tlnp | grep 8022
Authentication Failures
If authentication fails:
- Verify the public key is correctly entered in the user’s
publicKeyfield - Ensure the user has
isAdmin = true - Check that you are using the matching private key on the client
# Test with verbose output to see authentication details
ssh -v -p 8022 admin@localhost
“SSH access is only allowed for admin users!”
This error indicates the user exists and authenticated successfully, but does not have admin privileges. Set isAdmin = true on the user to grant SSH access.
Security Considerations
SSH access provides powerful administrative capabilities. Consider these security practices:
- Limit admin users - Only grant admin status to users who genuinely need it
- Protect private keys - Users should secure their private keys with passphrases
- Use strong keys - Prefer Ed25519 or RSA keys with at least 4096 bits
- Monitor access - Review server logs for SSH connection attempts
- Firewall the port - Restrict SSH port access to trusted networks if possible
Related Topics
- User Management - Managing users and the
publicKeyproperty - Configuration - Service configuration in structr.conf
- Admin Console - Detailed documentation of console commands and modes
Rate Limiting
Structr provides built-in rate limiting to protect your application from being overwhelmed by too many requests. When enabled, requests that exceed the configured threshold are delayed, throttled, or rejected. This helps protect against denial-of-service attacks and misbehaving clients.
Rate limiting is disabled by default. To enable it, set httpservice.dosfilter.ratelimiting to Enabled in the Configuration Interface under DoS Filter Settings.
How It Works
The rate limiter tracks requests per client IP address. When a client exceeds the allowed requests per second:
- Initial excess requests are delayed by a configurable amount
- If the client continues, requests are throttled (queued)
- If the queue fills up, additional requests are rejected with an HTTP error code
This graduated response allows legitimate users who briefly spike their request rate to continue with a slight delay, while persistent offenders are blocked.
Configuration
| Setting | Default | Description |
|---|---|---|
httpservice.dosfilter.ratelimiting | Disabled | Enable or disable rate limiting. |
httpservice.dosfilter.maxrequestspersec | 10 | Maximum requests per second before throttling begins. |
httpservice.dosfilter.delayms | 100 | Delay in milliseconds applied to requests exceeding the limit. |
httpservice.dosfilter.maxwaitms | 50 | Maximum time in milliseconds a request will wait for processing. |
httpservice.dosfilter.throttledrequests | 5 | Number of requests that can be queued for throttling. |
httpservice.dosfilter.throttlems | 30000 | Duration in milliseconds to throttle a client. |
httpservice.dosfilter.maxrequestms | 30000 | Maximum time in milliseconds for a request to be processed. |
httpservice.dosfilter.maxidletrackerms | 30000 | Time in milliseconds before an idle client tracker is removed. |
httpservice.dosfilter.insertheaders | Enabled | Add rate limiting headers to responses. |
httpservice.dosfilter.remoteport | Disabled | Include remote port in client identification. |
httpservice.dosfilter.ipwhitelist | (empty) | Comma-separated list of IP addresses exempt from rate limiting. |
httpservice.dosfilter.managedattr | Enabled | Enable JMX management attributes. |
httpservice.dosfilter.toomanycode | 429 | HTTP status code returned when requests are rejected. |
Monitoring
When rate limiting activates, Structr logs warnings with details about the affected client:
DoS ALERT: Request delayed=100ms, ip=192.168.1.100, overlimit=OverLimit[id=192.168.1.100, duration=PT0.016S, count=10], user=null
The log entry shows the IP address, the delay applied, and the request count that triggered the limit.
Whitelisting Trusted Clients
Internal services or monitoring systems may need to make frequent requests without being throttled. Add their IP addresses to the whitelist:
httpservice.dosfilter.ipwhitelist = 10.0.0.1, 10.0.0.2, 192.168.1.50
Whitelisted IPs are completely exempt from rate limiting.
Business Logic
Security
All code runs in the security context of the current user. Objects without read permission are invisible – they don’t appear in query results. Attempting to modify objects without write permission returns a 403 Forbidden error.
Admin Access
The admin user has full access to everything. Keep this in mind during development: if you only test as admin, permission problems won’t surface until a regular user tries the application. Test with non-admin users early.
Elevated Permissions
Sometimes you need to perform operations the current user isn’t allowed to do directly. Structr provides several functions for this.
Privileged Execution
$.doPrivileged() runs code with admin access:
{
    let projectId = this.project.id;

    $.doPrivileged(() => {
        // find() with a UUID string returns the object directly, not a collection
        let project = $.find('Project', projectId);
        project.taskCount = project.taskCount + 1;
    });
}
$.callPrivileged() calls a user-defined function with admin access:
{
    $.callPrivileged('updateStatistics', { projectId: this.project.id });
}
Executing as Another User
$.doAs() runs code as a specific user:
{
    $.doAs(targetUser, () => {
        // This code runs with targetUser's permissions
    });
}
Separate Transactions
$.doInNewTransaction() runs code in a separate transaction:
{
    $.doInNewTransaction(() => {
        // Changes here are committed independently
    });
}
Context Boundaries
These functions create a new context. You can’t use object references from the outer context directly – pass the UUID and retrieve the object inside:
{
    let id = this.id;  // Get the ID in the outer context

    $.doPrivileged(() => {
        // find() can be used to get a single object by ID
        let obj = $.find('MyType', id);  // Retrieve in inner context
        // ...
    });
}
Best Practices
Security
Security requires attention at multiple levels. A system is only as strong as its weakest link.
Enable HTTPS
All production deployments should use HTTPS. Structr integrates with Let’s Encrypt for free SSL certificates:
- Configure
letsencrypt.domainsinstructr.confwith your domain - Call the
/maintenance/letsencryptendpoint or use theletsencryptmaintenance command - Enable HTTPS:
application.https.enabled = true - Configure ports:
application.http.port = 80andapplication.https.port = 443 - Force HTTPS:
httpservice.force.https = true
Automate Certificate Renewal
Let’s Encrypt certificates expire after 90 days. Schedule a user-defined function to call $.renewCertificates() daily or weekly to keep certificates current.
Enable Password Security Rules
Configure password complexity requirements in structr.conf:
security.passwordpolicy.minlength = 8
security.passwordpolicy.complexity.enforce = true
security.passwordpolicy.complexity.requiredigits = true
security.passwordpolicy.complexity.requirelowercase = true
security.passwordpolicy.complexity.requireuppercase = true
security.passwordpolicy.complexity.requirenonalphanumeric = true
security.passwordpolicy.maxfailedattempts = 4
Use the LoginServlet for Authentication
Configure your login form to POST directly to /structr/rest/login instead of implementing authentication in JavaScript. This handles session management automatically.
Secure File Permissions
On the server filesystem, protect sensitive files:
structr.confshould be readable only by the Structr process (mode 600)- Follow Neo4j’s file permission recommendations for database files
Use Encrypted String Properties
For sensitive data like API keys or personal information, use the EncryptedString property type. Data is encrypted using AES with a key configured in structr.conf or set via $.set_encryption_key().
Use Parameterized Cypher Queries
Always use parameters instead of string concatenation when building Cypher queries. This protects against injection attacks and improves readability.
Recommended:
$.cypher('MATCH (n) WHERE n.name CONTAINS $searchTerm', { searchTerm: 'Admin' })
Not recommended:
$.cypher('MATCH (n) WHERE n.name CONTAINS "' + searchTerm + '"')
The parameterized version passes values safely to the database regardless of special characters or malicious input.
Use Group-Based Permissions for Type Access
Grant groups access to all instances of a type directly in the schema. This is simpler than managing individual object permissions.
Set Visibility Flags Consistently
Login pages should be visibleToPublicUsers but not visibleToAuthenticatedUsers. Protected pages should be visibleToAuthenticatedUsers only.
Test With Non-Admin Users Early
Admin users bypass all permission checks. If you only test as admin, permission problems won’t surface until a regular user tries the application.
The Main Areas
Security
Here you can manage users and groups, configure resource access grants, and set up CORS.
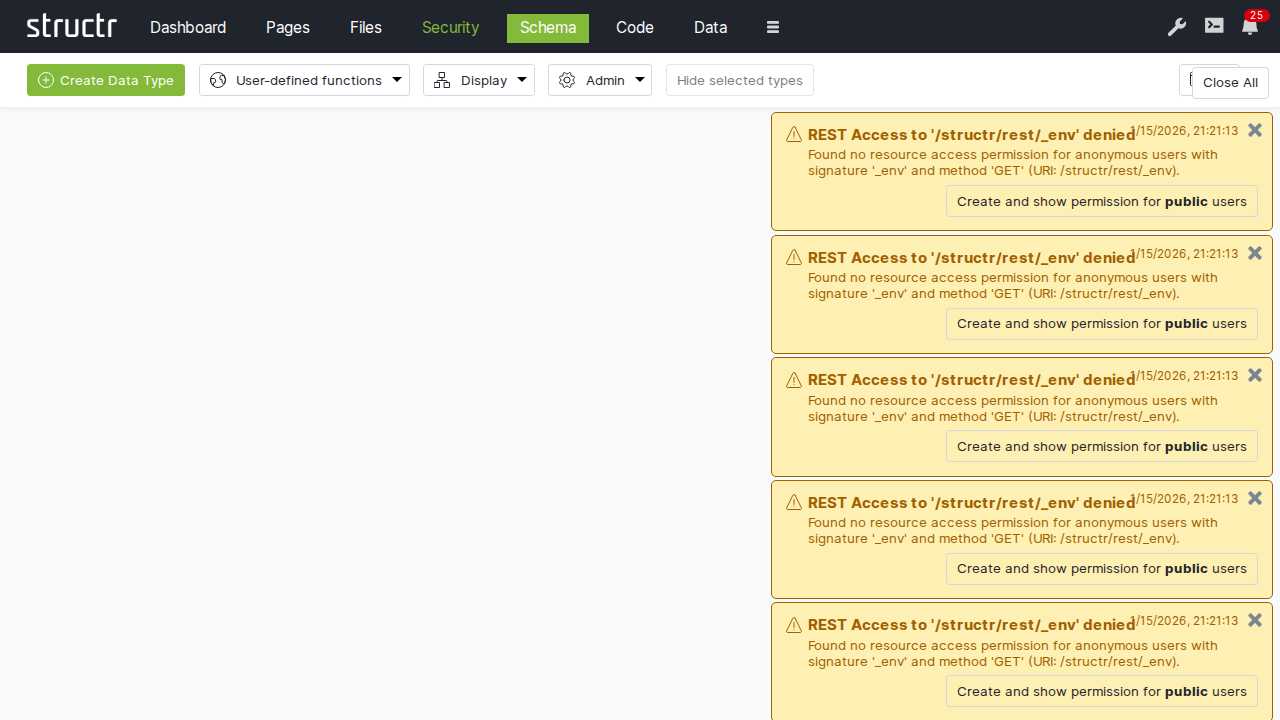
Admin User Interface
Security
The Security area is where you manage access control for your application. Here you create users and organize them into groups, define which REST endpoints are accessible to authenticated and anonymous users, and configure cross-origin request settings for browser-based clients. The permission model supports both role-based access through groups and fine-grained object-level permissions. Each of these concerns has its own tab.
Users and Groups
The first tab displays two lists side by side: users on the left, groups on the right. Both lists are paginated and filterable, which is helpful when you have many users.
Creating Users and Groups
Click the Create button above either list to add a new user or group. If you’ve extended the User or Group types (by creating subclasses or adding the User trait to another type), a dropdown appears next to the button that lets you choose which type to create.
Organizing Your Security Model
You can drag users onto groups to make them members, and drag groups onto other groups to create hierarchies. This flexibility lets you model complex organizational structures: departments containing teams, teams containing members, with permissions flowing through the hierarchy.
Editing Users
Click a user to edit the name inline. For more options, hover over the user and click the menu icon to open the context menu.
General Dialog
Here you can edit essential user properties: name, password, and email address. Three flags control special behaviors:
- Is Admin User – Grants full access, bypassing all permission checks
- Skip Security Relationships – Optimizes performance for users who do not need fine-grained permissions
- Enable Two-Factor Authentication – Adds an extra security layer for this user
The Failed Login Attempts counter (useful for diagnosing lockouts) and the Confirmation Key (used during self-registration) are also available here.
Advanced Dialog
This shows all user attributes in a raw table format.
Security Dialog
This opens the access control dialog for the user object itself.
Delete User
This removes the account.
See the User Management chapter for detailed explanations of these settings.
Editing Groups
Groups have names and members but fewer special properties. Click to edit the name inline. Use the context menu to access the Advanced dialog (all attributes), Security dialog (access control for the group object), or Delete Group.
Resource Access
The second tab controls which REST endpoints are accessible and to whom.
The Resource Access Table
Each row represents a grant with:
- Signature – The URL pattern this grant applies to
- Permissions – Checkboxes for each HTTP method (GET, POST, PUT, DELETE, OPTIONS, HEAD, PATCH), separately for authenticated and non-authenticated users
Creating Grants
Enter a signature in the input field next to the Create button and click Create. For details on signature syntax and configuration patterns, see the User Management chapter.
Per-User and Per-Group Grants
Resource Access grants are themselves objects with their own access control. Click the lock icon at the end of any row to open the access control dialog for that grant.
This means you can create multiple grants for the same signature, each visible to different users or groups. One grant might allow read-only access for regular users, while another allows full access for administrators. Each user sees only the grants that apply to them.
Visibility Options
The Settings menu on the right side of the tab bar includes options for showing visibility flags and bitmask columns in the table. The bitmask is a numeric representation of the permission flags, which can be useful for debugging.
CORS
The third tab configures Cross-Origin Resource Sharing settings.
The CORS Table
Each row configures CORS for one URL path. Enter a path in the input field, click Create, then fill in the columns:
Accepted Origins
This specifies which domains can make requests. Use * to allow any origin, or list specific domains like https://example.com. This becomes the Access-Control-Allow-Origin header.
Max Age
This tells browsers how long to cache the CORS preflight response, in seconds. Higher values reduce preflight requests but delay the effect of configuration changes.
Allow Methods
This lists which HTTP methods are permitted: GET, POST, PUT, DELETE, etc.
Allow Headers
This specifies which request headers clients can send: Content-Type, Authorization, etc.
Allow Credentials
This controls whether browsers include cookies and HTTP authentication with cross-origin requests.
Expose Headers
This determines which response headers JavaScript can access. By default, only a few headers are exposed; list additional ones here.
The delete button is in the second column.
For details on CORS concepts and configuration patterns, see the Authentication chapter in REST Interface.
Related Topics
- User Management – Concepts behind users, groups, and permissions
- REST Interface/Authentication – Resource Access Permissions and CORS
Context Menu
Security
A submenu with:
- Access Control / Visibility – Opens the full access control dialog
- Quick toggles – Make the file visible to authenticated users, public users, or both
Best Practices
Security
- Store SMTP and mailbox passwords securely
- Use TLS/SSL for all mail connections
- Be cautious with attachments from unknown senders