Data Creation & Import
Importing CSV Data
You can import CSV data in two different ways:
- with the simple import dialog in the Data section
- with the CSV Import Wizard in the Files section
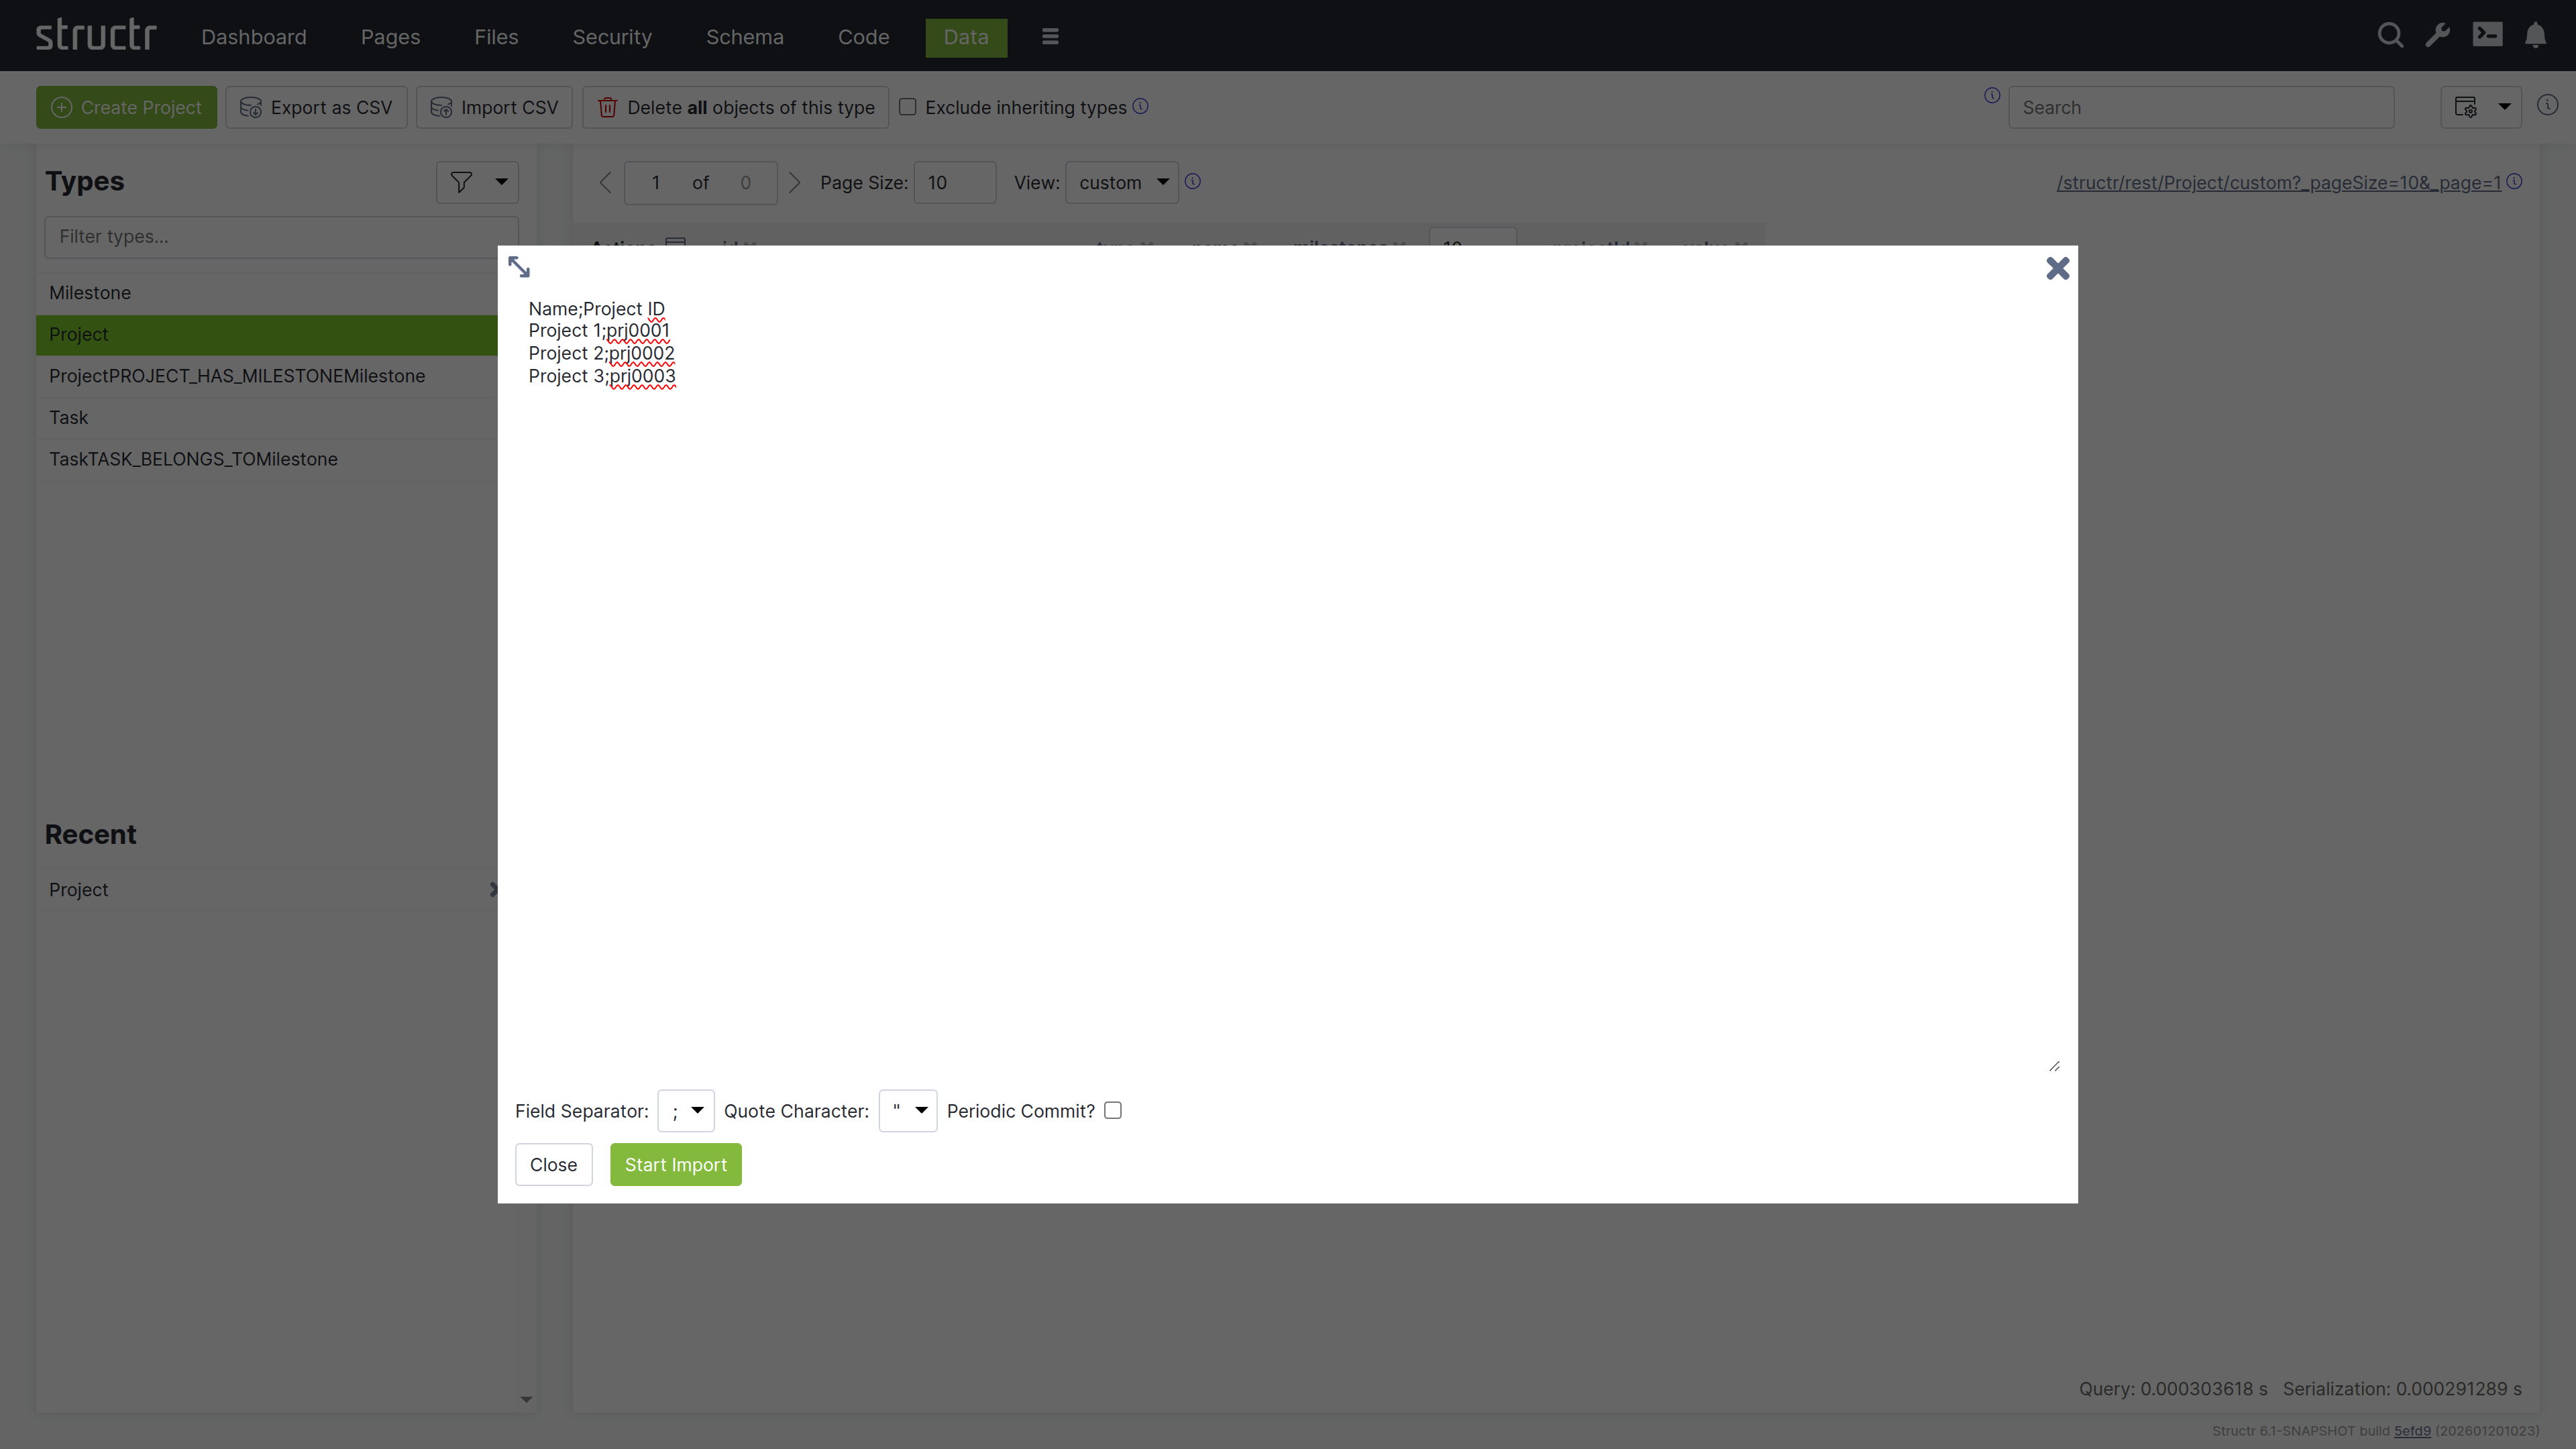
Simple Import Dialog
The simple CSV import dialog in the Data section is a tool to quickly import a limited dataset, based on very simple rules. The import is limited to a single type, the input can have a maximum size of 100,000 characters, and the columns in the CSV file must exactly match the property names of the target type. If you need more options, you can use the CSV Import Wizard in the Files section.
Import Wizard
The CSV Import Wizard allows you to import large and complex CSV files by mapping fields from the input document to properties of one or more schema types. You can also use a transformation function to modify values before the importing. The wizard recognizes fields with similar or identical names in the data to be imported and automatically selectes the corresponding target field in the data model.
The import wizard can be found in the Files section, because it is based on files in Structr Filesystem. This means that you need to upload the CSV file to Structr before you can import the data. The reason for that is that it is not possible to handle large amounts of data using copy & paste in your browser.
Once you uploaded a CSV file, you can open the Import Wizard by clicking on the “Import CSV” button in the context menu of the file. If the menu item is not there, you probably need to change the content type of the file to text/csv in the “General” settings.
The Import Wizard
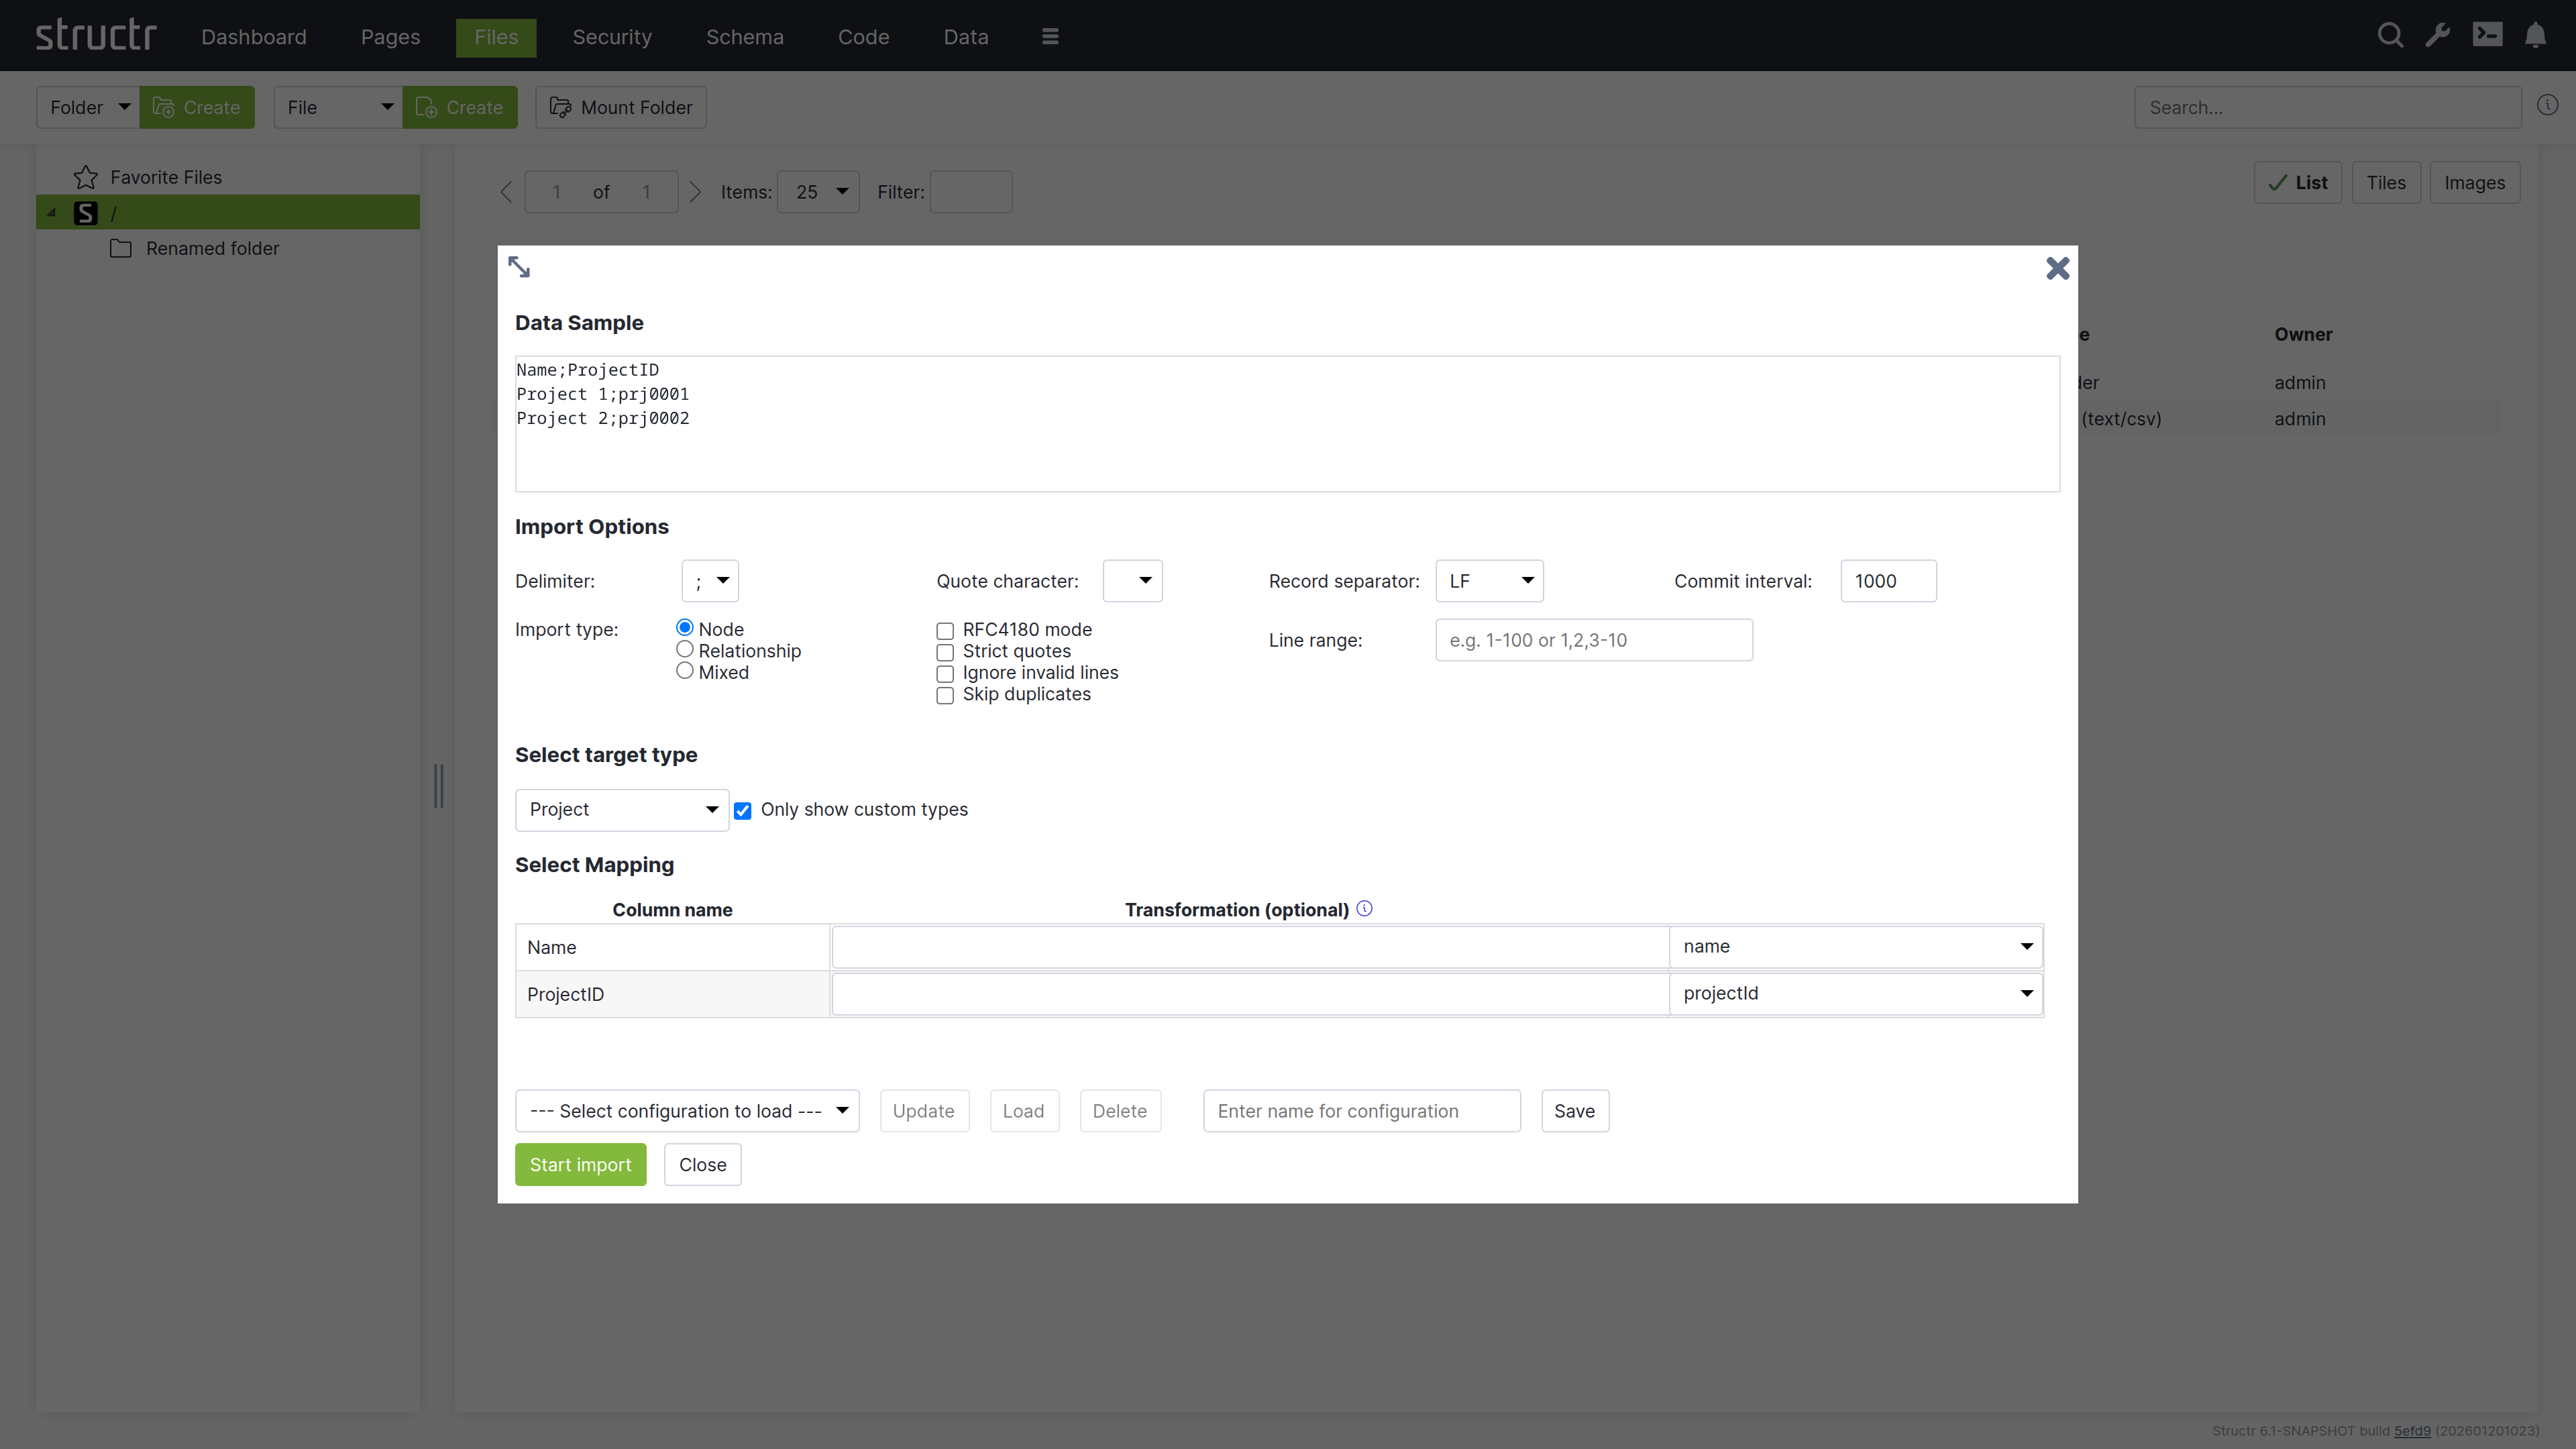
Data Sample
The Data Sample area shows the first few lines of the CSV file so you can select the correct import settings (delimiter, quote character etc.)
Import Options
The import options allow you to configure the importer for your data. The delimiter can be set to either , or ;, the optional quote character is needed for quoted CSV, and the record separator can be set to “line feed” (LF), “carriage return” (CR) or both. If you are not sure what to choose here, just use the default.
Commit Interval
The commit interval setting tells the importer how many objects will be imported in a single batch. If your CSV file contains 10,000 entries, it will be imported in 10 batches of 1,000, with a batch being the number of objects that are written in a single transaction.
Import Type
The import type setting determines the available options in the target type select box below. If you select “Node”, you will see a list of existing node types in the target type selection box. If you select “Relationship”, you will only see relationship types, and if you select “Mixed”, you will enter a separate configuration mode that is described below.
The other configuration options are special settings that allow you to fine-tune the import if something goes wrong. You can for example restrict the number of imported rows to get around an erroneous entry.
Select Target Type
In the select target type box, you can select a target type for your data. After a target type is selected, the import wizard displays a table that allows you to configure the mapping from input column to target property.
Start Import
When you are finished configuring the mapping between CSV columns and properties, you can click the “Start Import Button” to start the import. Structr will show status update notifications for the import progress in the upper right corner.
Mixed Import Mode
The Mixed Import Mode is a special mode that allows you to distribute the input from a single row to several different data types and relationships. It requires the data model to contain relationships between the types and allows you to use these relationships automatically. Please not that this is a very experimental feature that is very likely to change in the future.
Storing Import Configurations for Later
At the bottom of the CSV import dialog is a row of buttons that allow you to save the current configuration and to load or delete a saved configuration. If a saved configurations exist, you can select one from the list and click the “Load” button to restore the saved settings.