Introduction
Getting Started with Structr
This guide helps you get up and running with Structr, a low-code development platform that combines a graph database with a web application framework. Whether you build a simple website or a complex business application, Structr provides the tools to create data-driven applications.
What is Structr?
Structr is an open-source low-code platform that allows you to:
- Build web applications without extensive coding
- Create and manage complex data models using a visual schema editor
- Design responsive web pages with drag-and-drop functionality
- Implement business logic using server-side JavaScript (or other languages)
- Create REST APIs automatically based on your data model
- Manage users, groups, roles, permissions, and access rights out of the box
- Store and manage files in a virtual folder tree with your own metadata
Read More
Admin User Interface Overview, Building Applications with Structr, The Data Model.
Prerequisites
Before you begin, you should have:
- Basic understanding of web technologies (HTML, CSS, JavaScript)
- A modern web browser (Chrome, Firefox, Safari, or Edge)
- For local installation: Java 25 or higher and a Neo4j database (optional, as Structr can manage this for you)
Choose Your Installation Method
There are three ways to get started with Structr:
Option 1: Structr Sandbox (Recommended for Testing/Exploring)
The quickest way to start is with a free Structr Sandbox, a cloud-hosted server instance managed by the Structr team. A sandbox requires no installation, is ready to use in minutes, offers the full functionality for testing and is free of charge and obligations for 14 days.
How to get started
- Visit https://structr.cloud/
- Sign up for a free sandbox
- Access your personal Structr instance via the provided URL
- Sign in with the credentials sent to your email
Note: Sandboxes have limited CPU, memory, and disk space but are perfect for learning and prototyping. After the 14-day trial, you can upgrade to a paid plan to keep your sandbox running.
Option 2: Docker Installation (Recommended for Development)
For local development or self-hosted production environments, Docker provides the most straightforward setup. See https://gitlab.structr.com/structr/docker-setup for more details. The Docker setup gives you a consistent environment across different systems, includes all necessary dependencies and is straightforward to update and maintain.
Tip: If you’re new to Docker, install Docker Desktop and use its integrated Terminal (button at the bottom-right of the Docker Desktop window) to run the commands below.
Quick start
# Clone the Docker setup repository
git clone https://gitlab.structr.com/structr/docker-setup.git

# Change to the docker-setup directory
cd docker-setup
Before starting Structr, open docker-compose.yml in a text editor and change the privacy policy setting from no to yes:
AGREE_TO_STRUCTR_PRIVACY_POLICY=yes
Then start the containers:
# Start Structr with Docker Compose
docker compose up -d
Access Structr in your browser at http://localhost:8082/structr.
Option 3: Manual Installation (Advanced Users)
For experienced administrators who need custom configurations, manual installation is available. In this installation guide, we assume a recent Debian Linux system and you working as the root user.
Update the system and install dependencies
$ apt update
$ apt -y upgrade
Install GraalVM
GraalVM is a high-performance runtime that can execute applications written in Java, JavaScript, Python, Ruby, R, and LLVM-based languages like C and C++. It provides advanced optimizations including ahead-of-time compilation to native executables, resulting in faster startup times and lower memory usage compared to traditional JVMs.
Note: Depending on your server architecture, you need to adapt the following commands to the download URLs and version strings. Use
uname -ato determine the architecture of your server (aarch64orx86_64).
Download the GraalVM binaries from https://www.graalvm.org/downloads/.
Example for x86_64 (X86-64/AMD64) architecture:
$ wget https://download.oracle.com/graalvm/25/latest/graalvm-jdk-25_linux-x64_bin.tar.gz && tar xvzf graalvm-jdk-25_linux-x64_bin.tar.gz && mkdir -p /usr/lib/jvm && mv graalvm-jdk-25+37.1 /usr/lib/jvm && update-alternatives --install /usr/bin/java java /usr/lib/jvm/graalvm-jdk-25+37.1/bin/java 2537 && update-alternatives --auto java
Example for aarch64 (ARM) architecture:
$ wget https://download.oracle.com/graalvm/25/latest/graalvm-jdk-25_linux-aarch64_bin.tar.gz && tar xvf graalvm-jdk-25_linux-aarch64_bin.tar.gz && mkdir -p /usr/lib/jvm && mv graalvm-jdk-25+37.1 /usr/lib/jvm && update-alternatives --install /usr/bin/java java /usr/lib/jvm/graalvm-jdk-25+37.1/bin/java 2537 && update-alternatives --auto java
If the installation was successful, running java -version should result in the following output:
java version "25" 2025-09-16 LTS
Java(TM) SE Runtime Environment Oracle GraalVM 25+37.1 (build 25+37-LTS-jvmci-b01)
Java HotSpot(TM) 64-Bit Server VM Oracle GraalVM 25+37.1 (build 25+37-LTS-jvmci-b01, mixed mode, sharing)
Install Neo4j Debian Package (version 5.26 LTS)
$ wget -O - https://debian.neo4j.com/neotechnology.gpg.key | sudo apt-key add -
$ echo 'deb https://debian.neo4j.com stable 5' | sudo tee -a /etc/apt/sources.list.d/neo4j.list
$ apt update
$ apt -y install neo4j
You can alternatively install Neo4j version 2026.08.1, the version Structr is built against:
$ wget -O - https://debian.neo4j.com/neotechnology.gpg.key | sudo gpg --dearmor -o /etc/apt/keyrings/neotechnology.gpg
$ echo 'deb [signed-by=/etc/apt/keyrings/neotechnology.gpg] https://debian.neo4j.com stable latest' | sudo tee -a /etc/apt/sources.list.d/neo4j.list
$ sudo apt-get update
$ apt -y install neo4j=1:2026.08.1
Configure and Start Neo4j
Edit /etc/neo4j/neo4j.conf and adjust memory settings to fit your server configuration. For a server with 8 GB RAM, we recommend the following initial settings:
server.memory.heap.initial_size=1g
server.memory.heap.max_size=1g
server.memory.pagecache.size=2g
Start Neo4j with the following command:
$ systemctl start neo4j
You can check the status of the Neo4j process with the following command:
$ systemctl status neo4j
Install and Start Structr (version 7.0)
$ wget https://download.structr.com/repositories/releases/org/structr/structr/7.0/structr-7.0.deb
$ dpkg -i structr-7.0.deb
$ systemctl start structr
Troubleshooting: Conflicting Java Versions
Note: If Structr can’t be started with
systemctl start structr, it’s probably because you installed the GraalVM JDK for the wrong architecture, or there’s an existing Java version configured.
Check which Java version is currently active with java -version.
If you get something like cannot execute binary file: Exec format error as result, you have installed the wrong JDK for your CPU architecture. Use uname -a to see which architecture your server has (aarch64 or x86_64), download and install the right JDK.
If the result doesn’t show JDK version 25 you installed earlier, run update-alternatives --config java and choose the correct version from the list by entering the number displayed in the Selection column, 1 in the following example.
  Selection    Path                                         Priority   Status
------------------------------------------------------------
* 0            /usr/lib/jvm/java-17-openjdk-arm64/bin/java   1711      auto mode
  1            /usr/lib/jvm/graalvm-jdk-25+37.1/bin/java     2537      manual mode
  2            /usr/lib/jvm/java-17-openjdk-arm64/bin/java   1711      manual mode
In this example, you have to press 1 to select and configure the correct version.
Don’t forget to re-run `systemctl start structr’ to start the Structr process.
If Structr has been started successfully, the last lines of its system log file should look similar to the following:
2026-09-16 05:46:00.435 [main] INFO  o.structr.rest.service.HttpService - Starting Structr (host=0.0.0.0:8082, maxIdleTime=1800, requestHeaderSize=8192)
2026-09-16 05:46:00.436 [main] INFO  o.structr.rest.service.HttpService - Base path ./
2026-09-16 05:46:00.436 [main] INFO  o.structr.rest.service.HttpService - Structr started at http://0.0.0.0:8082
2026-09-16 05:46:00.437 [main] INFO  org.eclipse.jetty.server.Server - jetty-12.1.11; built: 2026-07-02T20:57:42.640Z; git: 6c1ced3f077bc633716c54758a743b09b21328e8; jvm 25.0.3+9-LTS-jvmci-b01
2026-09-16 05:46:00.451 [main] INFO  o.e.j.s.DefaultSessionIdManager - Session workerName=4f43cb7c8e721c74b8ae37912c0d506f
2026-09-16 05:46:00.452 [main] INFO  o.e.j.server.handler.ContextHandler - Started oeje10s.ServletContextHandler@4fd63c43{ROOT,/,b=null,a=AVAILABLE,h=oejshg.GzipHandler@7d483ebe{STARTED,min=256,inflate=32768}}
2026-09-16 05:46:00.458 [main] INFO  o.e.j.e.s.ServletContextHandler - Started oeje10s.ServletContextHandler@4fd63c43{ROOT,/,b=null,a=AVAILABLE,h=oejshg.GzipHandler@7d483ebe{STARTED,min=256,inflate=32768}}
2026-09-16 05:46:00.458 [main] INFO  o.e.j.server.handler.ContextHandler - Started oejsh.ContextHandler@468f2a6f{/structr,/structr,b=null,a=AVAILABLE,h=osrs.HttpService$@2ed84be9{STARTED}}
2026-09-16 05:46:00.460 [main] INFO  o.e.jetty.server.AbstractConnector - Started oejs.ServerConnector@50ff368c{HTTP/1.1, (http/1.1, h2c)}{0.0.0.0:8082}
2026-09-16 05:46:00.460 [main] INFO  org.eclipse.jetty.server.Server - Started oejs.Server@20e48e63{STARTING}[12.1.11,sto=1000] @24ms
2026-09-16 05:46:00.461 [main] INFO  org.structr.core.Services - Creating StorageSyncService..
2026-09-16 05:46:00.466 [main] INFO  org.structr.core.Services - Creating ProcessTimerService..
2026-09-16 05:46:00.466 [main] INFO  org.structr.core.Services - 7 service(s) processed
2026-09-16 05:46:00.466 [main] INFO  org.structr.core.Services - Registering shutdown hook.
2026-09-16 05:46:00.701 [main] INFO  org.structr.core.Services - Started Structr 7.0
2026-09-16 05:46:00.701 [main] INFO  org.structr.core.Services - ---------------- Initialization complete ----------------
Initial Configuration
After installation (for Docker or manual setup), you’ll need to go through the initial configuration procedure as follows.
Note: In the following chapter, we assume that you installed Structr on your local computer (localhost). If you installed it on a server instead, you need to adapt the URLs accordingly.
1. Enter the Setup Token
Navigate to http://localhost:8082/structr which will redirect you to the configuration wizard at http://localhost:8082/structr/config.
The wizard asks for a setup token. Structr prints it to the server log at startup in a line beginning with Initial setup:, for example:
Initial setup: open http://0.0.0.0:8082/structr/config and enter the setup token 3kQ9vX2mR7pL0sT4wY6zAg
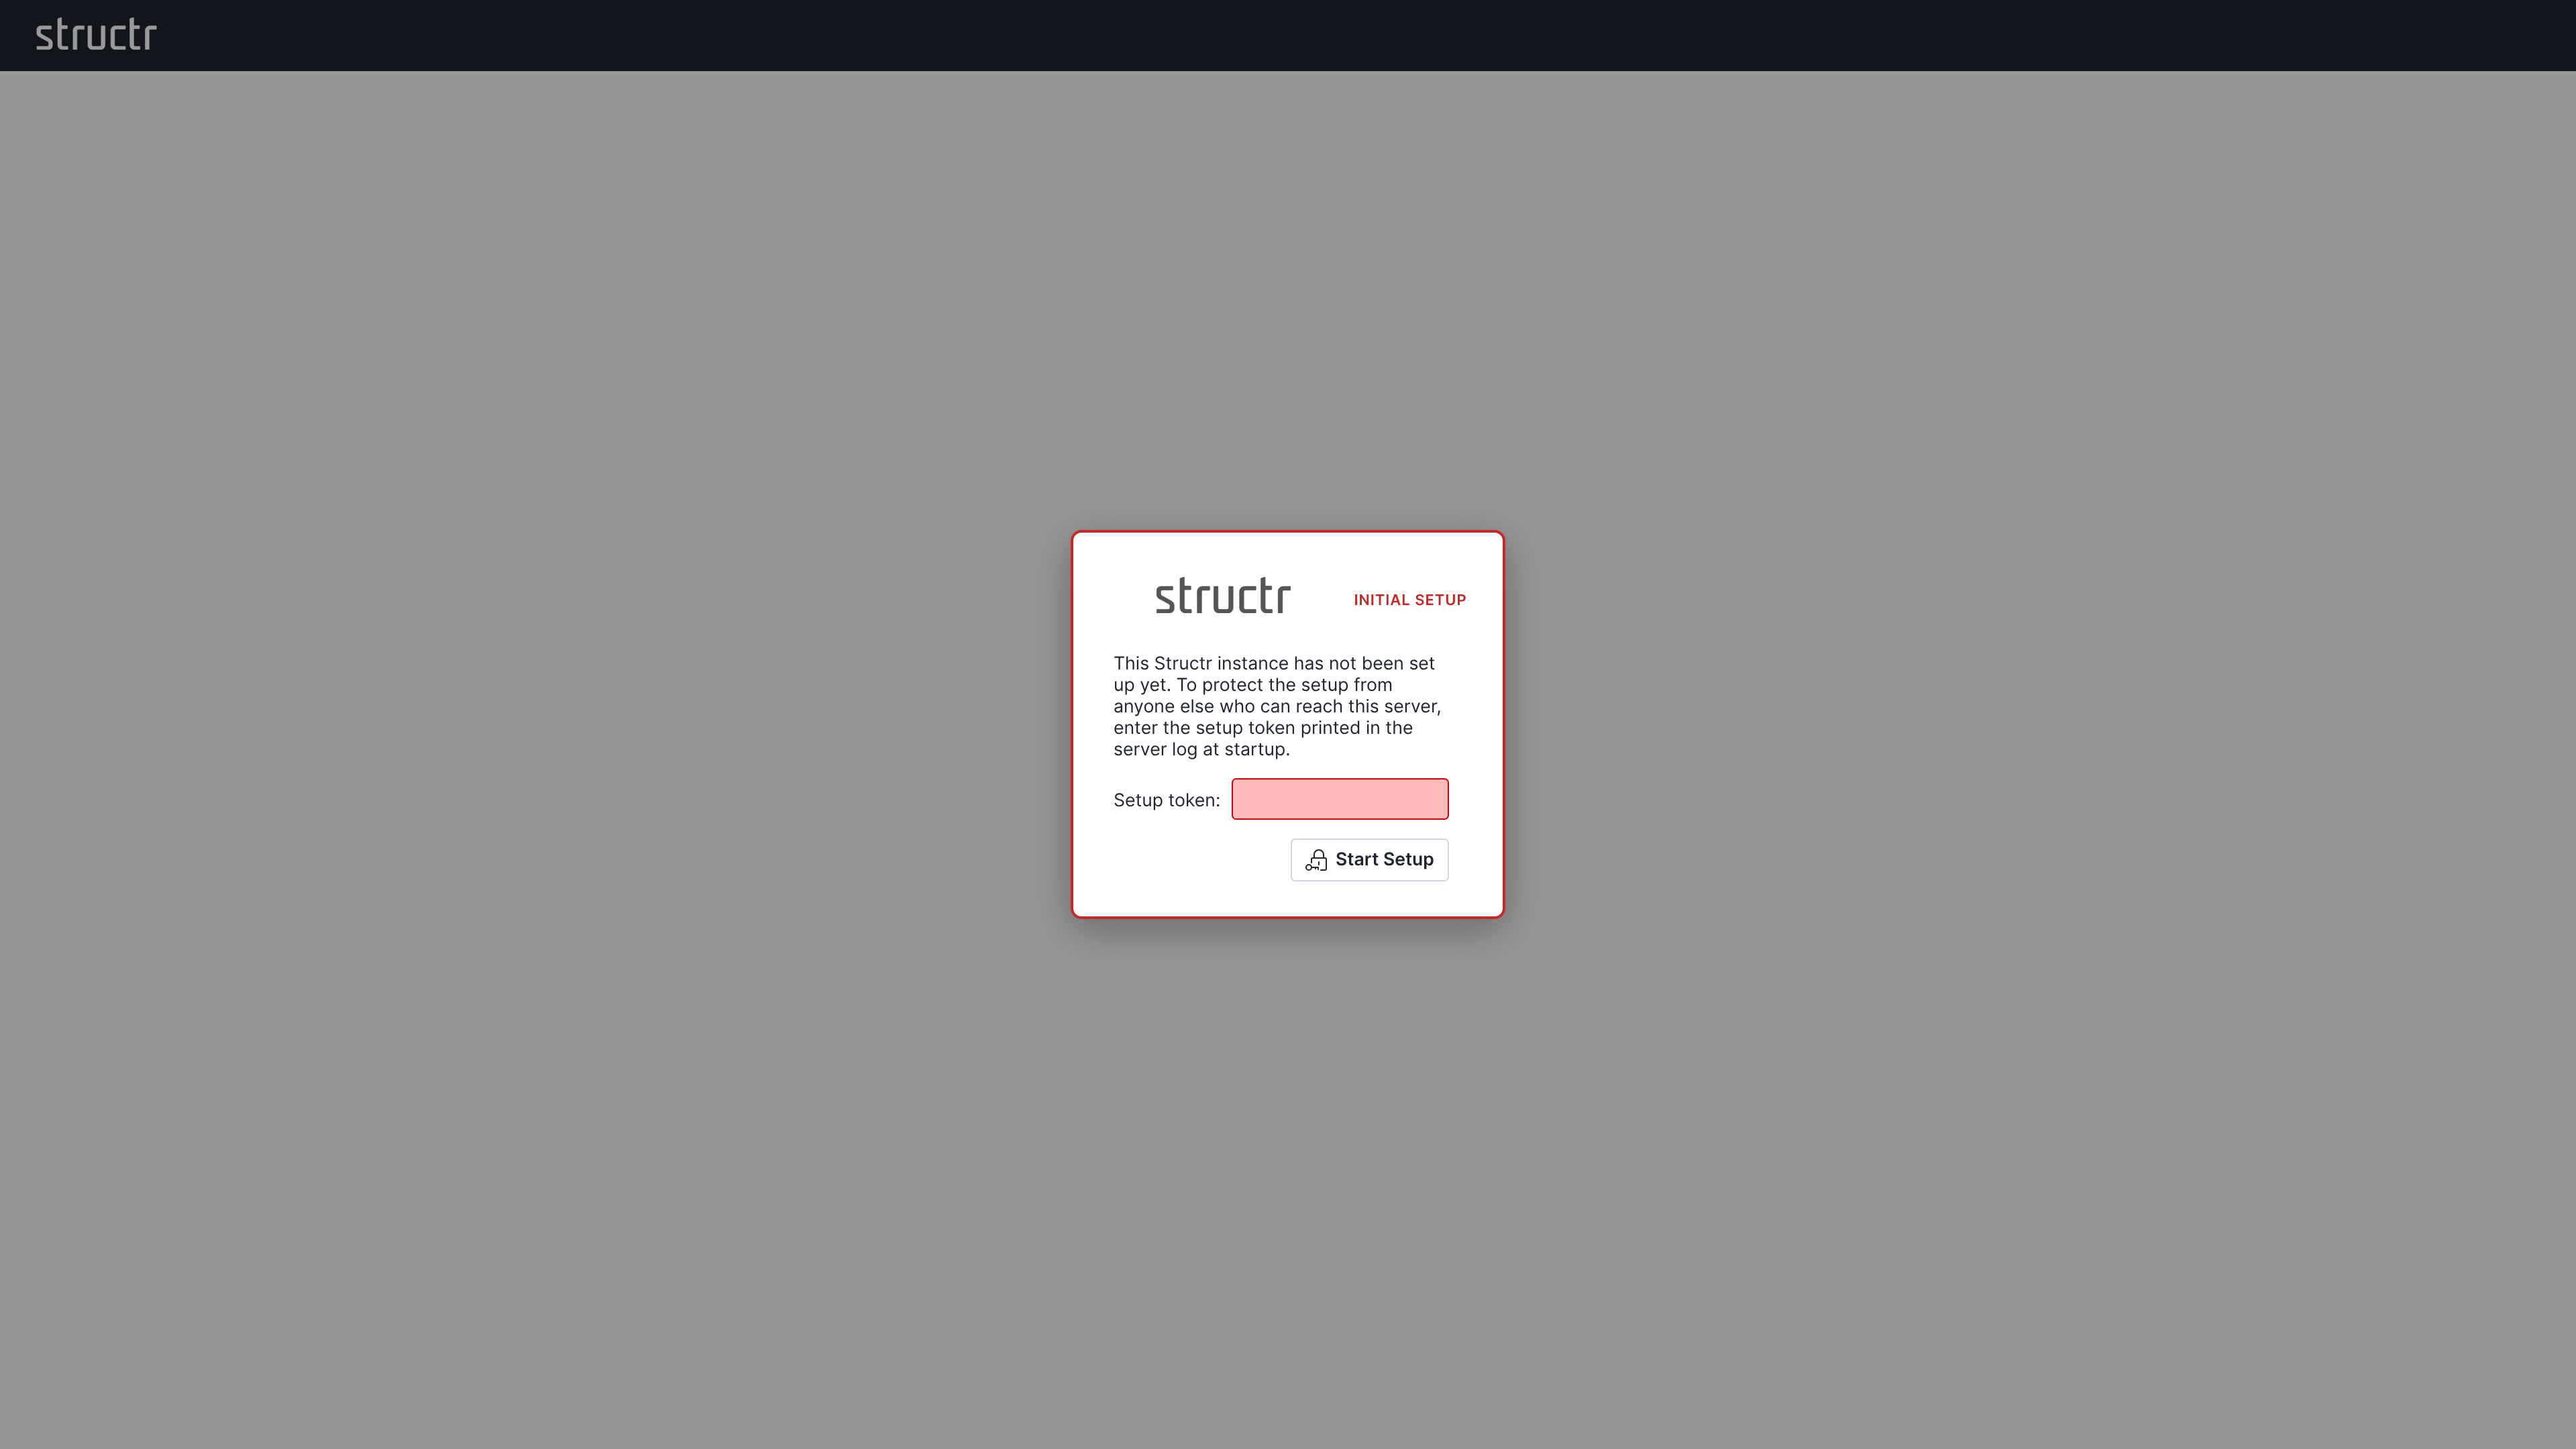
Copy the token from the log and enter it. The token protects the wizard from anyone else who can reach the server; it changes with every restart and is no longer needed once the setup is completed.
2. Set a Superuser Password
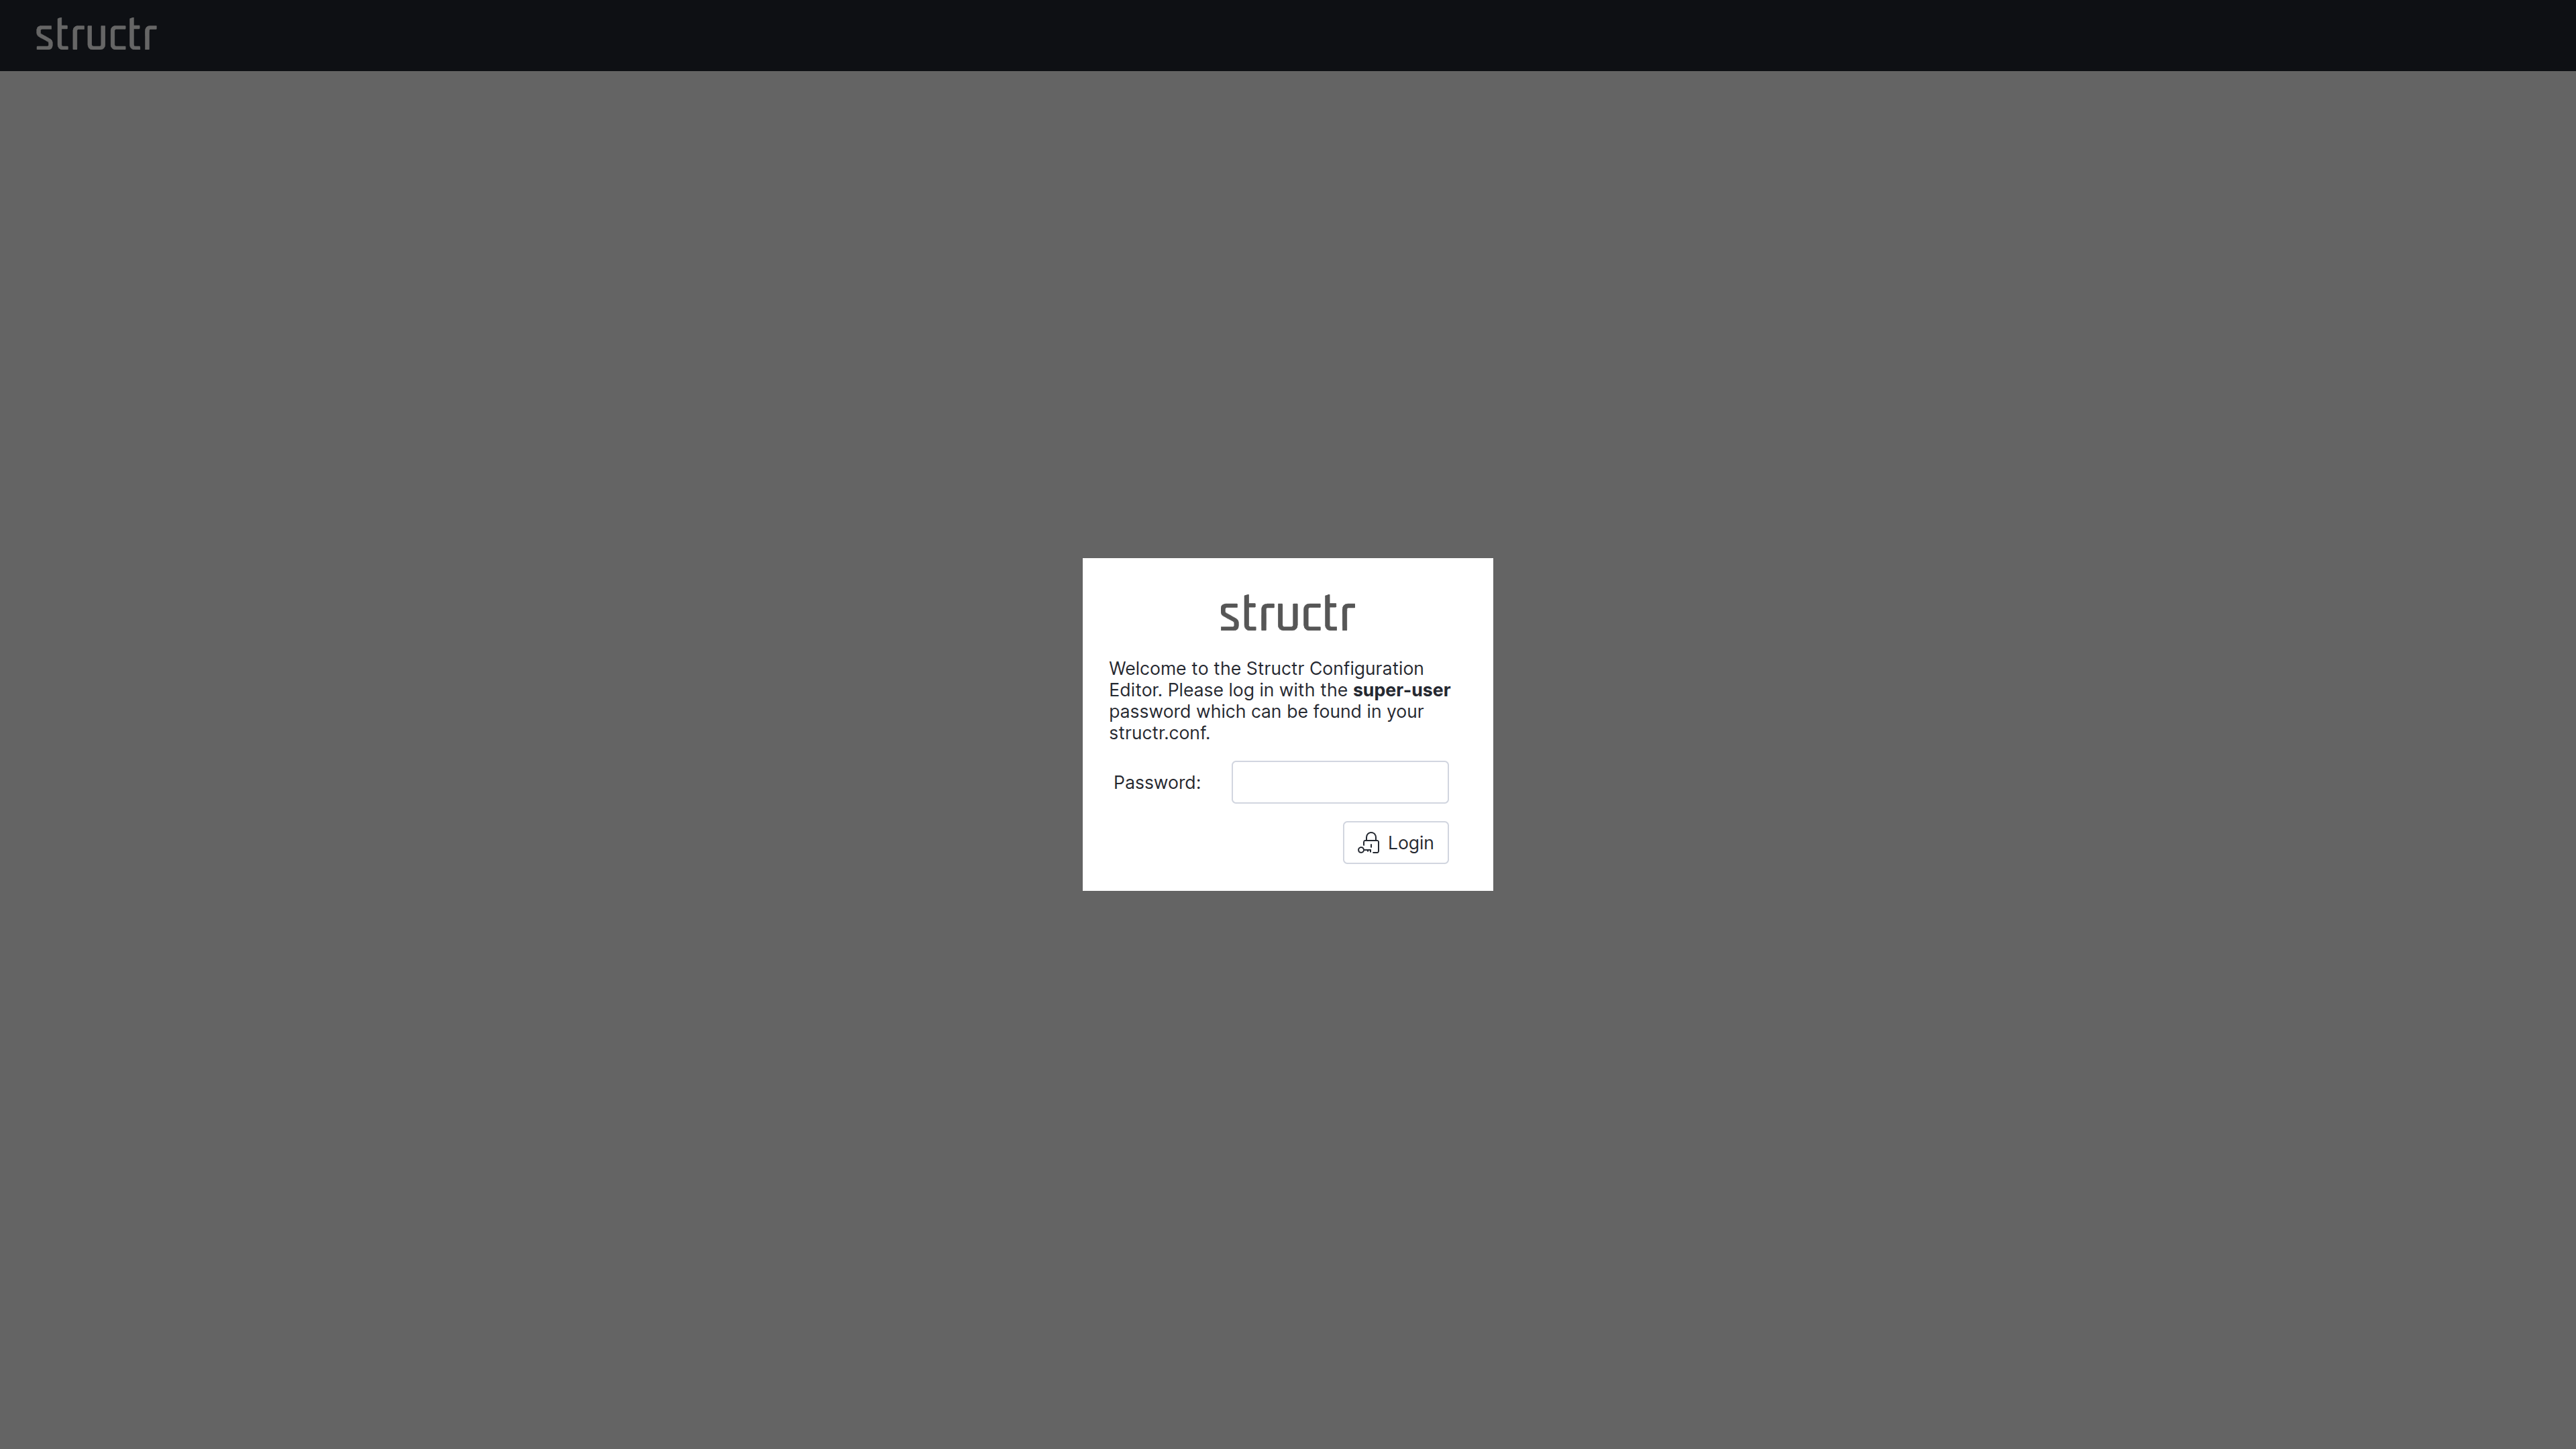
Note: Choose a strong password - this is your system administrator account with full access to all Structr features. After the first call, the configuration tool is secured with this password. If you have forgotten the password, you can only obtain it as a system administrator at the operating system level from structr.conf.
3. Configure a Database Connection
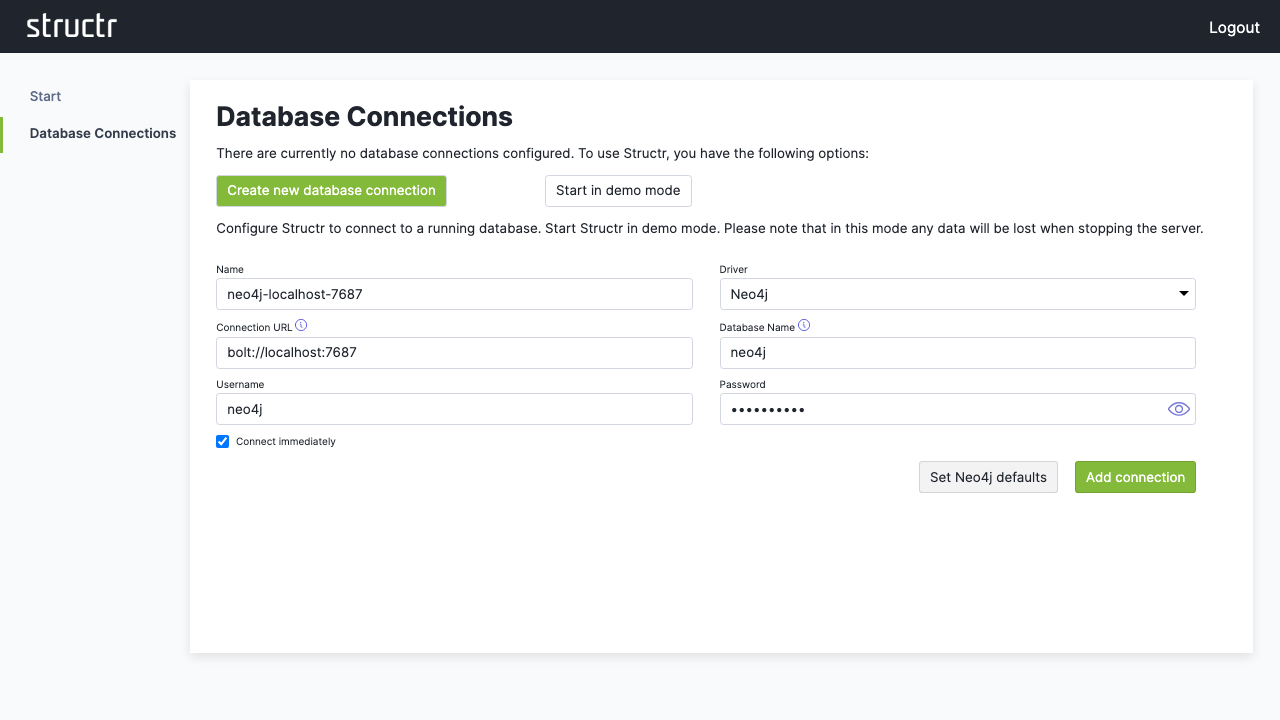
Click “Configure a database connection”. If you do not have a Neo4j server running, click “Use Neo4j Embedded”: Structr creates an embedded Neo4j database in the db folder of its installation directory (the setting database.path) and connects to it. For a Neo4j server, click “Create new database connection”.
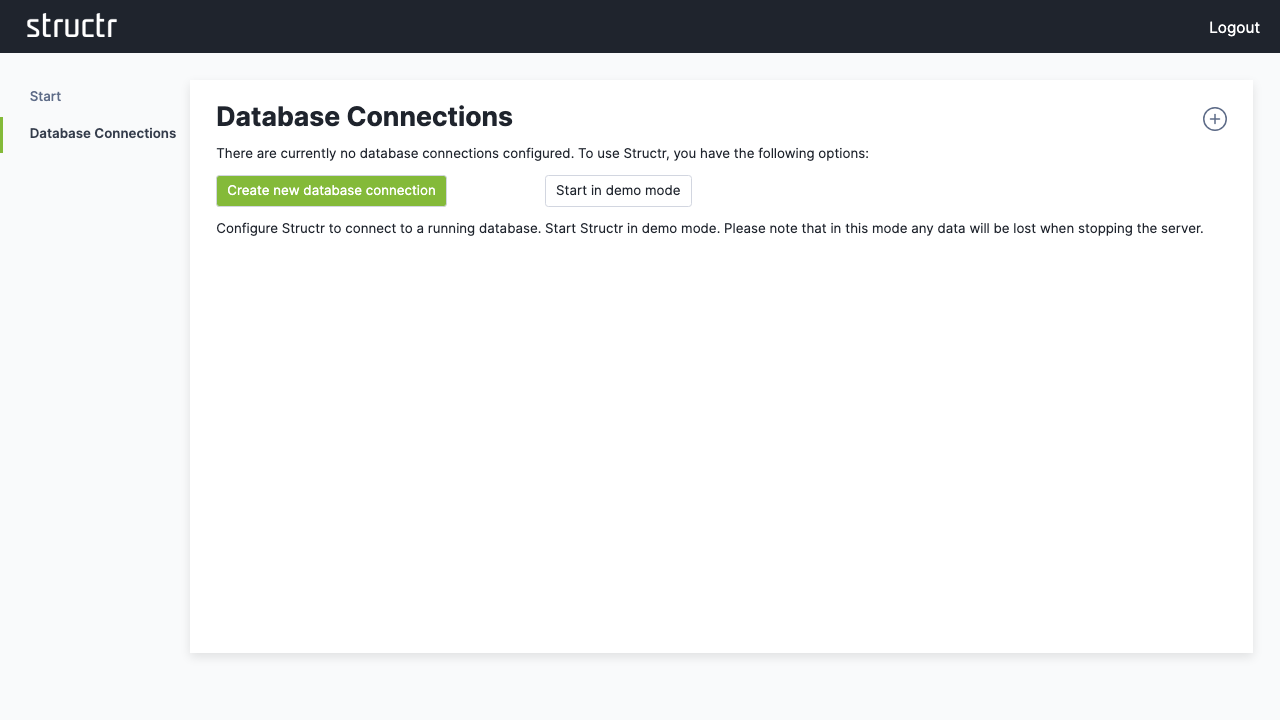
For a standard Neo4j setup:
- Click “Set Neo4j defaults” to auto-fill typical values
- Adjust the connection parameters if needed
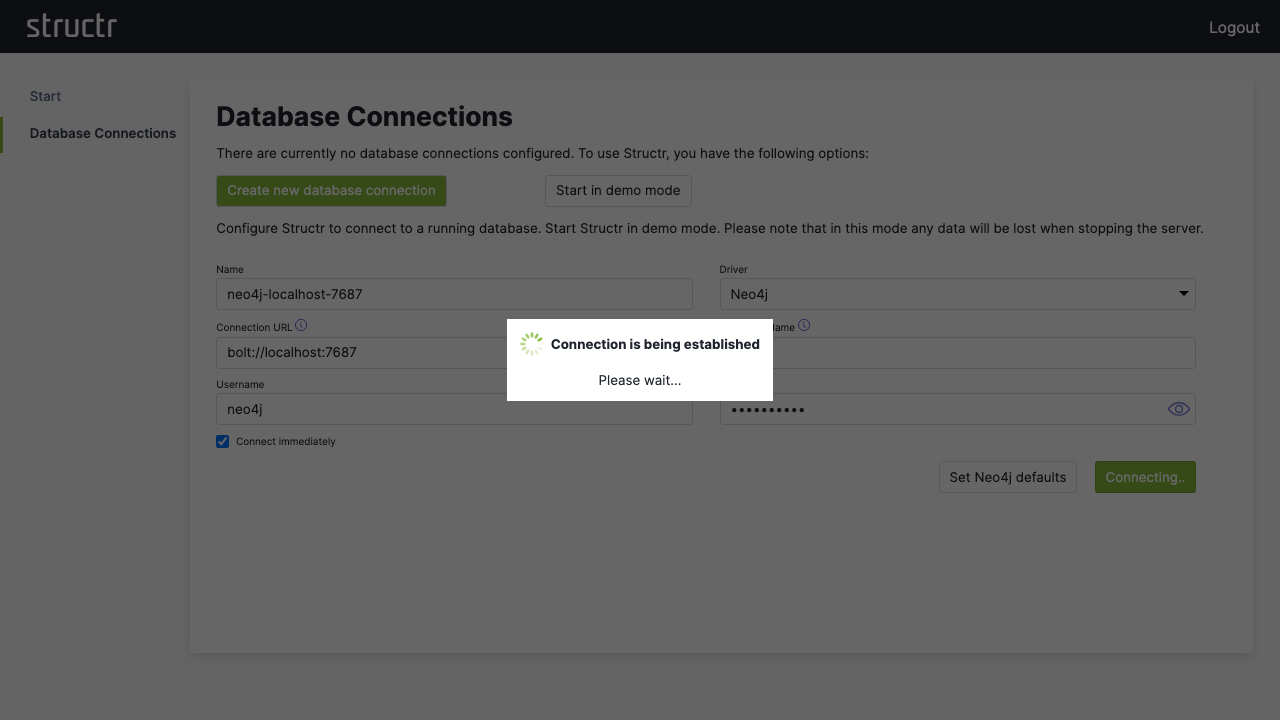
- Click “Add connection” to establish the connection
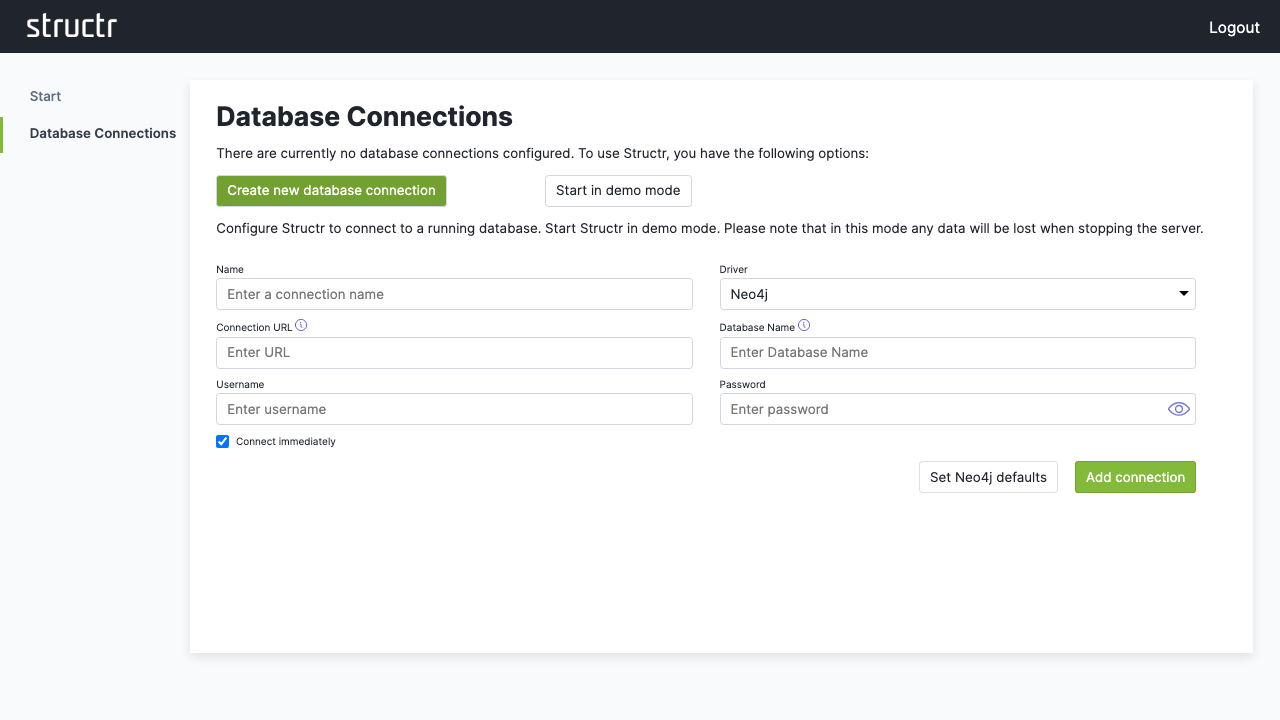
If your database connection does not use these default settings, change them according to your database configuration.
4. Access the Admin Interface
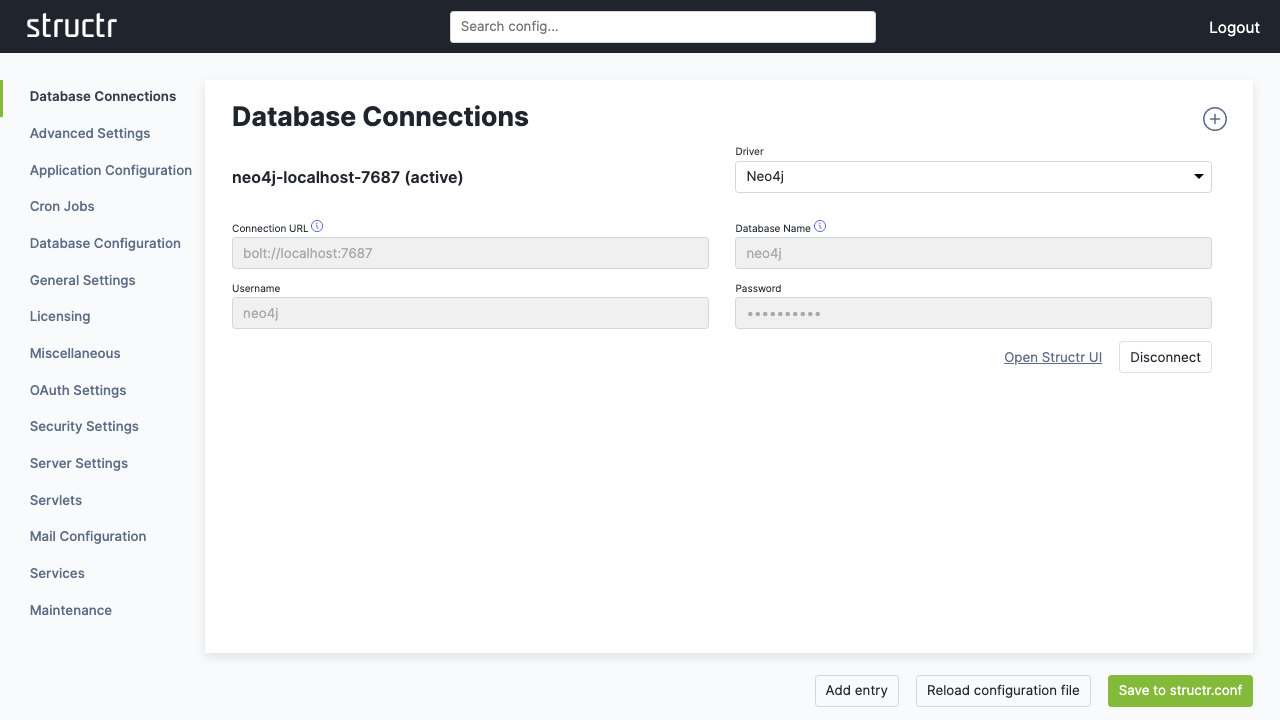
Once connected, click “Open Structr UI” to enter the main application.
First Steps
When you see the sign-in screen, you’re ready to start working with your Structr instance.
Sign In
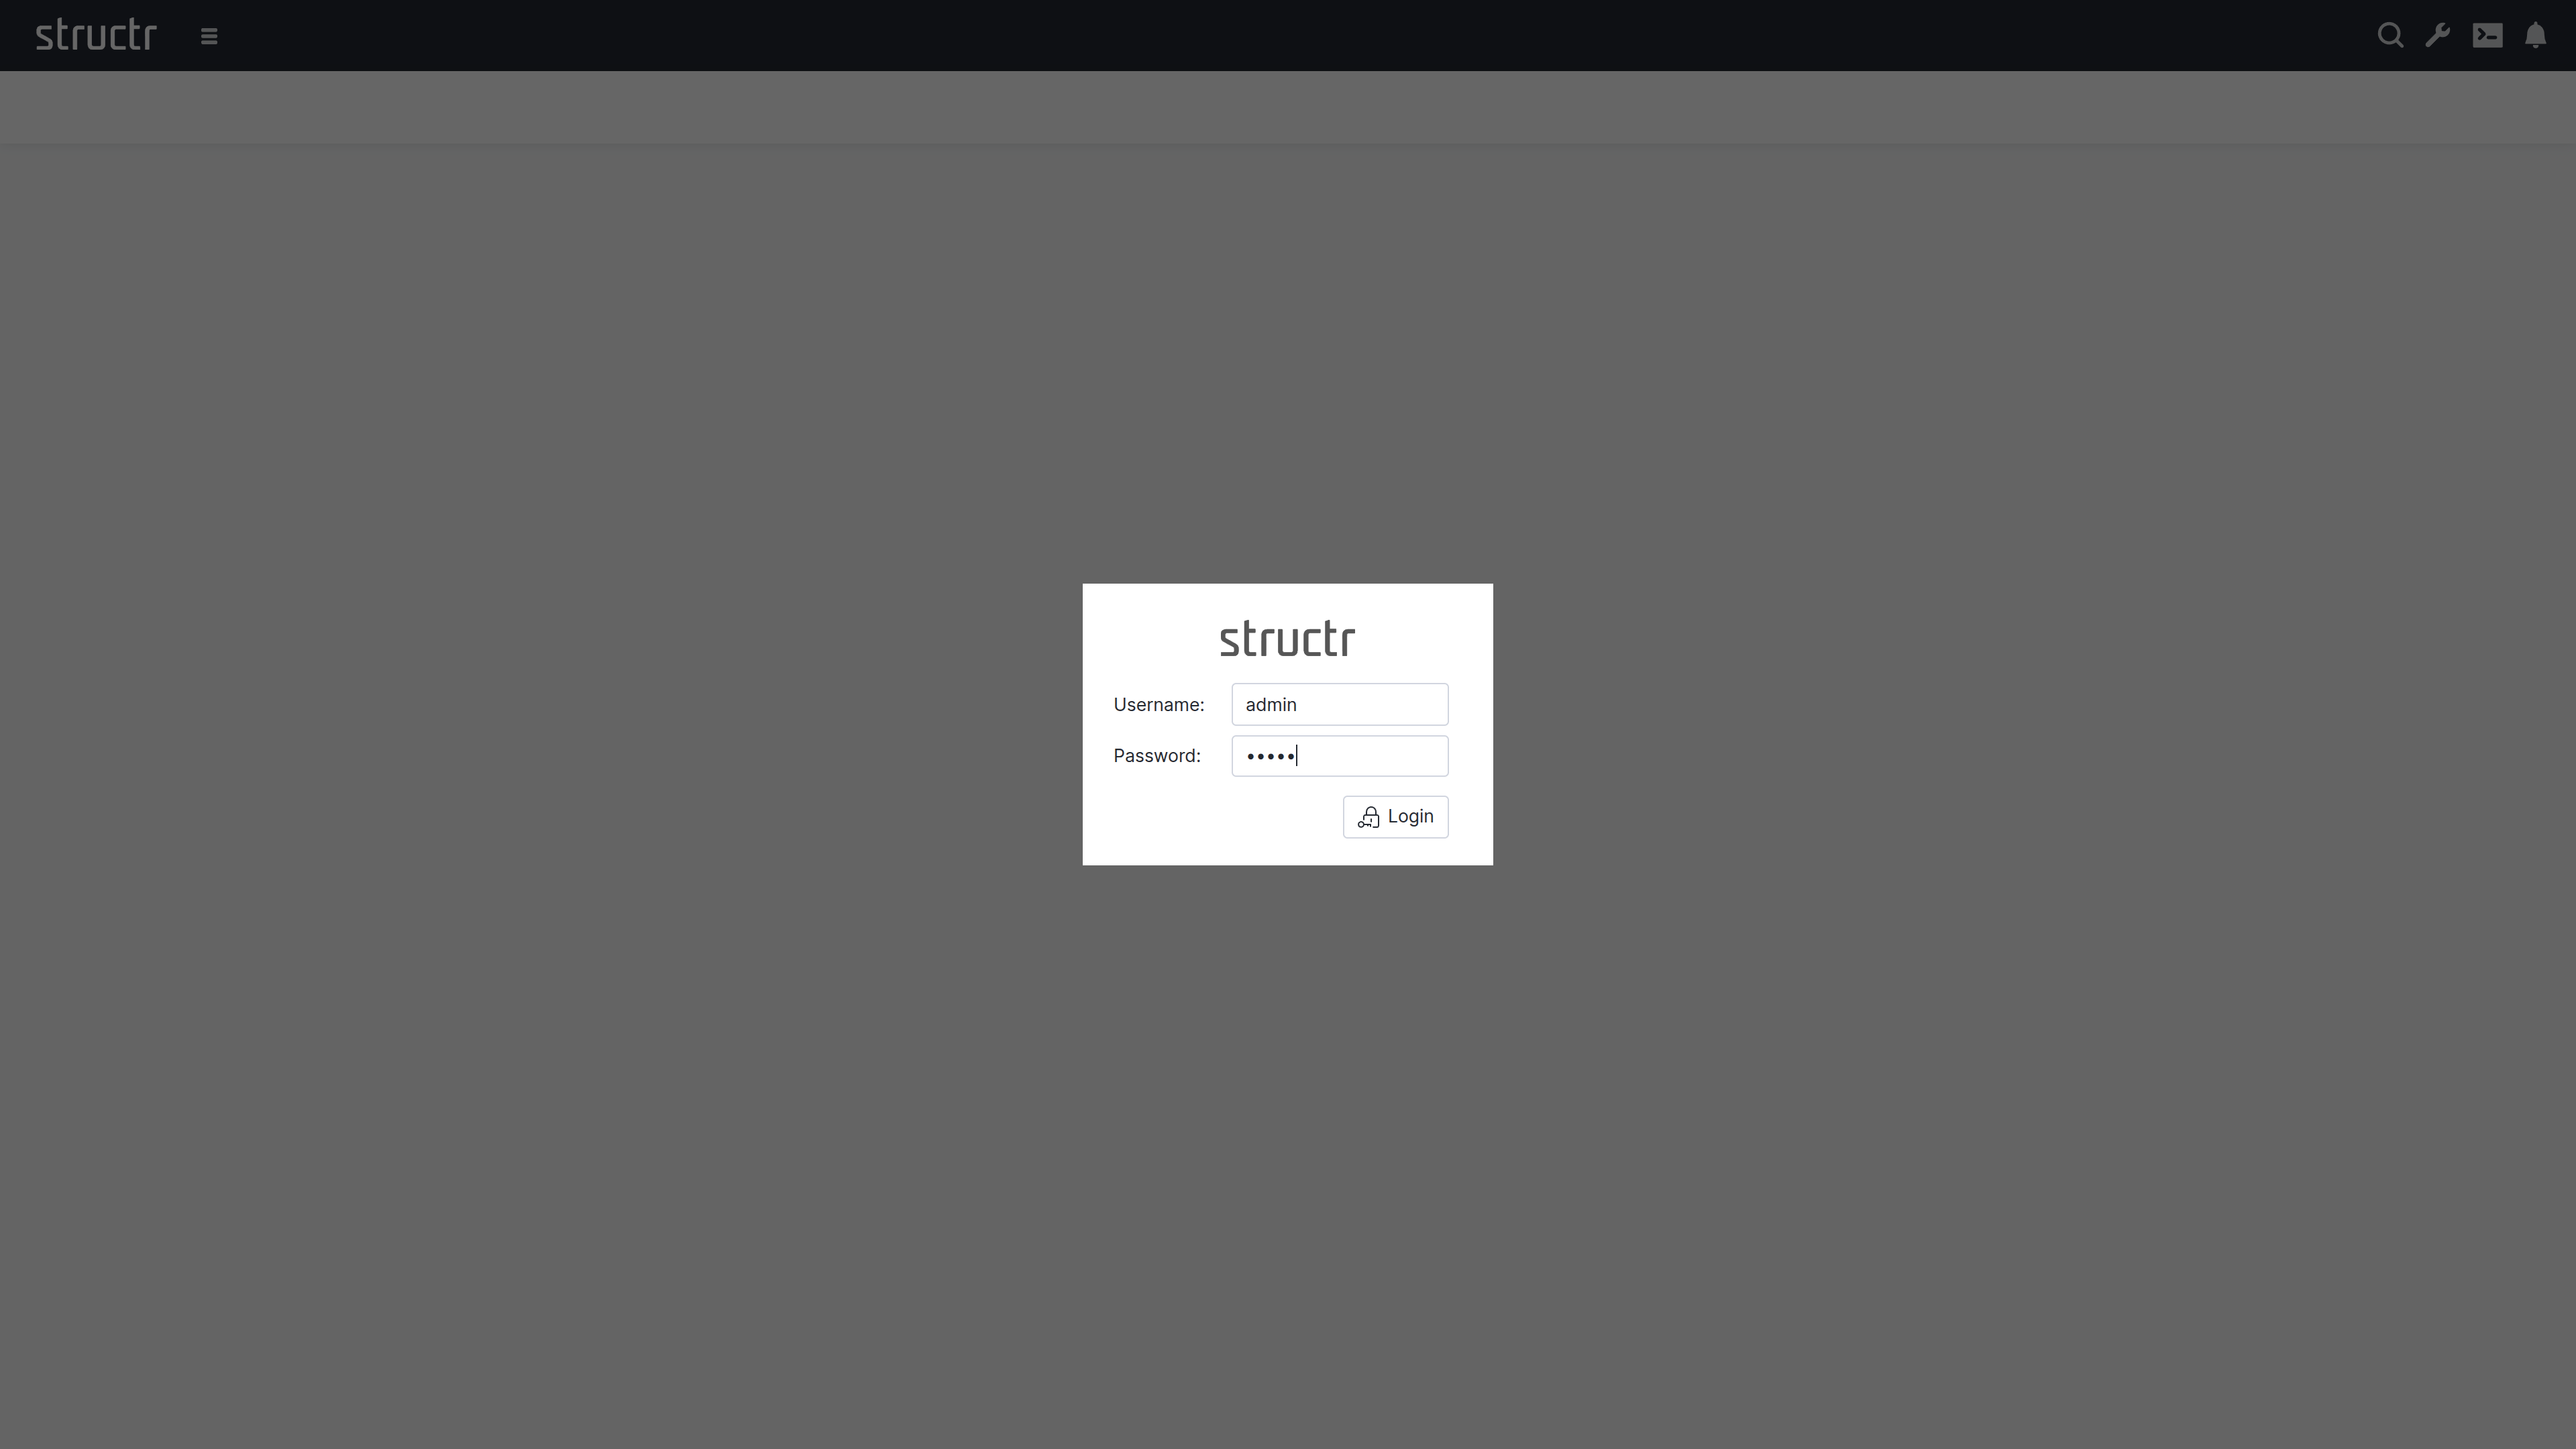
There’s default admin user which is created automatically if the database was found empty. The default password is admin.
Note: You should change the admin password immediately after signing in. Go to
Security→Users and Groups, right-click onadmin→Generaland set a password that can’t be easily guessed. You can also set password rules in the configuration.
Change Admin Password
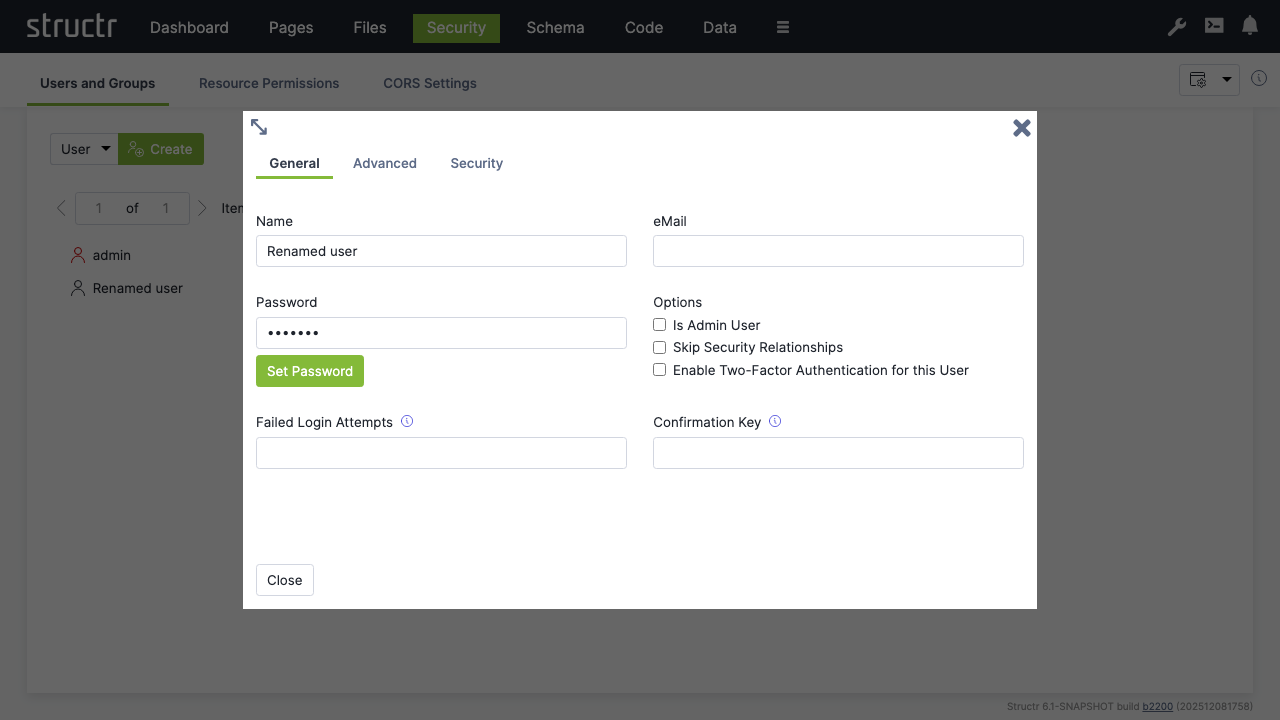
Enter the new password into the password field and click “Set Password” to apply it. Entering the value alone does not change the password.
Now you’re set and done and ready for the first steps with Structr.